Version 24.5 for Sparkrock 365 2024 release wave 1 release notes Published November 19, 2024
These release notes include supplemental information about version 24.5 for Sparkrock 365 2024 release wave 1.
Video
The following video includes information about the new features and enhancements in version 24.5 for Sparkrock 365 2024 release wave 1.
Highlights
The following sections highlight the major accomplishments in this release.
Employee benefits processing enhancements for a transfer HR request
Employee benefits processing enhancements for an additional assignment HR request
Retain employee information when reversing a new hire HR request
Processing enhancements for leave change HR request date changes
Register employee certifications for Employment Data & Analysis System (EDAS) reporting
Employment Data & Analysis System (EDAS) payroll payment reporting enhancements
Report Gender as F instead of X on the Employment Data & Analysis System (EDAS) report
Social Security Number (SSN) format and validation enhancements
Compensation journal and HR pay code enhancements for hourly employees who take unpaid absences
Search for employees on the Employees page using preferred first, middle, or last name
Preferred middle name and preferred last name enhancements for HR requests
Email notification enhancements for absence requests and HR requests
New features and changes
Version 24.5 for Sparkrock 365 2024 release wave 1 introduces exciting new features and enhancements to existing functionality.
Microsoft Dynamics 365 Business Central 2024 release wave 1
The base Microsoft Dynamics 365 Business Central platform that powers Sparkrock 365, has been updated from 22.5 to 24.5.
For more information about Microsoft Dynamics 365 Business Central releases since 22.5, select the following links:
What's new and planned for Dynamics 365 Business Central 2024 release wave 1 (24)
Update 24.5 for Microsoft Dynamics 365 Business Central online 2024 release wave 1
Update 24.4 for Microsoft Dynamics 365 Business Central online 2024 release wave 1
Update 24.3 for Microsoft Dynamics 365 Business Central online 2024 release wave 1
Update 24.2 for Microsoft Dynamics 365 Business Central online 2024 release wave 1
Update 24.1 for Microsoft Dynamics 365 Business Central online 2024 release wave 1
What's new and planned for Dynamics 365 Business Central 2023 release wave 2 (23)
Update 23.5 for Microsoft Dynamics 365 Business Central online 2023 release wave 2
Update 23.4 for Microsoft Dynamics 365 Business Central online 2023 release wave 2
Update 23.3 for Microsoft Dynamics 365 Business Central online 2023 release wave 2
Update 23.2 for Microsoft Dynamics 365 Business Central online 2023 release wave 2
Update 23.1 for Microsoft Dynamics 365 Business Central online 2023 release wave 2
To view a detailed list of cumulative platform fixes that are available from Microsoft, see Update history for Microsoft Dynamics 365 Business Central.
User groups migration
In Business Central 2024 release wave 2, Microsoft deprecated user groups. To manage groups of users, Microsoft replaced user groups with security groups. Security groups retain the functionality of user groups while also providing the capability to manage users across multiple Microsoft 365 applications in the Microsoft Entra admin center.
Important
Important:
If you use user groups in Sparkrock 365, you must convert your user groups to security groups or permission sets before the upcoming release of version 25.3 for Sparkrock 365 2024 release wave 2. User group functionality will no longer exist in that release.
In previous releases, Sparkrock 365 enhanced Microsoft's user group functionality. To support a conversion to security groups, this release introduces enhancements to Microsoft's security group functionality. Additionally, this release introduces a User Groups Migration Guide that you can use to convert user groups to security groups or permission sets.
To learn more about security groups, go to Control Access to Business Central Using Security Groups.
Note
Note:
The security group enhancements in this release do not affect mySparkrock user groups or workflow user groups. The mySparkrock user group and workflow user group functionality remains unchanged from previous releases.
The following sections include information about the Sparkrock 365 enhancements in this release to ensure a successful migration from user groups to security groups or permission sets.
New Apply Reports to Filter to Employees, Apply Reports to Filter to Positions, and Apply Reports to Filter to HR Request fields on the Security Groups page
To ensure that the same functionality that exists for user groups exists for security groups, this release adds Apply Reports to Filter to Employees, Apply Reports to Filter to Positions, and Apply Reports to Filter to HR Request fields on the Security Groups page.

To learn more about these fields, go to Set up security groups for limited access HR requests.
New Security Group Application Area Setup page
To ensure that the same functionality that exists for user groups exists for security groups, this release introduces a Security Group Application Area Setup page.
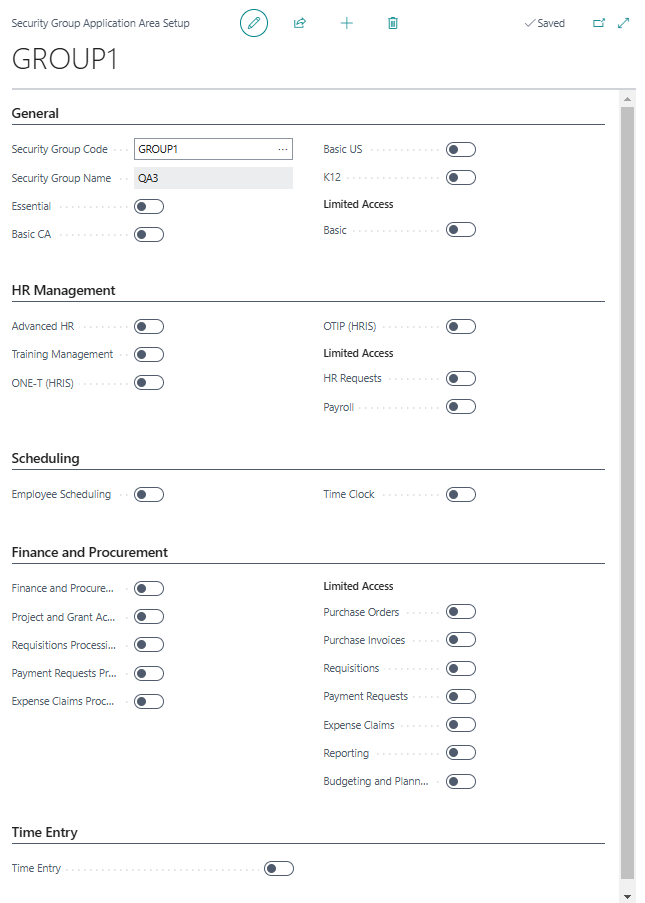
To learn more about this page, go to Manage application area access for a security group.
New User Groups Migration Guide
This release introduces a User Groups Migration Guide. You can use the guide to convert user groups to security groups or convert user groups to permissions sets.
Convert user groups to security groups
When you convert user groups to security groups, the guide migrates permissions, application area setup, and reports to filter settings.
The conversion process for security groups includes the following high level steps:
- Create security groups in the Microsoft Entra admin center based on the user groups in Sparkrock 365.
- Create security groups in Sparkrock 365 and assign links to the respective security groups in the Microsoft Entra admin center.
- Run the Sparkrock 365 User Groups Migration Guide.
The following sections describe these steps in detail.
Create security groups in the Microsoft Entra admin center based on the user groups in Sparkrock 365
Before running the User Groups Migration Guide, an administrator must create a security group in the Microsoft Entra admin center for each Sparkrock 365 user group that you want to migrate.
Tip
Tip:
To help create a list of user groups and members to send to your Microsoft Entra administration, on the User Group Members page for each user group, use the Open in Excel feature. To learn more about the Open in Excel feature, go to Export your business data to Excel.
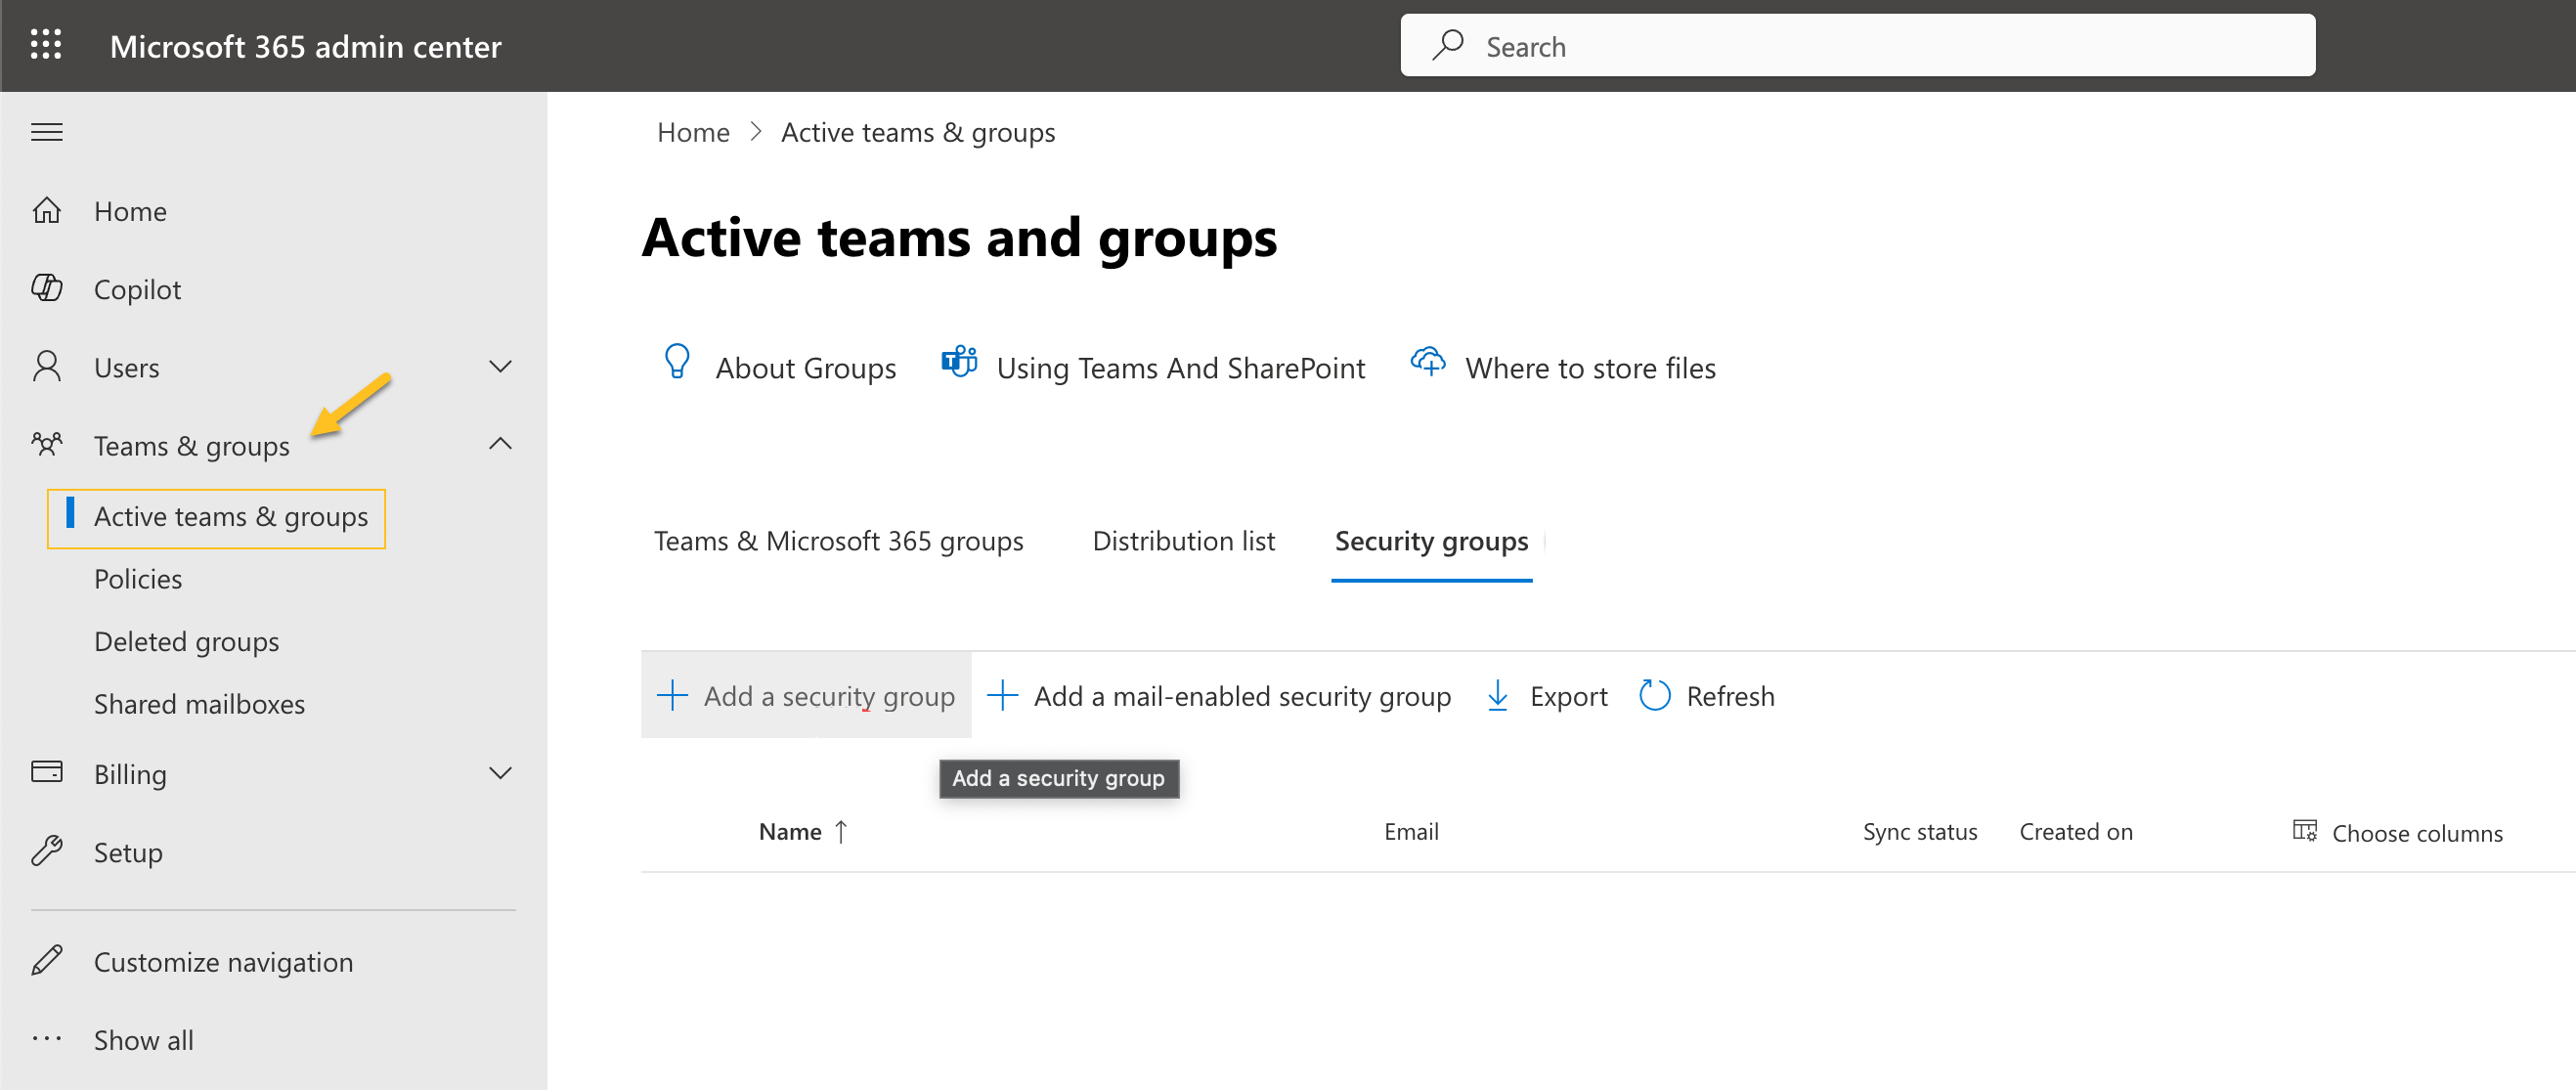
To create security groups in the Microsoft Entra admin center, perform the following steps:
Log in to the Microsoft Entra admin center.
In the left menu, choose Teams & groups > Active teams & groups.
The Active teams and groups page opens.
For each user group that you want to migrate in Sparkrock 365, perform the following steps:
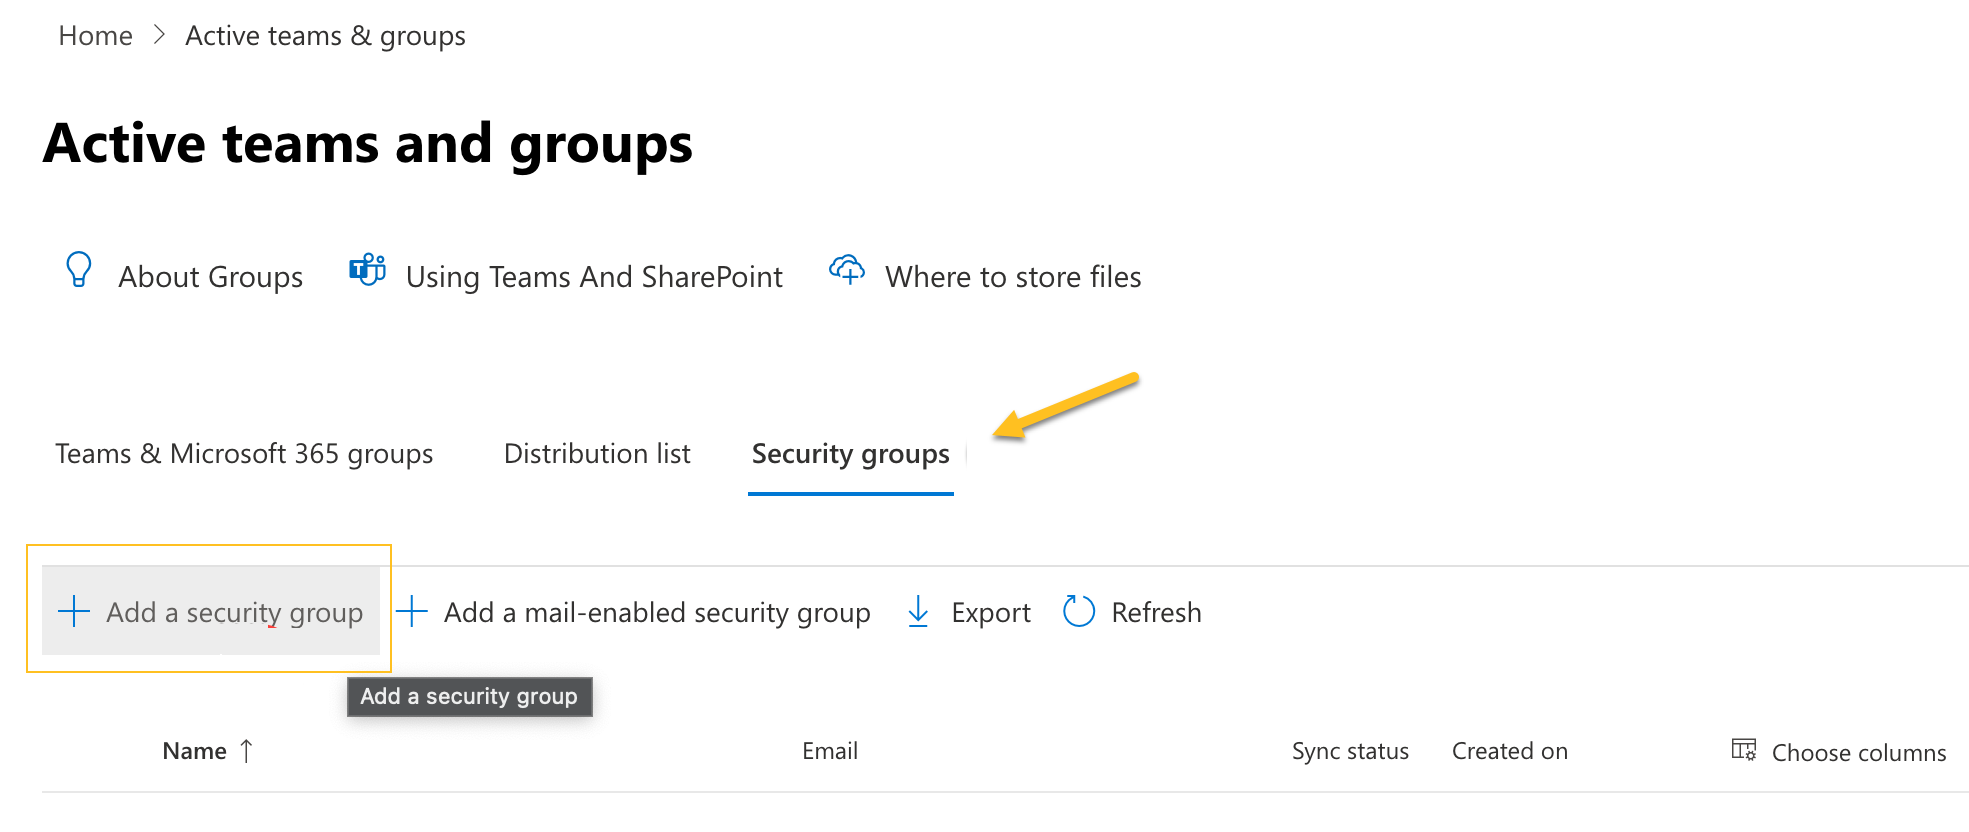
On the Security groups tab, choose Add a security group.
In Name, specify a name for the security group.
Assign the one or more users to the security group based on the one or more users in the respective Sparkrock 365 user group.
Create security groups in Sparkrock 365 and assign links to Microsoft Entra admin center security groups
Before running the User Groups Migration Guide, an administrator must create a security group in Sparkrock 365 for each user group that you want to migrate. During the creation process, you link the Sparkrock 365 security group to the Microsoft Entra admin center security group.
Note
Note:
When creating security groups during this step, you do not have to assign permissions, configure application area setup, or configure reports to filter settings. This configuration occurs when you run the Sparkrock 365 User Groups Migration Guide.
To create security groups in Sparkrock 365 and assign links to Microsoft Entra admin center security groups, perform the following steps:
Select Search (Alt+Q)
 , enter security groups, and then choose the related link.
The Security Groups page opens.
For each security group that you want to create, perform the following steps:
On the action bar, choose New.
The New Security Group page opens.
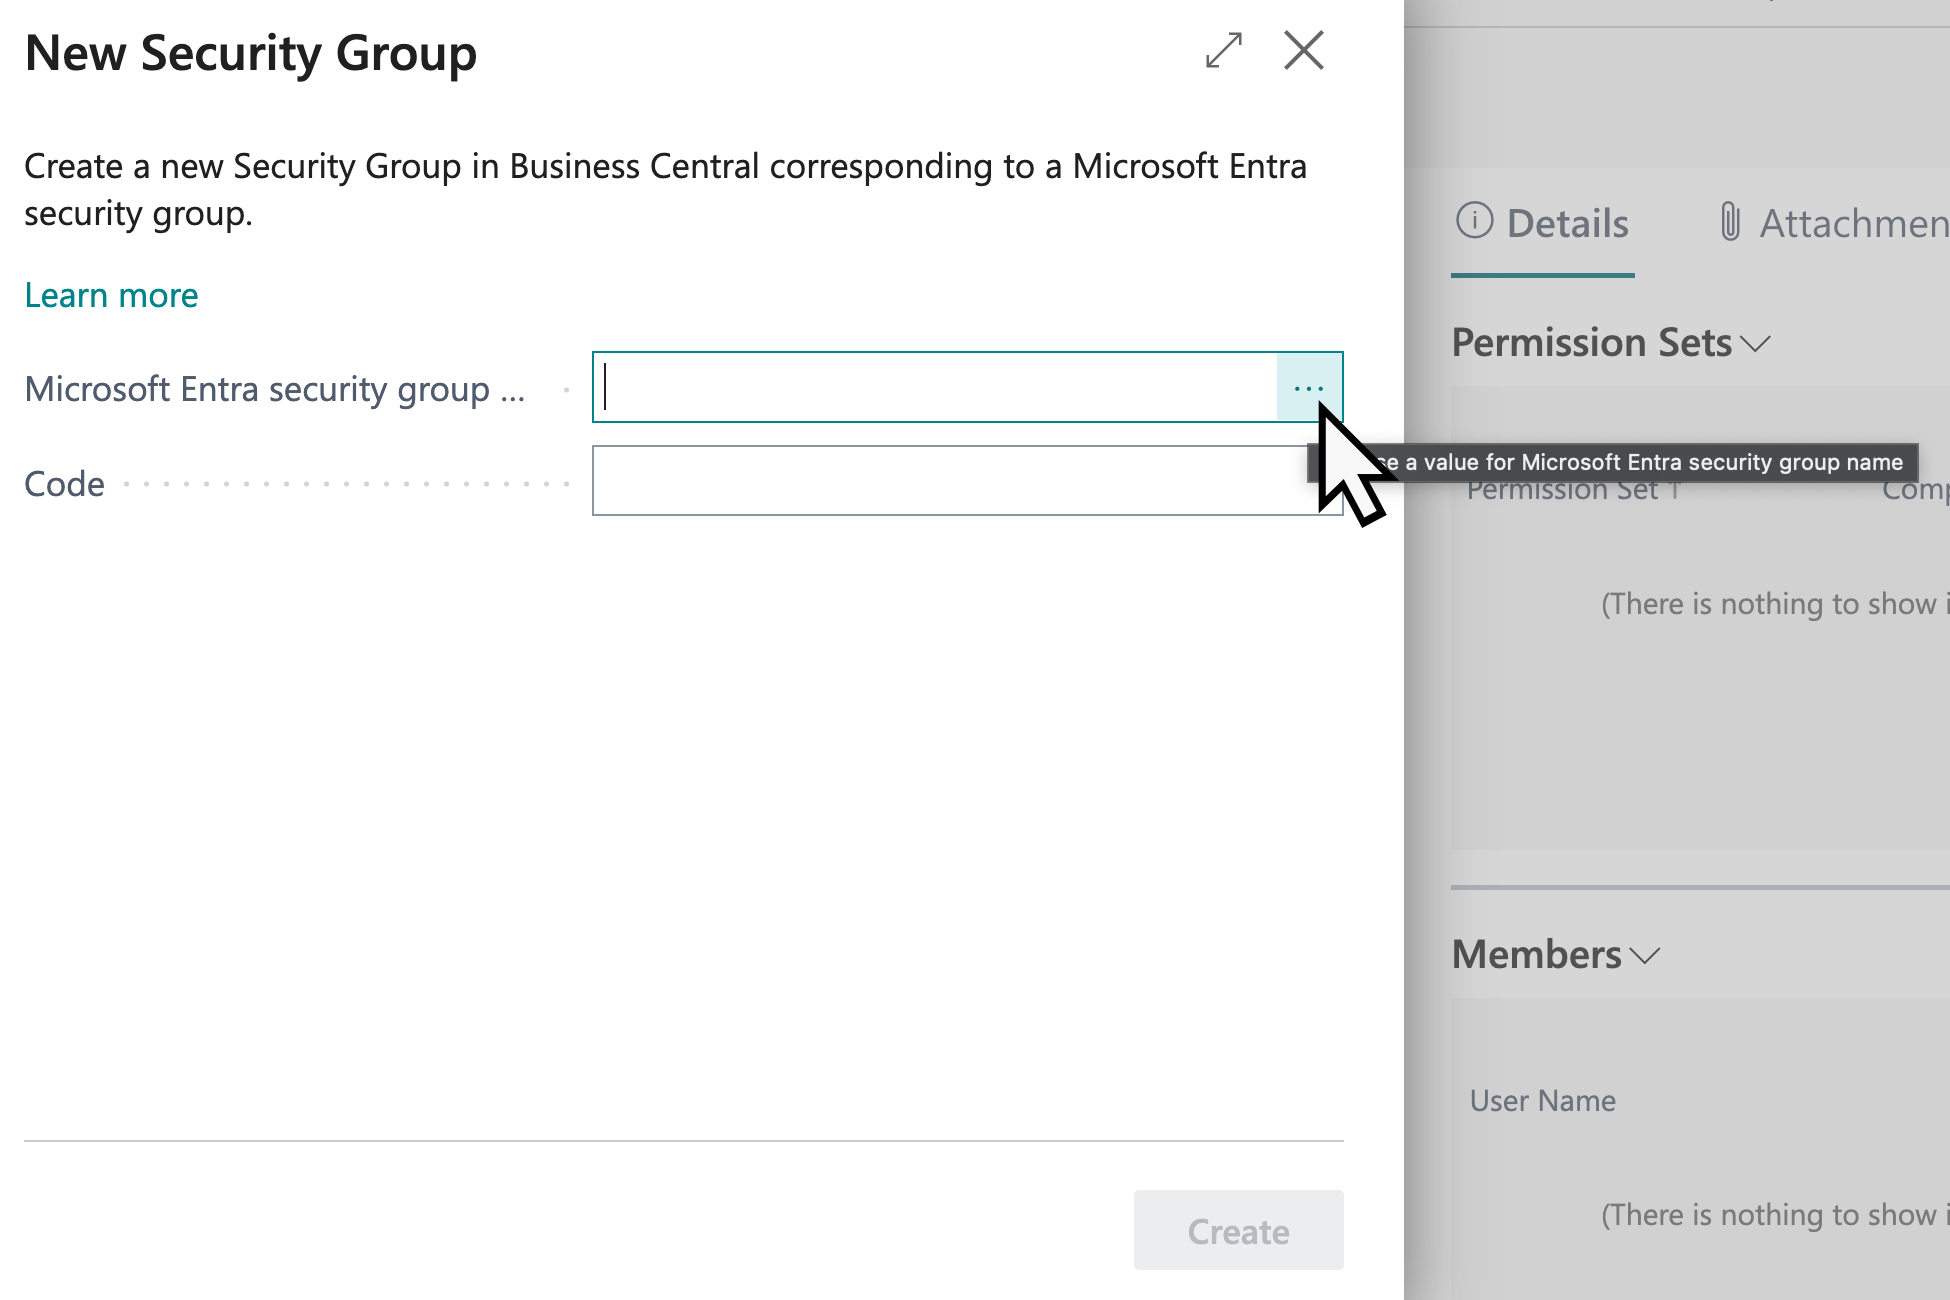
In Microsoft Entra security group name, specify the name of the security group in Microsoft Entra.
To perform a lookup of Microsoft Entra security group names, choose
 .
.This field establishes a link between this security group in Sparkrock 365 and the security group in Microsoft Entra.
In Code, specify the code that is to represent this security group.
It is recommended that you use the same code as the user group. The User Groups Migration Guide automatically detects security groups with matching user group codes. If the codes do not match, you must manually map the user groups to security groups when running the guide.
Choose Create.
The security group is created successfully.
Run the Sparkrock 365 User Groups Migration Guide to convert user groups to security groups
After you have created security groups in Sparkrock 365, you can run the migration.
Important
Important:
The user groups migration guide was designed to be run once. During the migration, the guide deletes all user groups from Sparkrock 365.
To run the User Groups Migration Guide to convert user groups to security groups, perform the following steps:
Select Search (Alt+Q)
, enter feature management, and then choose the related link.The Feature Management page opens.
On the row with Feature: Convert user group permissions, in the Enabled for column, select All Users.
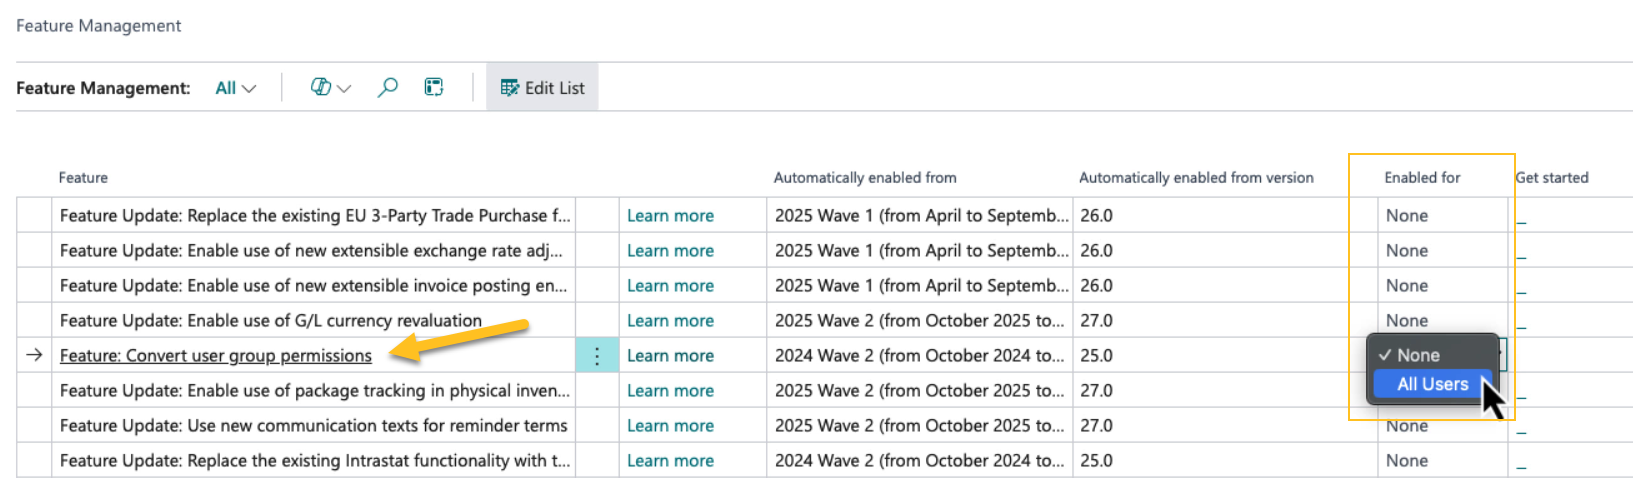
A dialog box appears that displays the following text:
There are still user groups defined in the system. Do you want to run the user group conversion guide?
To proceed, choose Yes.
The User Groups Migration Guide welcome page opens.
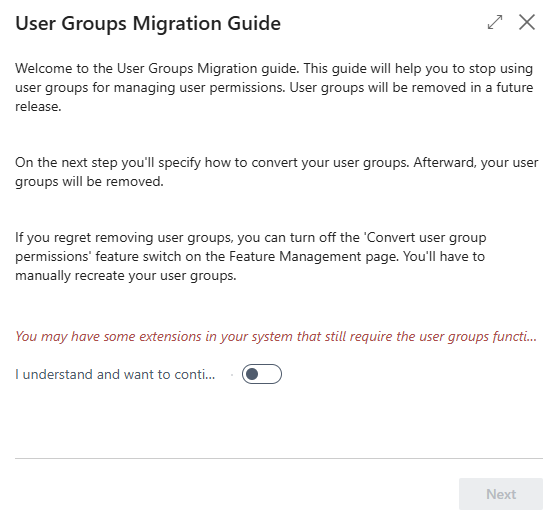
To proceed, turn on I understand and want to continue, and then choose Next.
The next User Groups Migration Guide page appears.

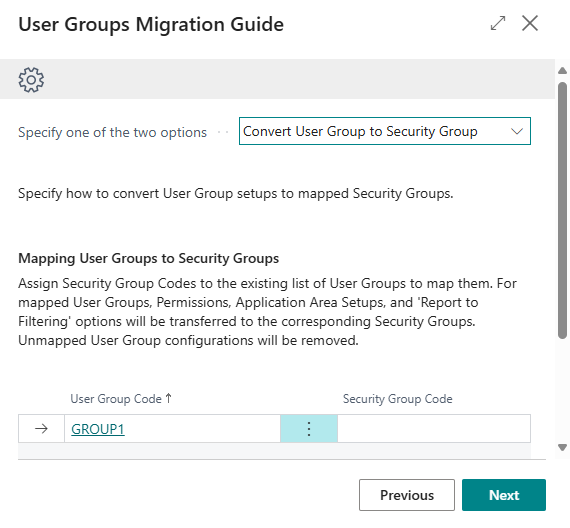
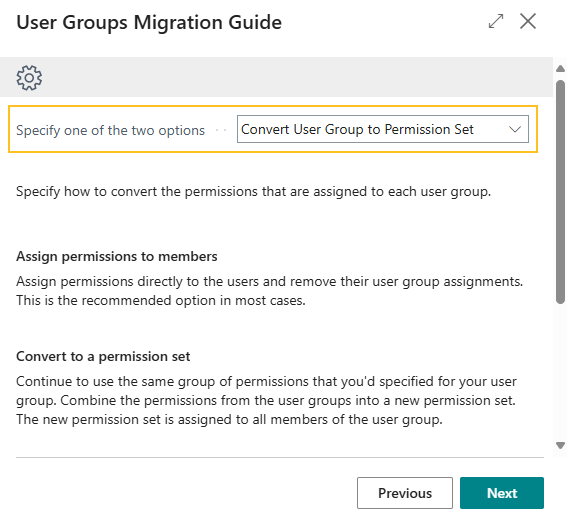
The User Groups Migration Guide automatically detects security groups with matching user group codes.
In Specify one of the two options, specify Convert User Group to Security Group.
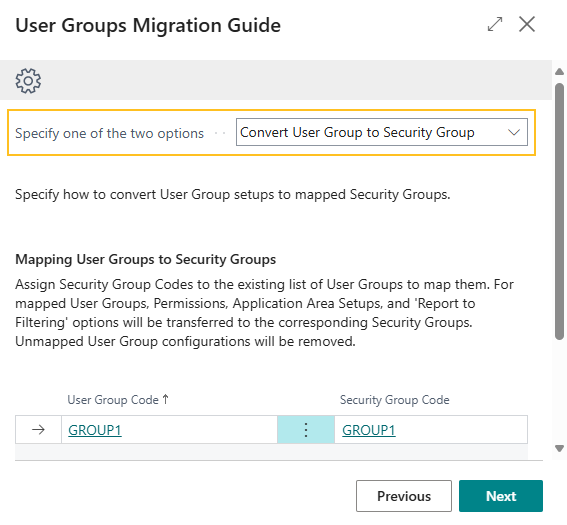
If required, update mappings, clear mappings, and manually map user group codes to security group codes.
You can only map a user group to a single security group.
The User Groups Migration Guide does not migrate unmapped user groups.
To proceed, choose Next.
Sparkrock 365 completes the migration of permissions, application area setup, and reports to filter settings.
When the User Groups Migration Guide completes the migration, the following text is displayed:
All Done. Click Finish to close the guide.
To proceed, choose Finish.
Convert user groups to permission sets
If desired, instead of converting user groups to security groups, you can convert user groups to permission sets. To convert user groups to permission sets, run the User Groups Migration Guide.
Run the Sparkrock 365 User Groups Migration Guide to convert user groups to permission sets
Important
Important:
The User Groups Migration Guide was designed to be run once. During the migration, the guide deletes all user groups from Sparkrock 365.
To run the User Groups Migration Guide to convert user groups to permission sets, perform the following steps:
Select Search (Alt+Q)
, enter feature management, and then choose the related link.The Feature Management page opens.
On the row with Feature: Convert user group permissions, in the Enabled for column, select All Users.
A dialog box appears that displays the following text:
There are still user groups defined in the system. Do you want to run the user group conversion guide?
To proceed, choose Yes.
The User Groups Migration Guide welcome page opens.
To proceed, turn on I understand and want to continue, and then choose Next.
The User Groups Migration Guide page opens.
In Specify one of the two options, specify Convert User Group to Permission Set.
For each user group, in Action, specify one of the following options:
- Convert to a permission set : User group permissions are assigned to a new permission set. The new permission set is then assigned to all members of the user group.
- Assign permissions to members : User group permissions are assigned directly to individual users.
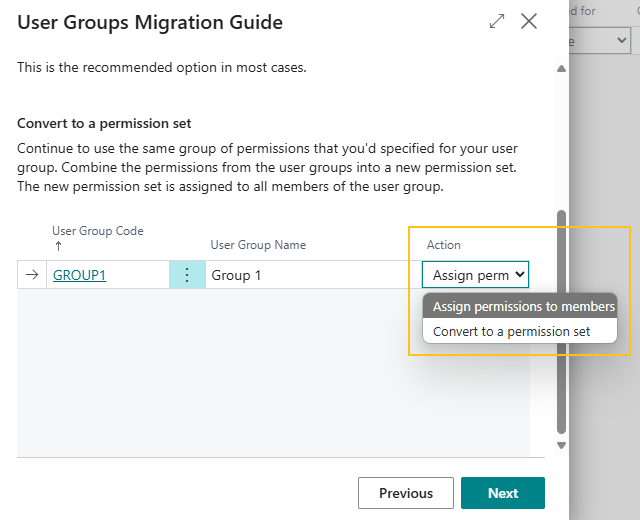
The User Groups Migration Guide does not migrate unmapped user groups.
When converting a user group to a permission set, if there is an existing permission set with the same name, Sparkrock 365 appends _1 to the permission set, for example, if there is an existing permission set named GROUP1, the new permission set is named GROUP1_1.
To proceed, choose Next.
Sparkrock 365 completes the migration of user groups to permission sets.
When the tool completes the migration, the following text is displayed:
All Done. Click Finish to close the guide.
To proceed, choose Finish.
New security group functionality on the Security Administrator role center
On the Security Administrator role center, this release introduces the following security group related enhancements:
New Security Groups menu item.
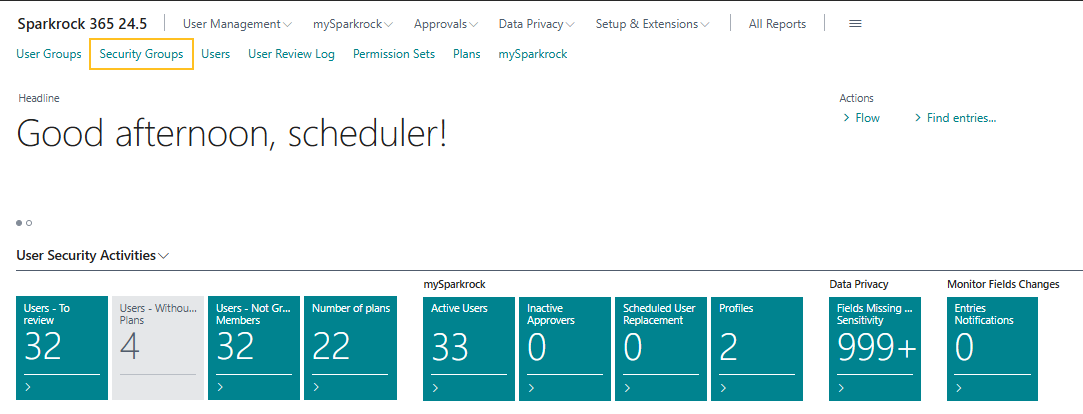
The new Security Groups menu item opens the Security Groups page.
New Security Group Application Areas menu item.
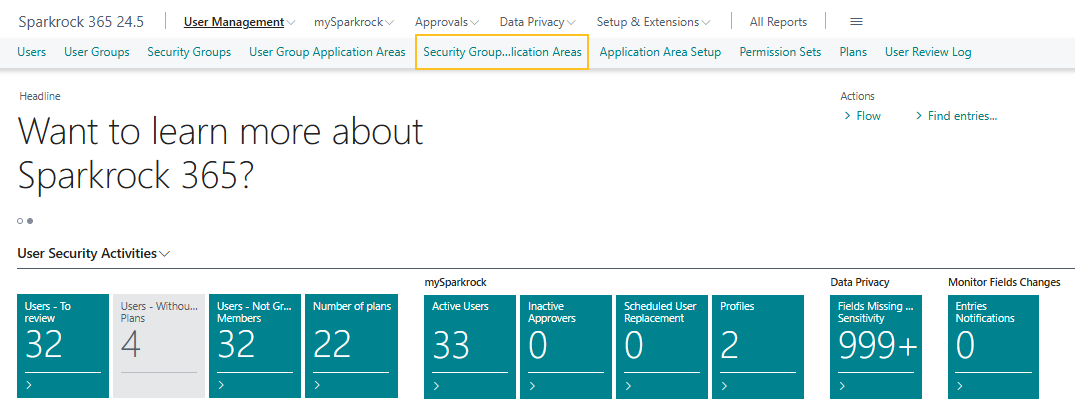
The new Security Group Application Areas menu item opens the Security Group Application Areas page.
In the Insights section, there is a new Users in Security Groups part.
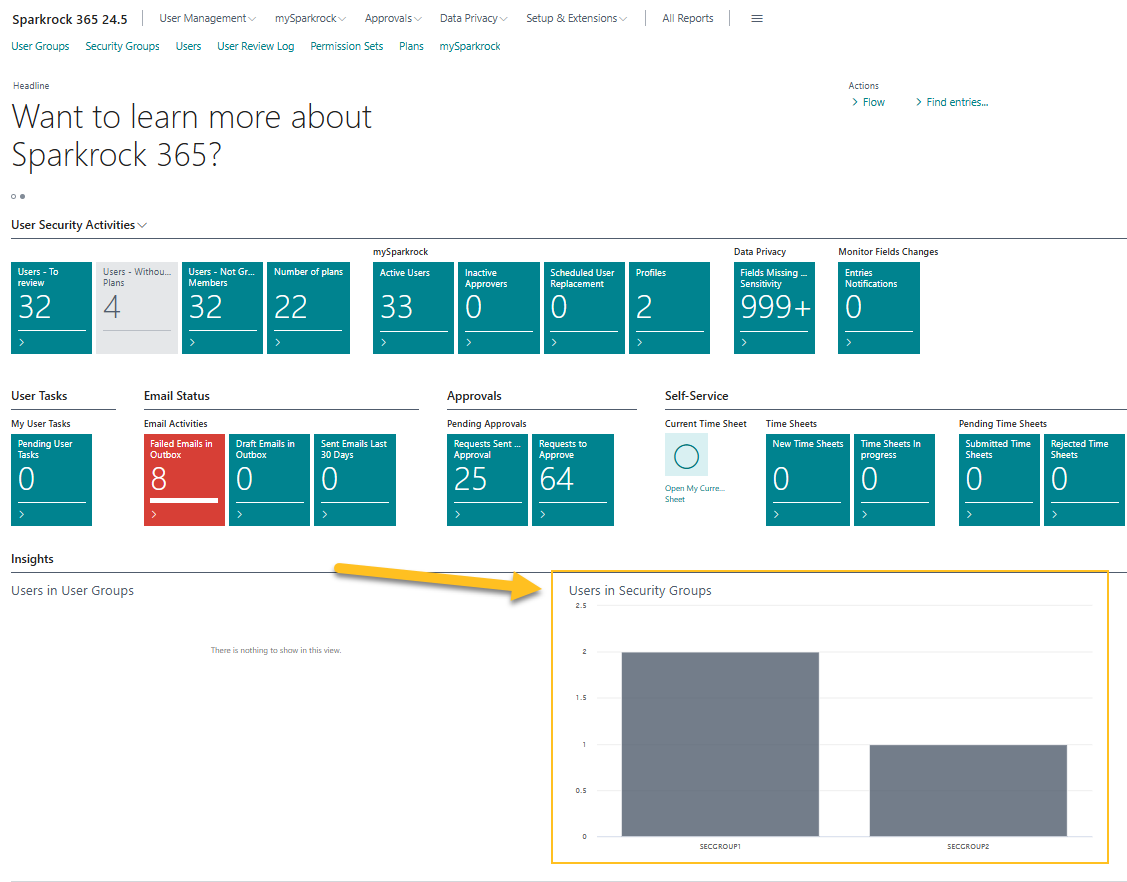
The Users in Security Groups part displays a chart that shows the number of users in each security group.
PD-5623
Analysis mode
Sparkrock 365 now includes the capability for you to analyze data directly from Sparkrock 365 pages, without having to run a report or open another application, such as Microsoft Excel. The feature provides an interactive and versatile way to calculate, summarize, and examine data. Instead of running reports using different options and filters, you can add multiple tabs that represent different tasks or views on the data.
To learn more, go to Analyze list data using data analysis mode.
Productivity enhancements
The following sections describe some of the productivity enhancements in this release.
Modern action bar
To help users become more proficient, this release introduces enhancements to the action bar. You can customize the action bar to meet the requirements of your organization, or yourself. You can add actions that you want to make available in a discoverable and consistent way across Sparkrock 365.
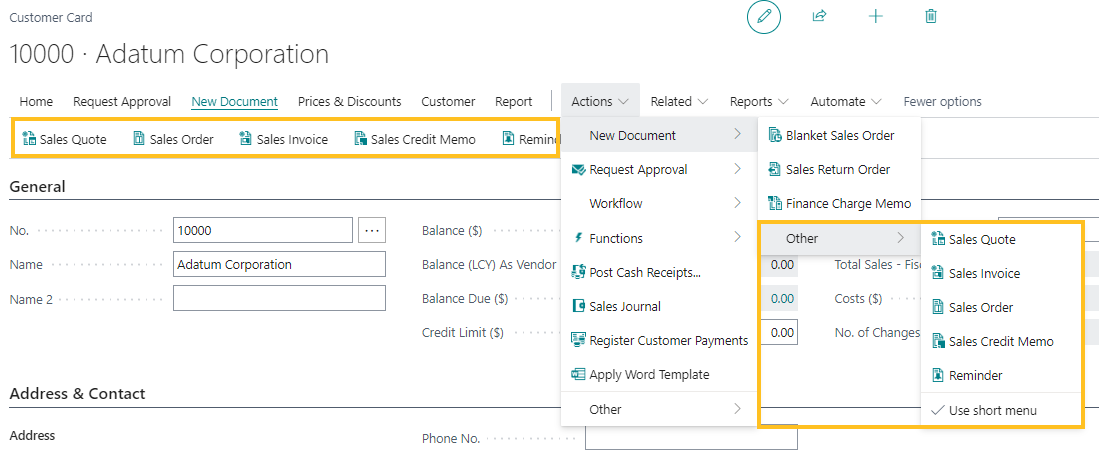
To learn more, go to Modern Action Bar and Personalize your workspace.
Actionable errors
To assist users in resolving errors more effectively, this release enhances the Sparkrock 365 error handling framework to include promoted actions in both error dialogs and validation errors.
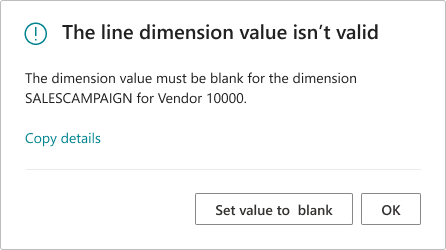
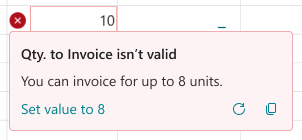
To learn more, go to Actionable errors.
Show related record details from lookups
To help users access information about related records, this release introduces a Show Details button on lookups.
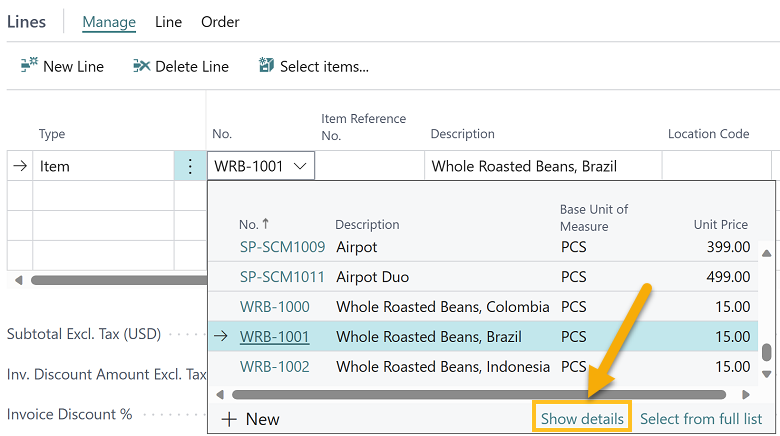
To learn more, go to Show related record details from lookup.
Search company data from Tell Me
This release introduces the capability for you to search company data from Tell Me.
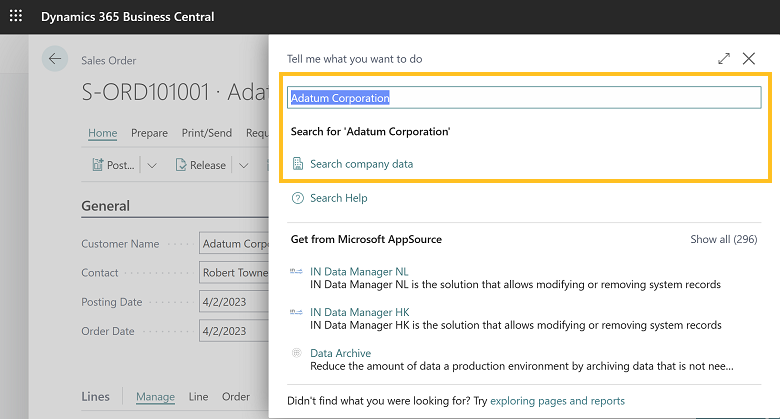
The search results include the top results in the tables to which you have access.

Sparkrock 365 does not search all tables. To view or set up the list of tables that Sparkrock 365 searches, choose Set up where to search.
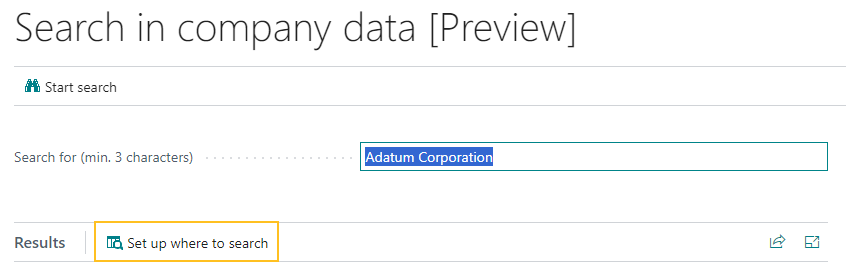
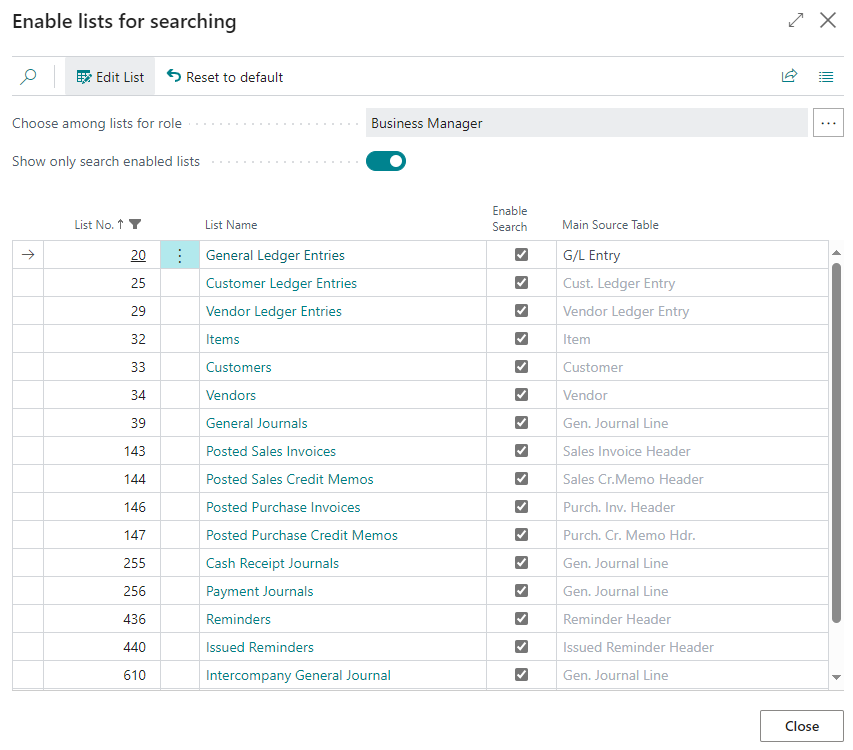
When you choose Set up where to search, Sparkrock 365 opens the Enable lists for searching page.
To learn more, go to Get to data search from anywhere in Business Central and Search for a Record in Your Data.
Finance enhancements
The following sections describe some of the platform finance related enhancements in this release.
Purchase and sales order navigation
To provide insight into the documents that are associated with purchase and sales orders, this release introduces the capability to more quickly access information for posted documents directly from an order or return.
For example:
- From sales order lines, you can drill down in the Qty. Shipped and Qty. Invoice fields.
- From purchase order lines, you can drill down in the Qty. Received and Qty. Invoiced fields.
- From sales return lines, you can drill down in the Return Qty. Received and Qty. Invoiced fields.
- From purchase return lines, you can drill down in the Return Qty. Shipped and Qty. Invoiced fields.
To learn more, go to Navigate easier between order, receipt, and invoice documents.
General journal approvals
When you send a general journal batch or specific general journal lines for approval, Sparkrock 365 prevents users from making changes to the batch or lines until the batch or lines are approved. Because mistakes happen, this release introduces actionable inline errors to make the correction workflow easier.
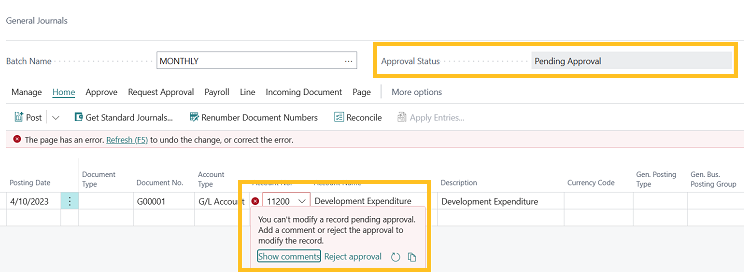
For example, after a user submits a general journal batch for approval, an accounting manager notices that the wrong General Ledger (G/L) account is specified. If the accounting manager tries to change the G/L account, Sparkrock 365 now displays an inline validation error message and provides two actions that the accounting manager can take to fix the mistake. The accounting manager can choose Show Comments, and then add a comment to document what changes are necessary. Also, the accounting manager can choose Reject approval to return the general journal batch to the submitter.
To learn more, go to More control over general journal approvals.
Allow lines with amounts of zero on recurring general journals
This release introduces changes that make it easier to maintain recurring general journals that have zero amount lines in some runs. During posting, Sparkrock 365 now ignores the lines that have a zero amount and doesn't post these lines. Sparkrock 365 no longer prompts you to add an amount or delete these zero amount lines. This feature saves you from having to delete the lines, and then add the lines again in a future run. The lines remain in the journal for the next run, where you can update the amounts as required.
To learn more, go to Allow lines with amounts of zero on recurring general journals and Work with general journals.
Reverse ledger entry with realized gain or loss
Starting with this release, you can use the Reverse transaction action to reverse payments that were applied to entries that originated in foreign currencies and were adjusted using the Exchange Rate Adjustment batch job.
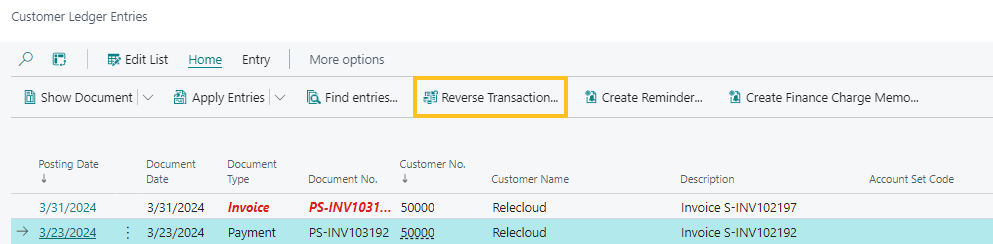
This feature works for both purchases and sales.
The following list is a simple scenario that illustrates how this feature works:
- Post a sales invoice for a customer using a foreign currency.
- Adjust the exchange rate for that currency.
- Post a payment applied to the invoice.
- Unapply and reverse the payment transaction, for example, from the Customer Ledger Entries page.
To learn more, go to Reverse a customer and vendor ledger entry with a realized gain or loss entry and Update currency exchange rates.
Financial consolidation run enhancements
When you run consolidation for business units that use a foreign currency, you must pay attention to the exchange rates that various parts of the process use, and even more so when you redo a consolidation.
To more easily track these exchange rates, starting with this release, you can use the Setup Business Unit Currencies page.
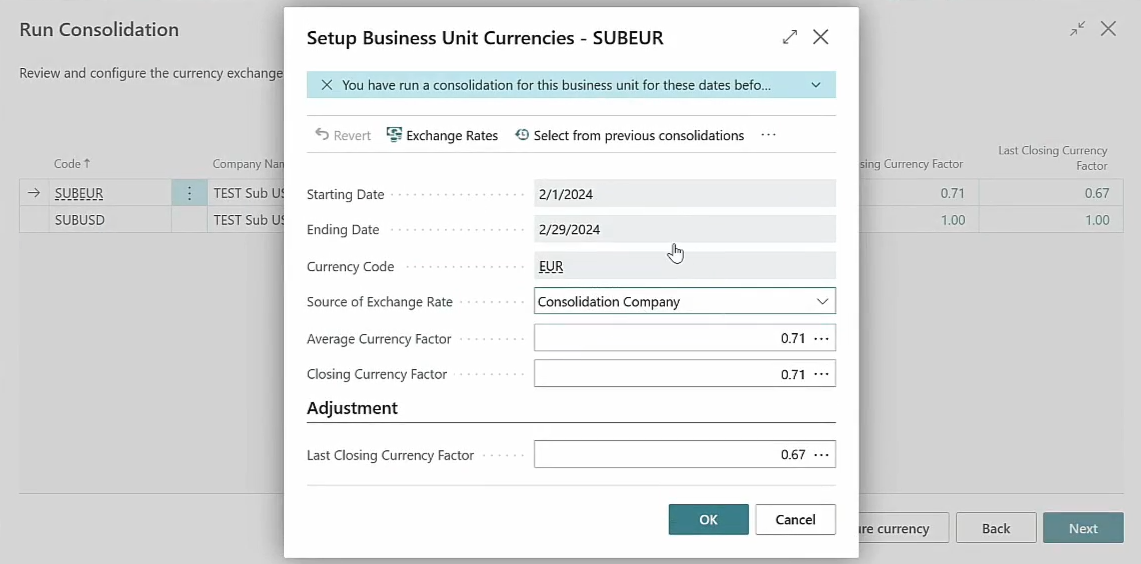
When you run a consolidation, the Setup Business Unit Currencies page provides the last rates that were entered for average, closing, and last closing rate. Also, you can look up the exchange rates in the currency exchange rate table, which makes it easier to validate. To modify the rates that are used for the current run, you can enter the values or copy the values from previous runs.
The Setup Business Unit Currencies page is particularly valuable when you want to rerun a previous consolidation, where you must use the closing rate of the consolidation run previous to the earliest of such runs. This setup is required to correctly revaluate your balance sheet items. To find the relevant last run to copy values from, or just look up the rates that were used when you're troubleshooting, you can use the Select from previous consolidations action. Sparkrock 365 displays only the runs for the specified business unit.
To learn more, go to Set up financial consolidation runs more efficiently and Set up company consolidation.
Excel report layouts
This release introduces new Excel reports and report layouts that let you interactively generate analysis and present learnings about key aspects of your business, such as finance, sales, and purchases.
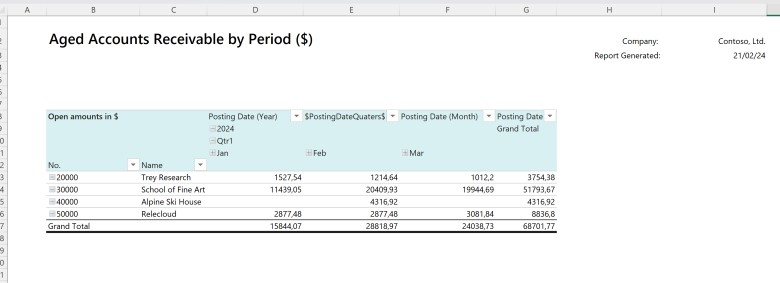
You now have more ways to create your own Excel layouts for reports because not only do you get the reports, but also data from the report request pages and data for translations of a layout. If the data comes from multiple tables, the report layouts show the data in multiple worksheets, This design is intended to help you understand where the data originated. The reports are flexible, and you can use the reports in the way that best fits your requirements.
For example, you can perform the following tasks:
- Use the reports as-is to get insight about your organization.
- Use pivot tables to slice and dice data for analysis.
- Use the reports as a template to create your own Excel layouts for the same data.
On the Report Layouts page, you can create your own copies of the report layouts.
To learn more, go to Use new Excel layouts for selected reports and Working with Microsoft Excel layouts.
Allocation accounts enhancements
Sparkrock is enhancing the Business Central allocation accounts feature. While the enhancements are in progress, you cannot use this feature. This feature will be available in a future release.
Statistical accounts enhancements
Sparkrock is enhancing the Business Central statistical accounts feature. While the enhancements are in progress, you cannot use this feature. This feature will be available in a future release.
Bank deposit enhancements
This release introduces several architectural changes to the bank deposit functionality in Sparkrock 365. These changes are necessary because Microsoft implemented changes to the bank deposit functionality in Business Central. For more information about the Business Central changes, go to Standardizing the bank reconciliation process in North American versions. For the most part, the bank deposit functionality in Sparkrock 365 works the same as previous releases.
The following sections include information about the customer facing changes in this release to the bank deposit functionality in Sparkrock 365.
New Bank Deposits page
The Deposits page has been replaced with a Bank Deposits page.
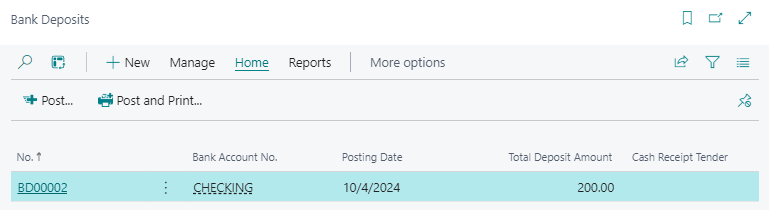
When you update to this release, all data that appeared on the Deposits page in the previous release now appears on the Bank Deposits page.
New Posted Bank Deposits page
The Posted Deposits page has been replaced with a Posted Bank Deposits page.

All data that appeared on the Posted Deposits page in previous releases continues to appear on the Posted Deposits page in this release. Starting with this release, new posted bank deposits appear on the Posted Bank Deposits page.
New Bank Deposit page
The Deposit page has been replaced with a Bank Deposit page.

When you update to this release, all data that appeared on the Deposit page in the previous release now appears on the Bank Deposit page.
To learn more, go to Create bank deposits.
New Posted Bank Deposit page
The Posted Deposit page has been replaced with a Posted Bank Deposit page.
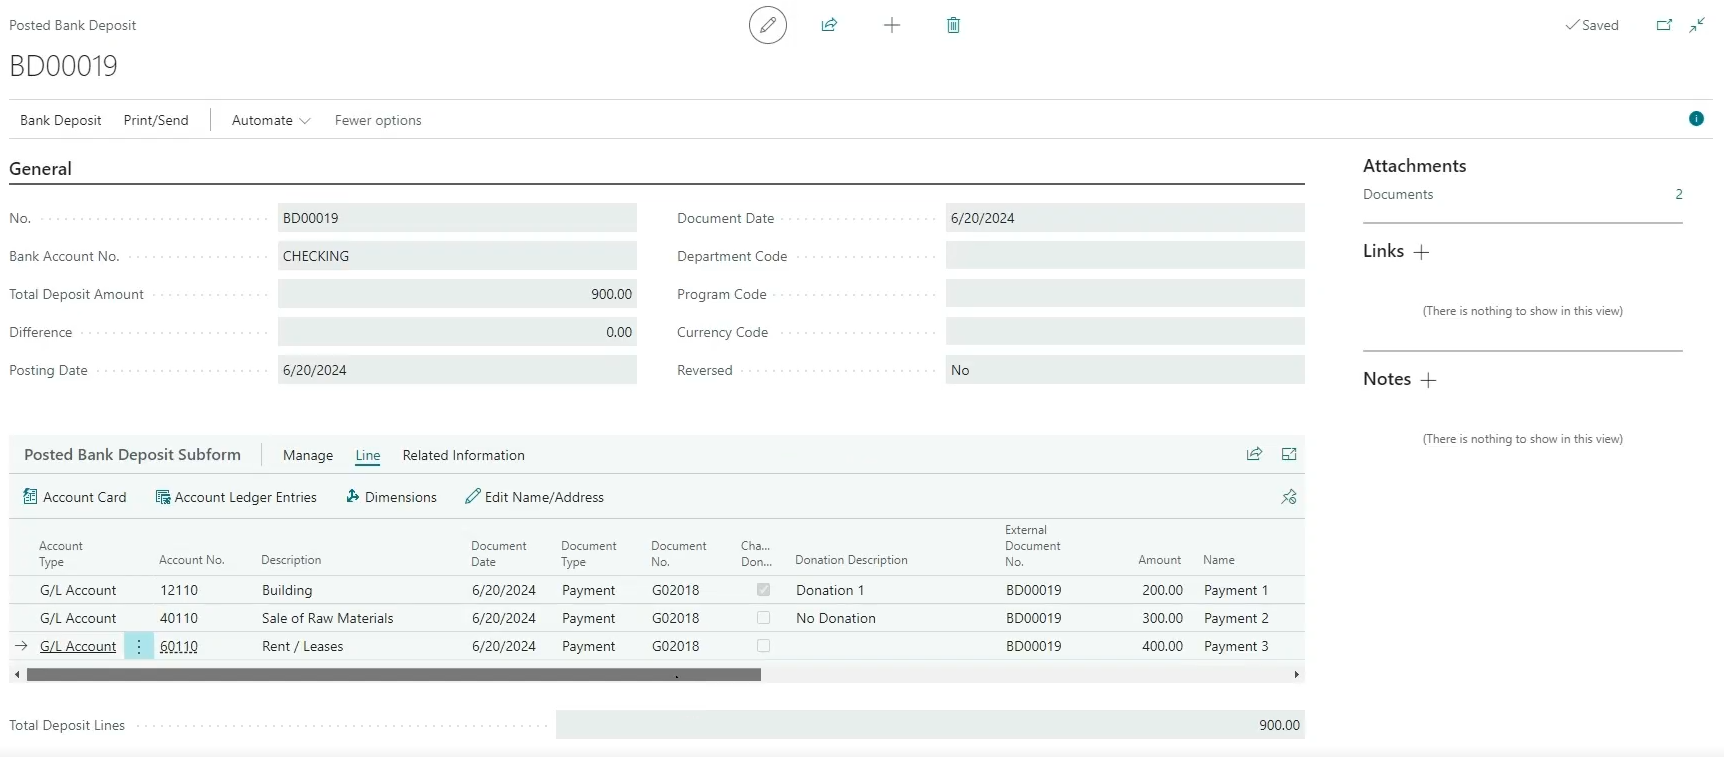
When you update to this release, all data that appeared on the Posted Deposit page in the previous release now appears on the Posted Bank Deposit page.
To learn more, go to Create bank deposits.
Post as lump sum
On the new Bank Deposit page, there is a Post as Lump Sum field.

When Post as Lump Sum is turned on, Sparkrock 365 posts the bank deposit as a single bank account ledger entry with the total amount. Also, all lines must have the same value for Document No. as the bank deposit.
To learn more, go to Create bank deposits.
Cash receipts integration with the new Bank Deposit and Posted Bank Deposit pages
To integrate the Sparkrock 365 cash receipts functionality from previous releases with the new Bank Deposit and Posted Bank Deposit pages in this release, this release includes the following changes to the base Business Central functionality:
On the Cash Receipt Batch Card page, there is a new Transfer to Deposit action.
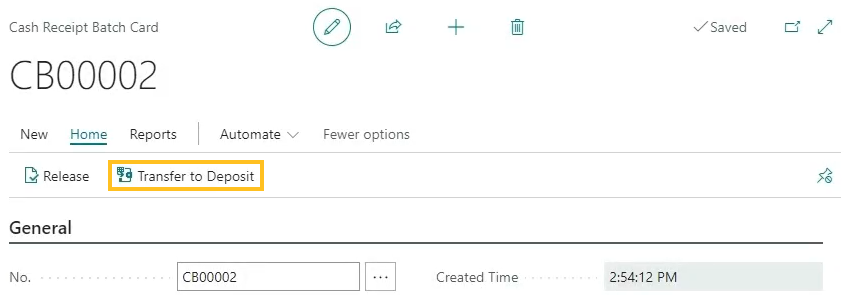
When you choose the Transfer to Deposit action, Sparkrock 365 transfers the cash receipt data to the bank deposit. On the bank deposit, Sparkrock 365 automatically populates the values of Cash Receipt No. and Cash Receipt Line No.. On the cash receipt, Sparkrock 365 automatically populates the value of Bank Deposit No. and updates the Status to Transferred to Deposit.
On the Cash Receipt Batch Card page, there is a new No. of Transferred to Deposit field.
The No. of Transferred to Deposit field displays the total number of cash receipts that have been transferred to a bank deposit. When you select the link that appears for the field value, Sparkrock 365 opens the Cash Receipts page where you can view the cash receipts that have been transferred to a bank deposit.
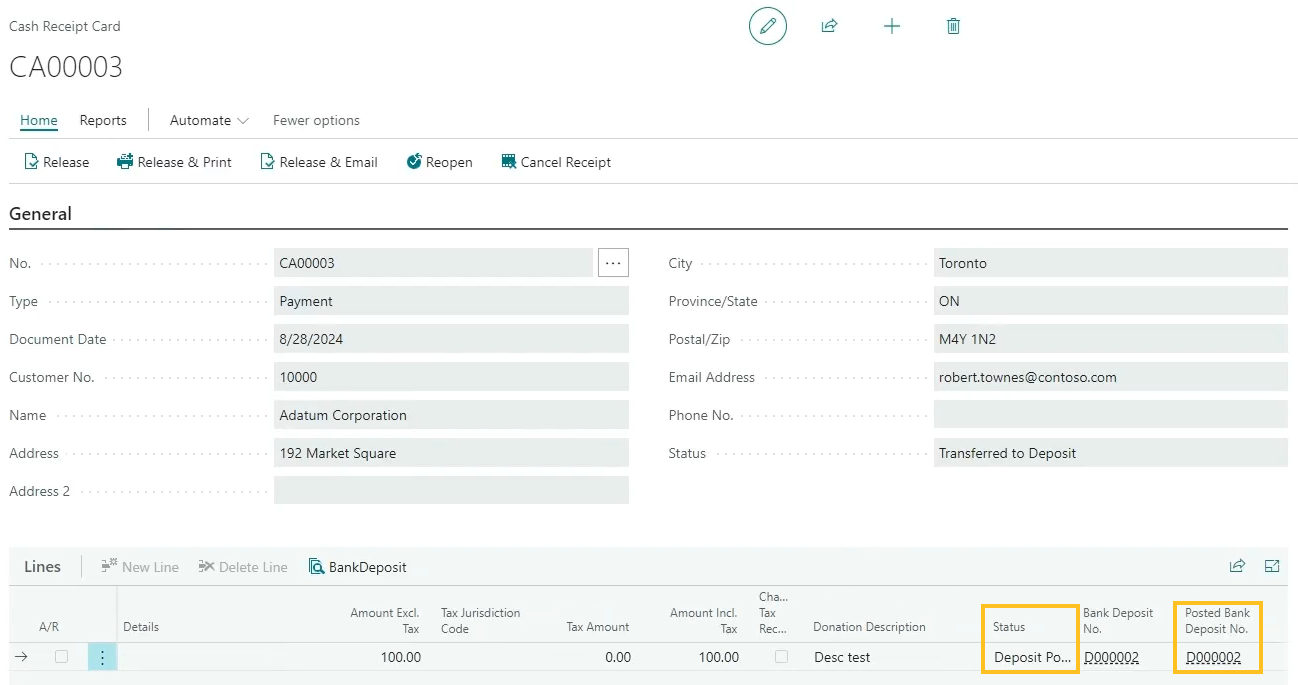
On the Cash Receipts and Cash Receipt Card pages, there is a new Status of Transferred to Deposit.

When you choose the Transfer to Deposit action, after Sparkrock 365 completes the transfer, Sparkrock 365 updates the Status on the respective cash receipt lines to Transferred to Deposit. If deposit lines are removed, Sparkrock 365 reverts the Status to Open.
On the Cash Receipt Card page, on the Lines FastTab, there is a new Bank Deposit action.
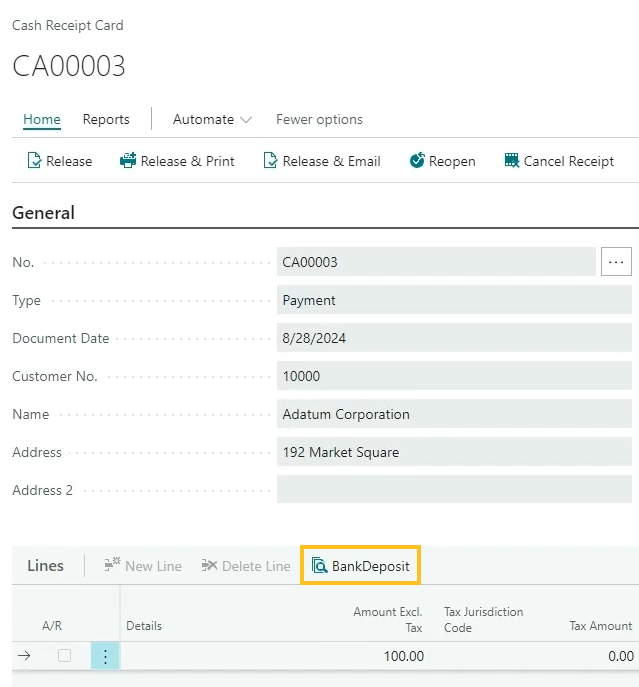
You can use the Bank Deposit action to open the respective Bank Deposit or Posted Bank Deposit pages.
When you post a deposit that is associated with a cash receipt, on the Cash Receipt Card page, on the Lines FastTab, Sparkrock 365 automatically updates the Status to Deposit Posted and assigns a value to Posted Bank Deposit No..
To learn more, go to Cash receipts and bank deposits.
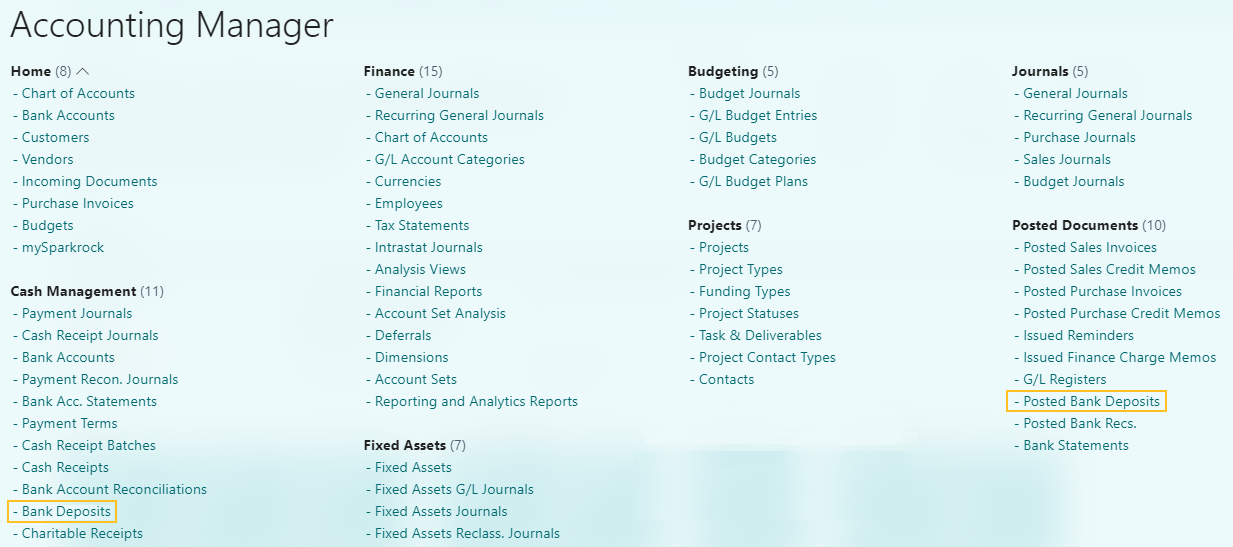
Accounting Manage role center enhancements
On the Accounting Manager role center, in the Cash Management section, this release renames the Deposits link to Bank Deposits. The Bank Deposits link opens the Bank Deposits page. In the Posted Documents section, this release renames the Posted Deposits link to Posted Bank Deposits. The Posted Bank Deposits link opens the Posted Bank Deposits page.
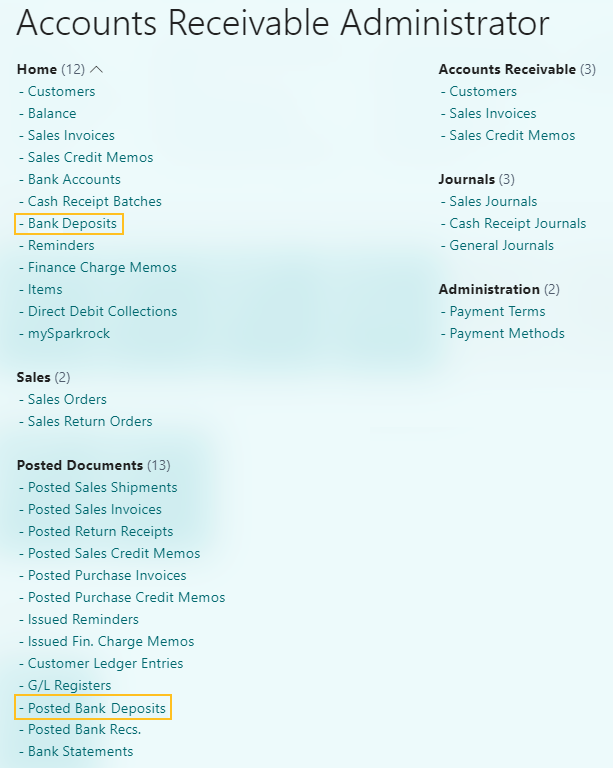
Accounts Receivable Administrator role center enhancements
On the Accounts Receivable Administrator role center, in the Home section, this release renames the Deposits link to Bank Deposits. The Bank Deposits link opens the Bank Deposits page. In the Posted Documents section, this release renames the Posted Deposits link to Posted Bank Deposits. The Posted Bank Deposits link now opens the Posted Bank Deposits page.
Charitable receipts integration with the new Bank Deposit and Posted Bank Deposit pages
To integrate the Sparkrock 365 charitable receipts functionality from previous releases with the new Bank Deposit and Posted Bank Deposit pages in this release, this release includes the following changes to the base Business Central functionality:
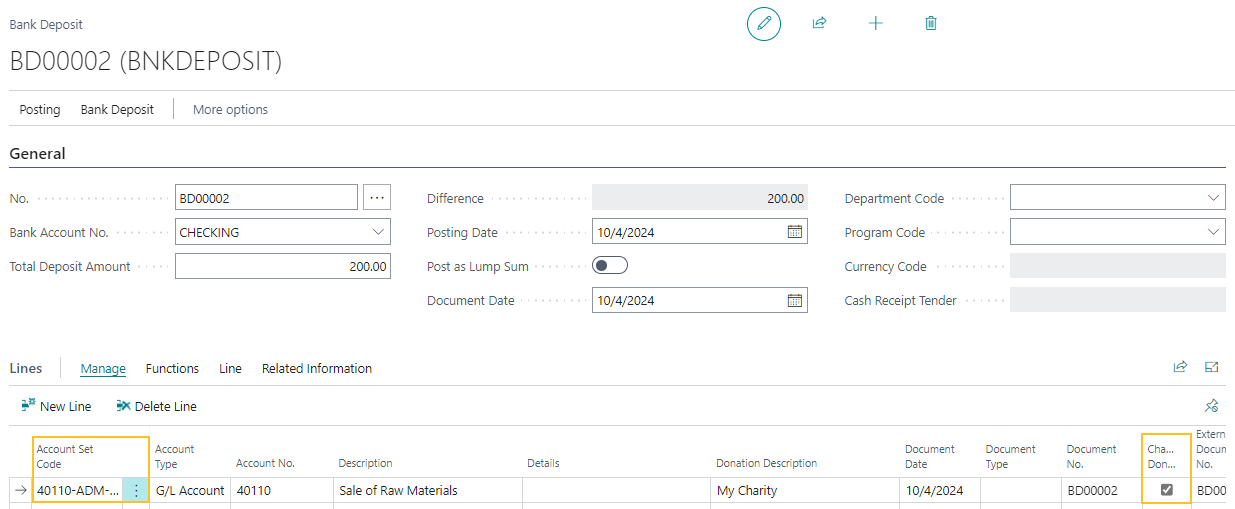
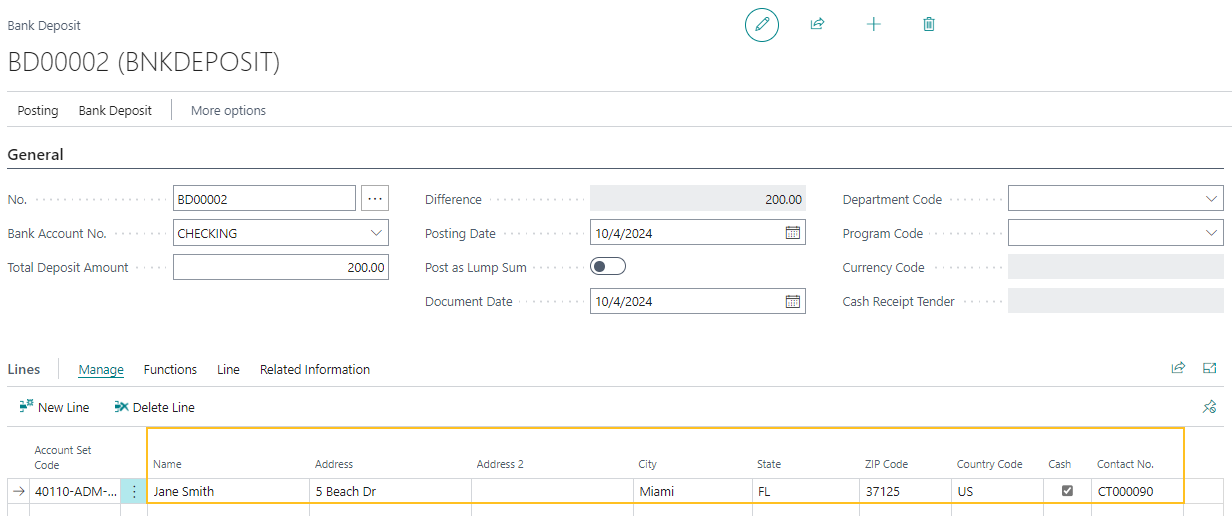
On the Bank Deposit page, on the Lines FastTab, this release adds the following Sparkrock 365 charitable donation specific fields to the base Business Central functionality:
Account Set Code: Specifies the code that represents the respective account set of the charitable donation. When you specify a value for Account Set Code, Sparkrock 365 automatically populates the Account Type, Account No., and Description fields on the same line.
Donation Description: Specifies a description of the charitable donation.
Charitable Donation: Specifies whether this bank deposit line is a charitable donation.
Name: Specifies the name of the charitable donation donor.
Address: Specifies the address of the charitable donation donor.
Address 2: Specifies the address line 2 of the charitable donation donor.
City: Specifies the city of the charitable donation donor.
State: Specifies the state of the charitable donation donor.
ZIP Code: Specifies the ZIP code of the charitable donation donor.
Country Code: Specifies the country code of the charitable donation donor.
Cash: Specifies whether the charitable donation is cash.
Contact No.: Specifies the number that represents the contact of the charitable donation donor.
When you post a bank deposit that has the Charitable Donation checkbox selected, Sparkrock 365 performs the following tasks:
- Populates the Posted Bank Deposit page with the charitable donation specific fields that appear on the Bank Deposit page, except for Account Set Code.
- Copies the values for Account Set Code to the respective General Ledger (G/L) entries.
- Populates the Charitable Receipts page with the charitable donation specific fields that appears on the Bank Deposit page, as well as details from the posted deposit lines.
- Populates the value of the Charitable Receipt No. field on the Charitable Receipts page.
When you post a bank deposit that has the Charitable Donation checkbox selected, and then you run a related Charitable Receipts report, Sparkrock 365 automatically populates the report with the charitable donation specific fields that appear on the Bank Deposit page, except for Account Set Code and Cash.
To learn more, go to Create a charitable receipt for a bank deposit and Create a charitable receipt for a cash receipt.
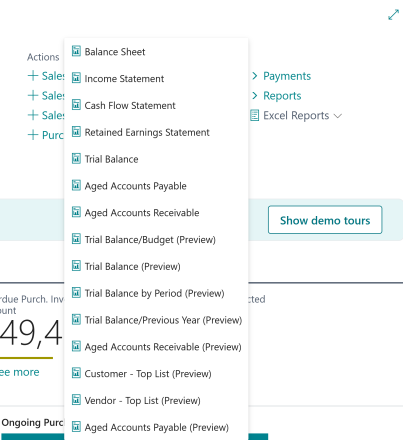
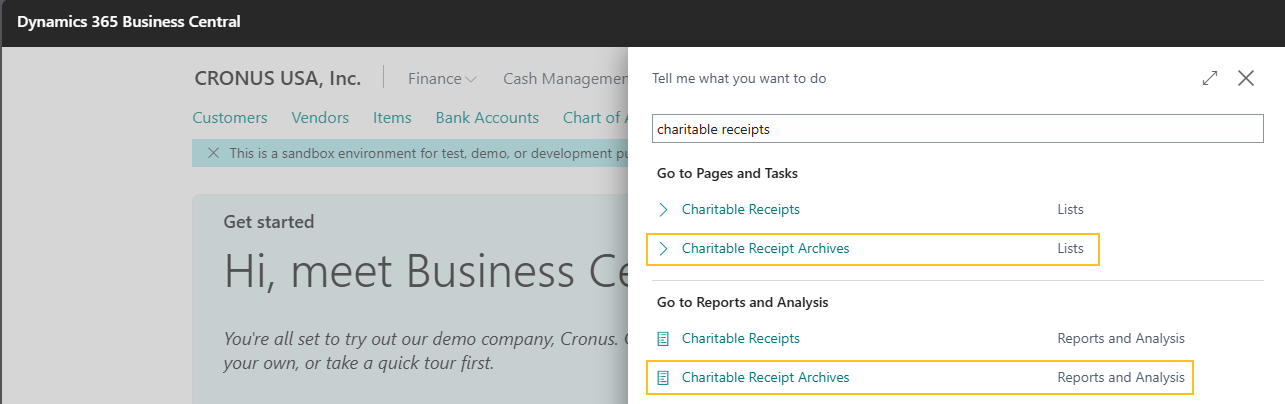
New Charitable Receipt Archives list and report pages
To provide the capability for you to manage charitable receipts that were created before the update to version 24.5 for Sparkrock 365 2024 release wave 1, this release introduces Charitable Receipt Archives list and report pages.

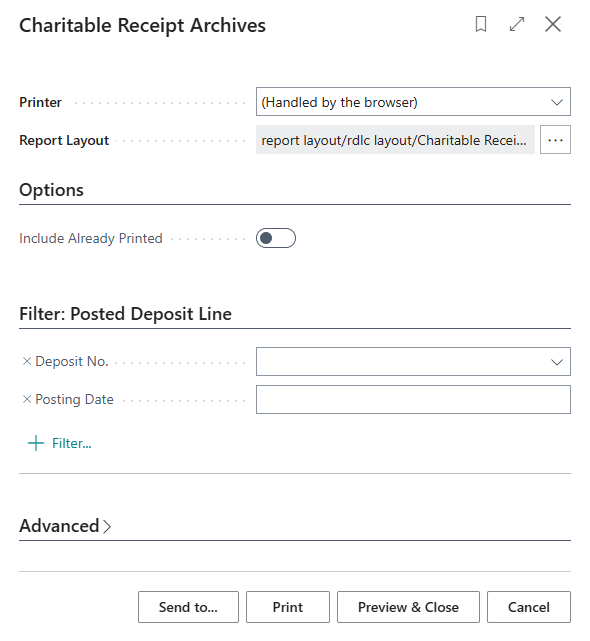
The Charitable Receipt Archives list and report pages are available from Tell Me.
From the Charitable Receipt Archives page, you can perform the following tasks for charitable receipts that were created before the update to version 24.5 for Sparkrock 365 2024 release wave 1:
View details for charitable receipts.
Edit the name or address on charitable receipts.
Print charitable receipts.
To learn more, go to View a charitable receipt that was created before the update to version 24.5 for Sparkrock 365 2024 release wave 1, Edit a charitable receipt that was created before the update to version 24.5 for Sparkrock 365 2024 release wave 1, and Print a charitable receipt that was created before the update to version 24.5 for Sparkrock 365 2024 release wave 1.
Edit dimension set entries from the new Bank Deposit page
On the Bank Deposit page, on the Lines FastTab action bar, you can choose Line > Dimensions to open the respective Edit Dimension Set Entries page and make changes as required.

After you post the bank deposit, on the Posted Bank Deposit page, on the Lines FastTab action bar, you can choose Line > Dimensions to open the respective Dimension Set Entries page and view the associated dimensions.
Manage attachments from the new Bank Deposit page
On the Bank Deposit page, you can manage attachments at the bank deposit level and at the bank deposit line level as required. To manage attachments at the bank deposit level, you can use the Attachments FactBox.
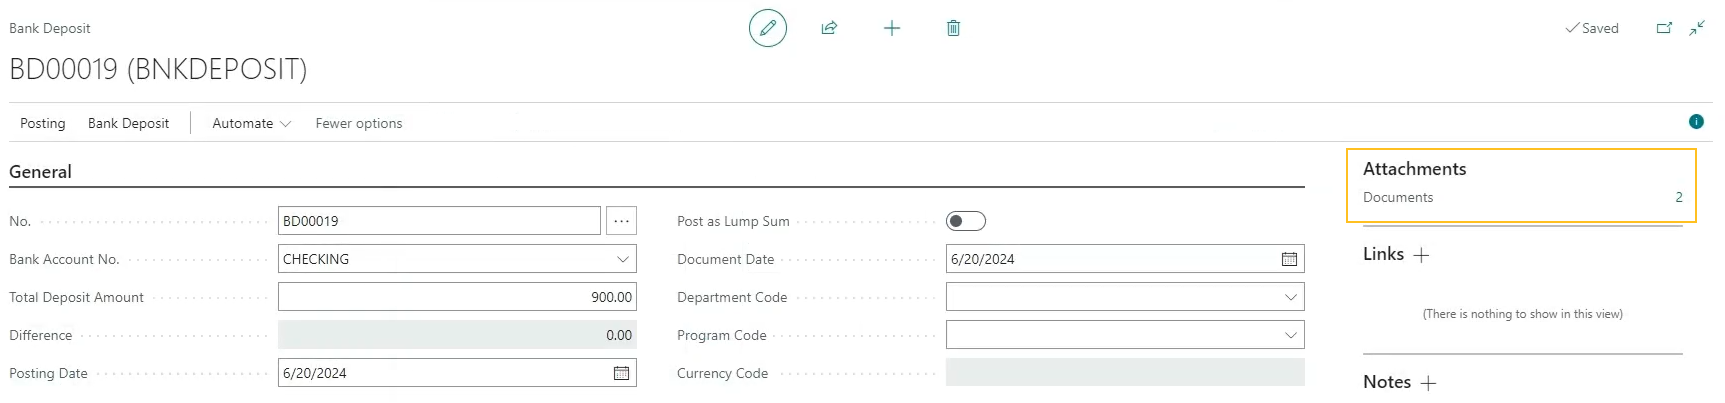
During posting, Sparkrock 365 copies attachments that appear in the Attachments FactBox to the respective posted bank deposit and General Ledger (G/L) entries.
To manage attachments at the bank deposit line level, you can select the line, and then on the Lines FastTab action bar, you can choose Related Information > Attachments.
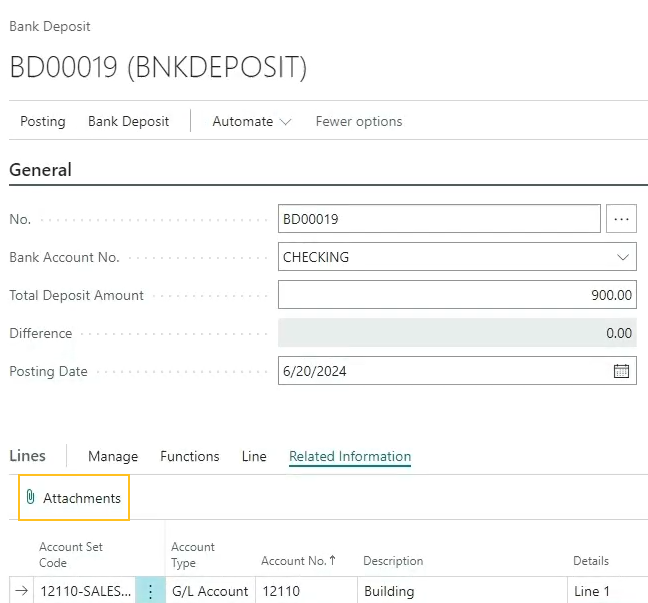
When you choose the Attachments action, Sparkrock 365 opens the Attached Documents page where you can manage attachments for the line as required.
During posting, Sparkrock 365 copies attachments at the bank deposit line level to the posted bank deposit lines.
To learn more, go to Bank deposit attachments.
Deposit import integration with the new Bank Deposit page
To integrate the Sparkrock 365 deposit import functionality from previous releases with the new Bank Deposit page in this release, on the Bank Deposit page, this release adds an Import from Excel action to the base Business Central functionality.
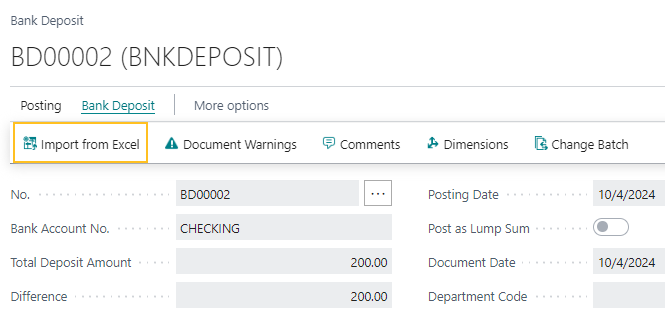
You can use the Import from Excel action to import bank deposit data into Sparkrock 365 from a new enhanced Excel template. To download the new Excel template file, select the following link:
Import bank deposit lines from Excel template
To learn more, go to Bank deposit lines import.
Dimension validation setup integration with the new Bank Deposit and Bank Deposits pages
To integrate the Sparkrock 365 dimension validation setup functionality from previous releases with the new Bank Deposit page in this release, on the Bank Deposits page, this release adds the following changes to the base Business Central functionality:
Error handling that is based on the setup of the Dimension Validation Setup page.
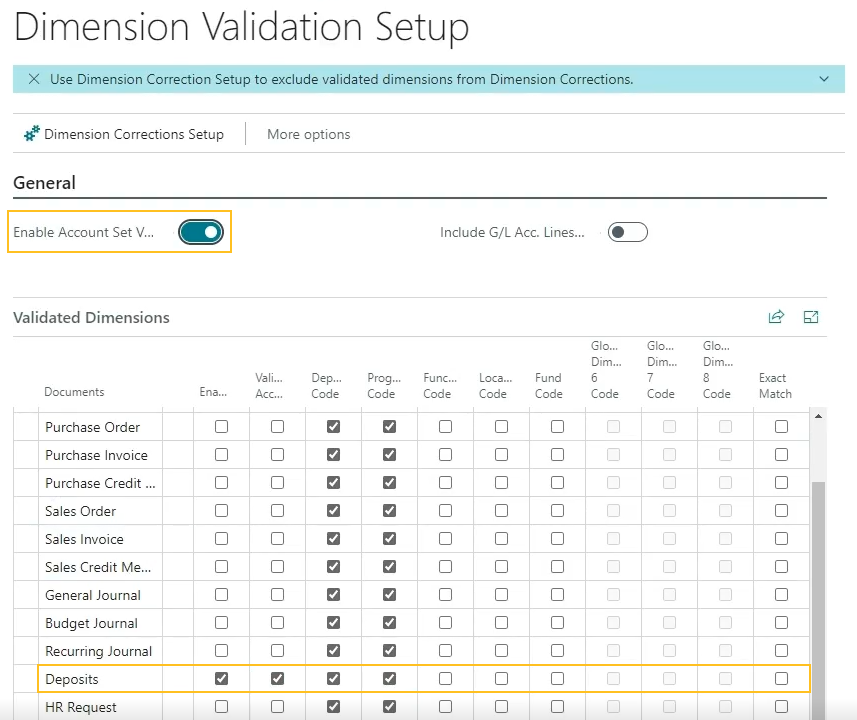
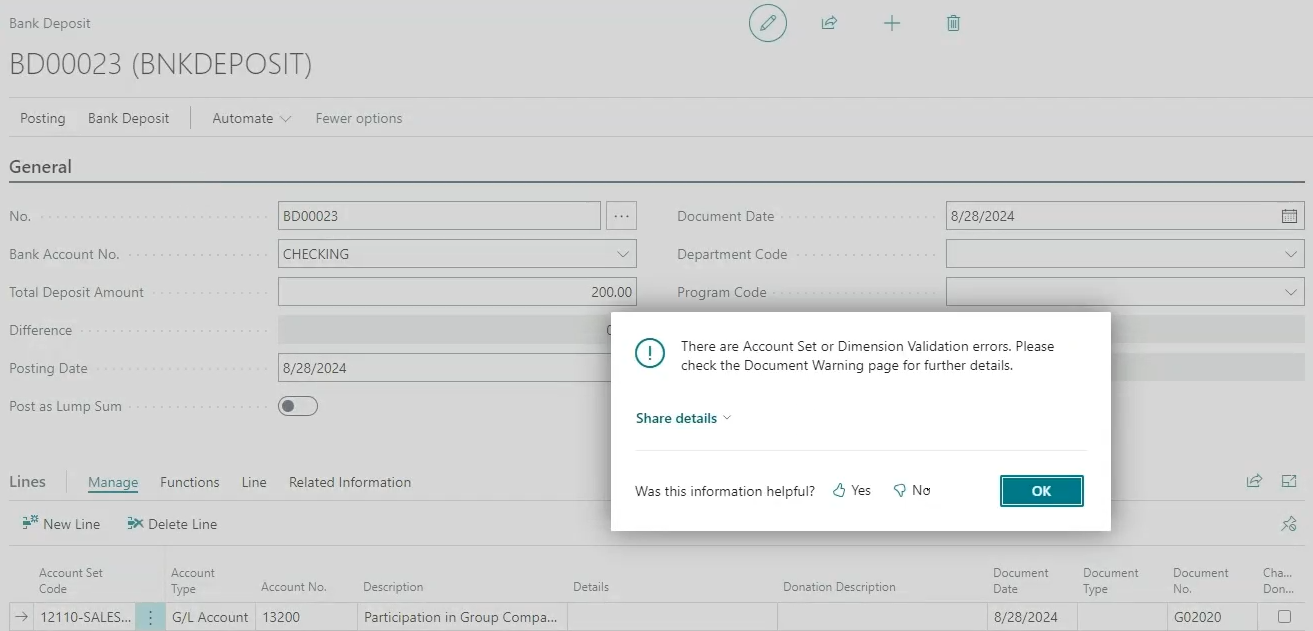
On the action bar, you can choose the Document Warnings action to open the Document Warnings page, and then view the document warnings that are related to the dimension validation setup.
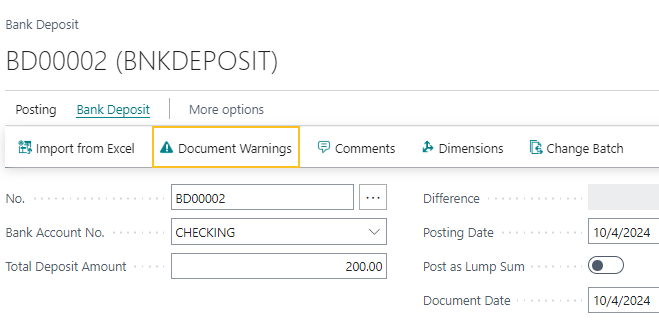
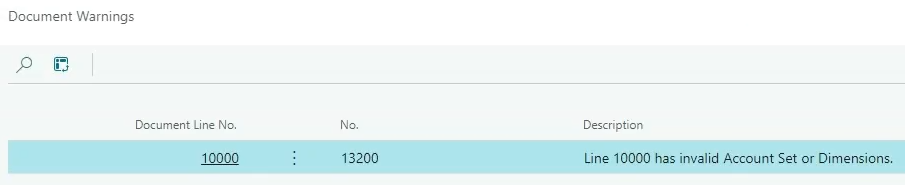
To learn more, go to Set up account set validation.
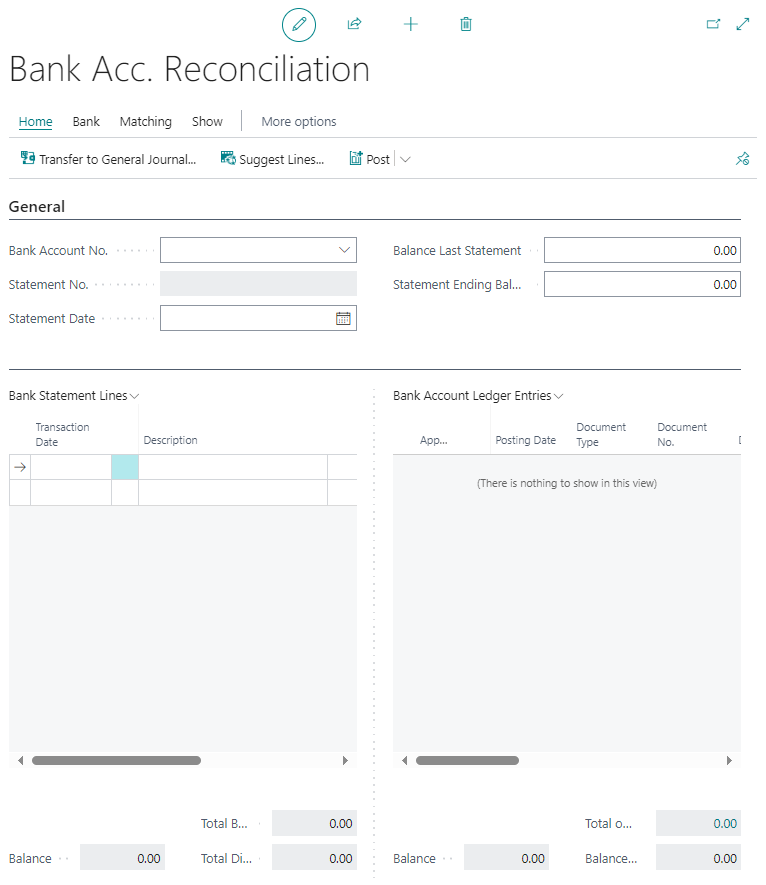
Bank reconciliation enhancements
Before this release, depending on your environment setup, bank reconciliations could be performed through the Bank Acc. Reconciliation page or the Bank Rec. Worksheet page. The Bank Rec. Worksheet page was missing some features that exist on the Bank Acc. Reconciliation page. To standardize the bank reconciliation process, Microsoft removed the Bank Rec. Worksheet page from Business Central and enhanced the Bank Acc. Reconciliation page.
The following list describes some of the enhancements to the Bank Acc. Reconciliation page:
- This release adds the capability for users to reconcile deposits.
- The header and footer fields ensure that users have the same overview of outstanding checks and payments that existed in previous releases on the Bank Rec. Worksheet page.
- The Bank Statement report displays more detailed information on the General Ledger (G/L) balance and outstanding checks and payments.
- The standard side-by-side bank view provides the capability for users to import bank statements (.csv files), use automatic matching, post and reconcile deposits, and get a better overview of related data during bank reconciliation through on-page information, such as a test report as well as a more audit-friendly report for posted bank reconciliations.
For more information about the Business Central changes, go to Standardizing the bank reconciliation process in North American versions.
The following list includes information about the customer facing changes in this release to the bank reconciliation functionality in Sparkrock 365:
On the Bank Account Reconciliations page, when you choose the New action to create a bank account reconciliation, Sparkrock 365 now opens the Bank Acc. Reconciliation page, instead of the Bank Rec. Worksheet page.
You no longer have the option to use the Bank Rec. Worksheet page based on the setup of the General Ledger Setup page.
To integrate the Sparkrock 365 bank account reconciliation functionality from previous releases with the base Business Central bank account reconciliations changes in this release, this release adds the following changes to the base Business Central functionality:
On the Bank Acc. Reconciliation page, in the Bank Account Ledger Entries section, there is a new Date Cleared field.
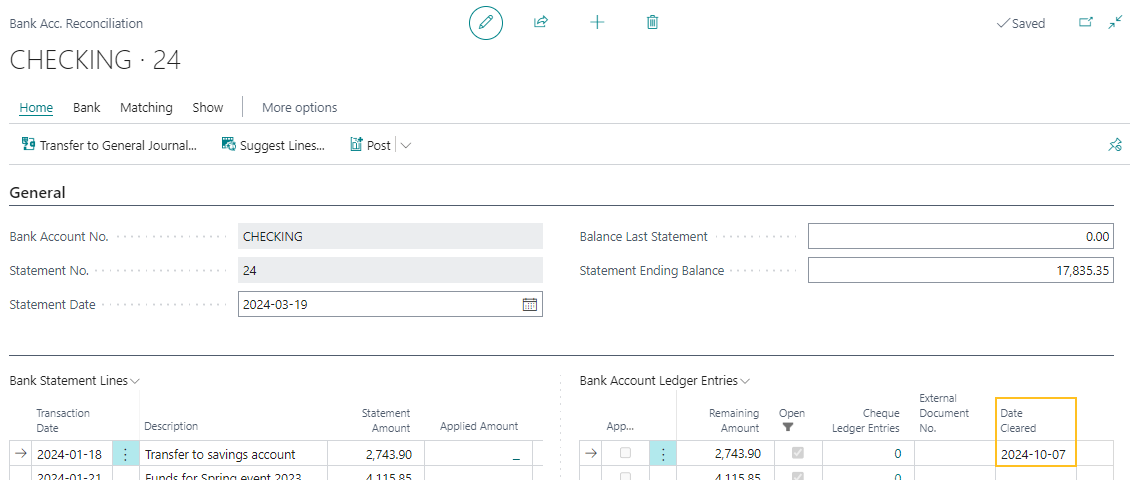
The Date Cleared field specifies the date on which the bank account ledger entry cleared.
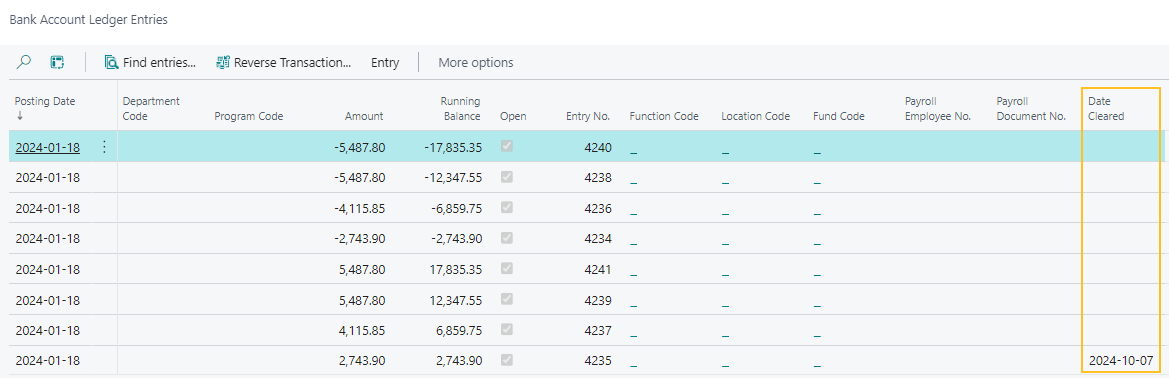
On the Bank Account Ledger Entries page, there is a new Date Cleared field.
On the Bank Acc. Reconciliation page, when you choose the Post action, Sparkrock 365 performs the following steps:
- Searches for records where the Applied checkbox is selected for a bank account ledger entry and performs validations on the bank account reconciliation, for example, verifies that a value is populated for Statement Date, and that the value of Statement Ending Balance is the same as the value for Total Balance.
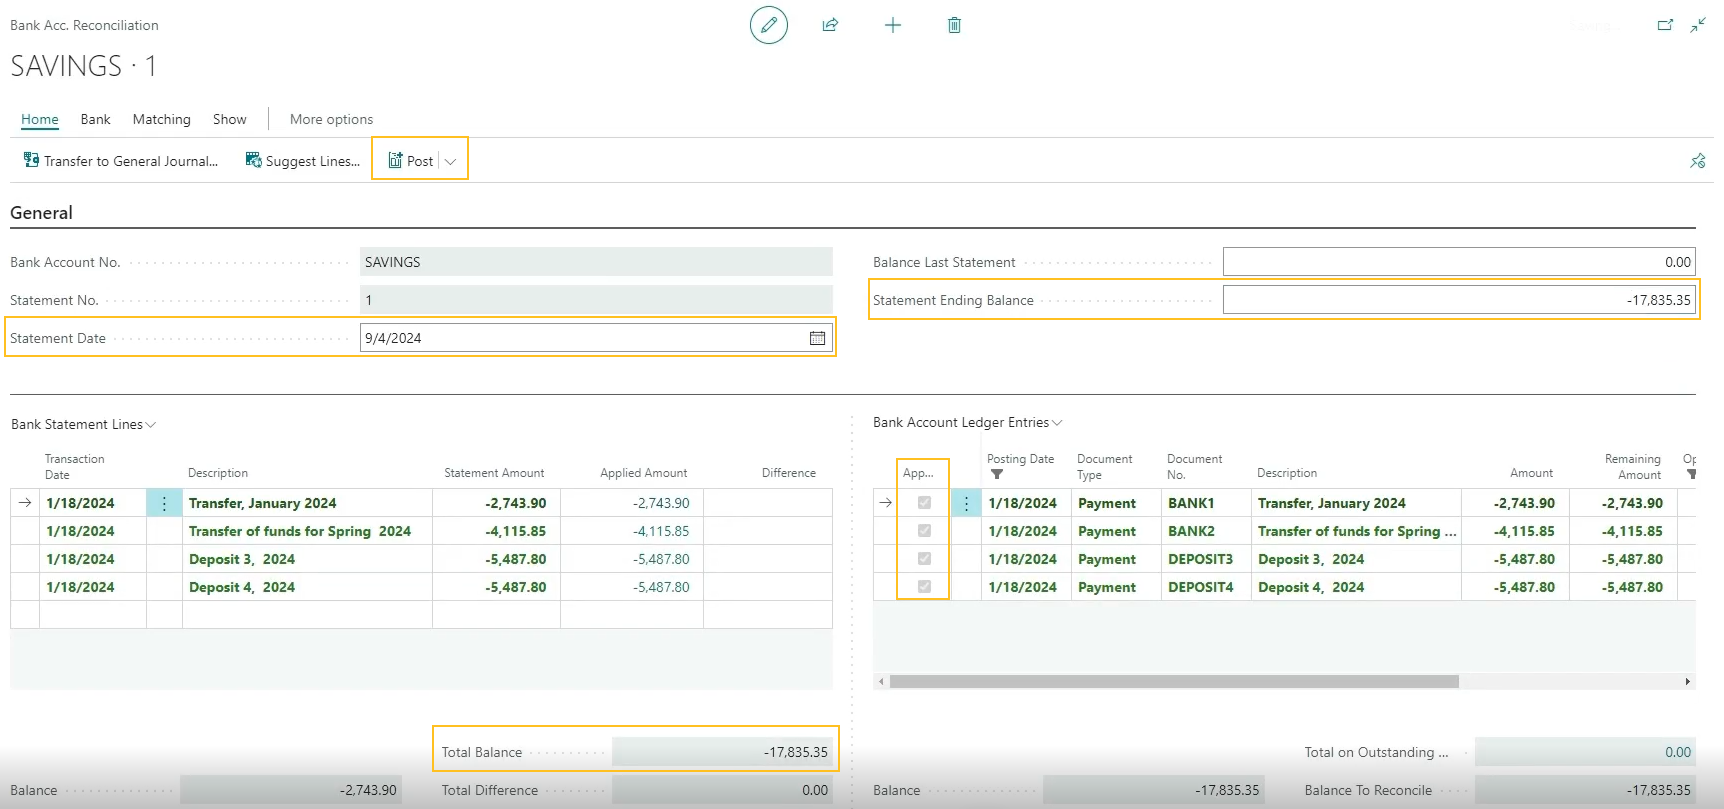
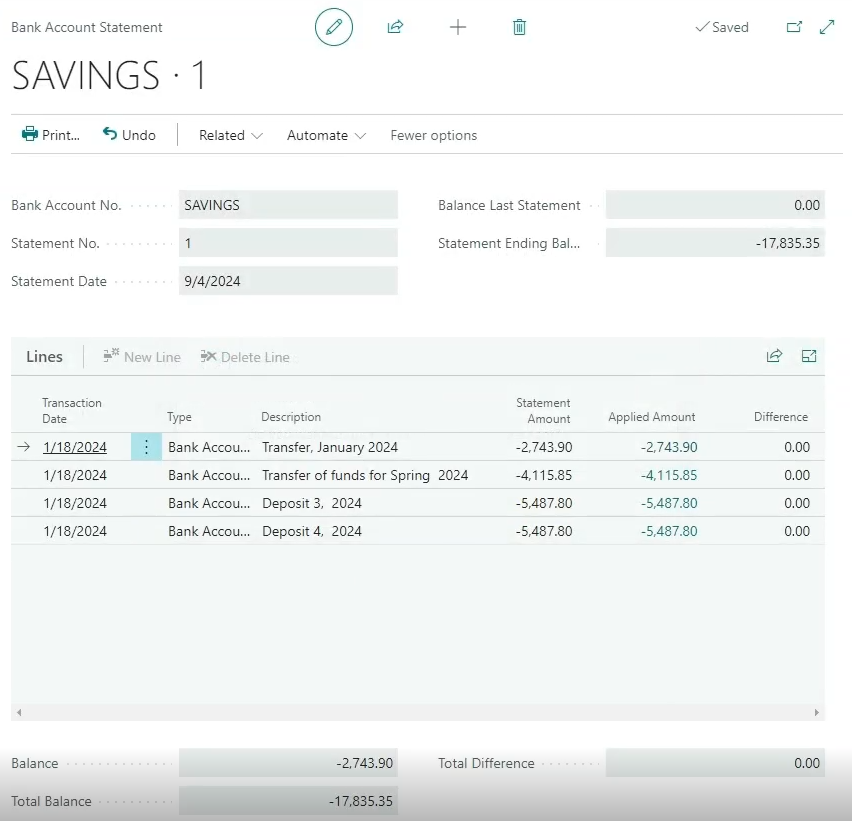
- Creates the respective bank account statement.
- On the Bank Acc. Reconciliation, Bank Account Ledger Entries, and Check Ledger Entries pages, updates the Cleared field with the Statement Date value from the Bank Acc. Reconciliation page.
For bank account ledger entries, Sparkrock 365 only updates records where the Document No. is the same on the Bank Acc. Reconciliation and Bank Account Ledger Entries pages.
For check ledger entries, Sparkrock 365 only updates records where the Document No. on the Bank Acc. Reconciliation page is the same as the Check No. on the Check Ledger Entries page.
- Searches for records where the Applied checkbox is selected for a bank account ledger entry and performs validations on the bank account reconciliation, for example, verifies that a value is populated for Statement Date, and that the value of Statement Ending Balance is the same as the value for Total Balance.
This release removes the Import Bank Statement action from the following role centers:
- Accounting Manager
- Accounts Payable Coordinator
The import bank statement functionality is only available on the Bank Acc. Reconciliation page.
This release removes the Import Bank Statement task from the Tell Me search results.
The import bank statement functionality is only available on the Bank Acc. Reconciliation page.
To learn more, go to Manage and reconcile your bank accounts, Bank statement import, and Bank account reconciliation date cleared.
Control whether mySparkrock users can receive purchase orders
In preparation for a future mySparkrock release, this release introduces the capability for you to control whether mySparkrock users can receive purchase orders on mySparkrock. This new functionality is available on the user and user profile levels.
The following sections include information about the customer facing changes in this release to support this feature.
New Receive Purchase Orders on mySparkrock field on the mySparkrock User Setup Card page
On the mySparkrock User Setup Card page, this release introduces a Receive Purchase Orders on mySparkrock field.
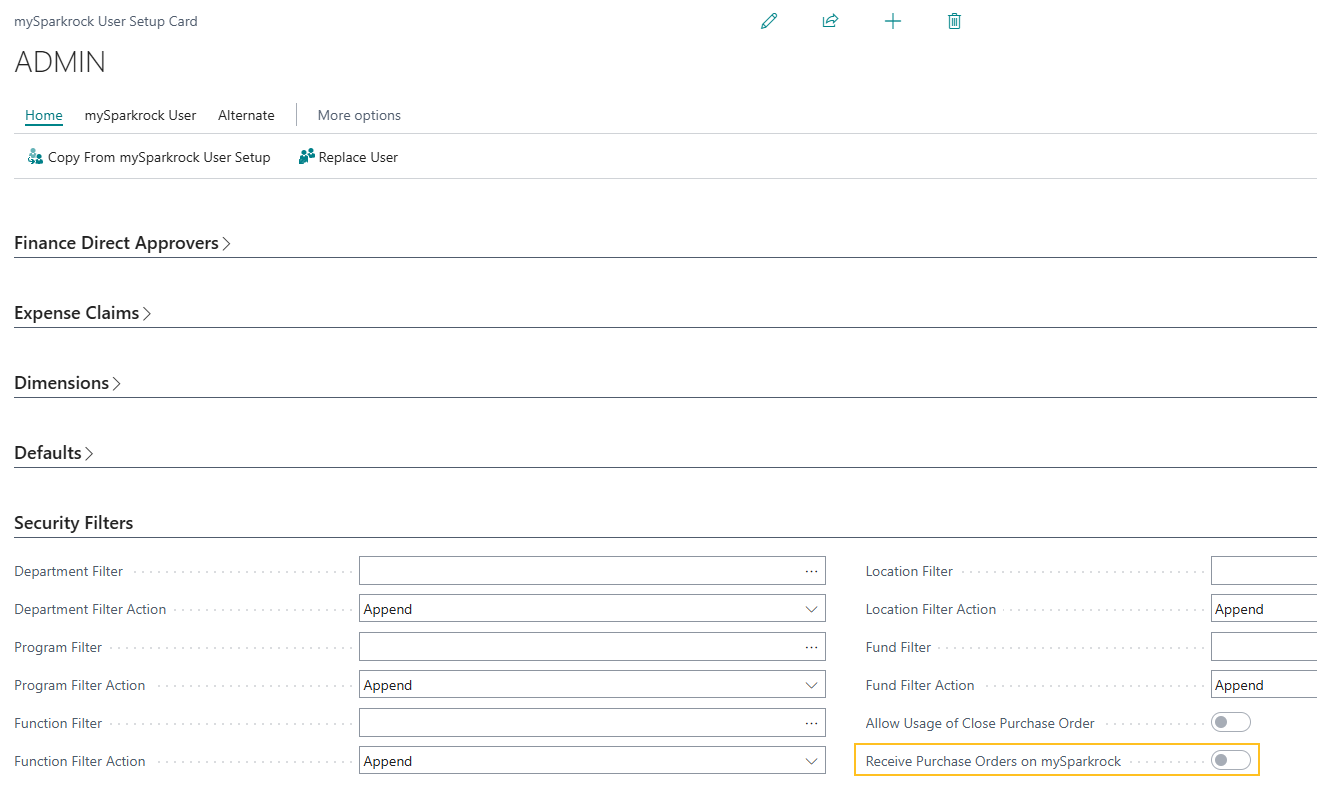
To specify that a user can receive purchase orders on mySparkrock, on the respective mySparkrock User Setup Card page, turn on Receive Purchase Orders on mySparkrock. Alternatively, to prevent a user from receiving purchase orders on mySparkrock, turn off Receive Purchase Orders on mySparkrock.
New Receive Purchase Orders on mySparkrock field on the mySparkrock User Profile Card page
On the mySparkrock User Profile Card page, this release introduces a Receive Purchase Orders on mySparkrock field.
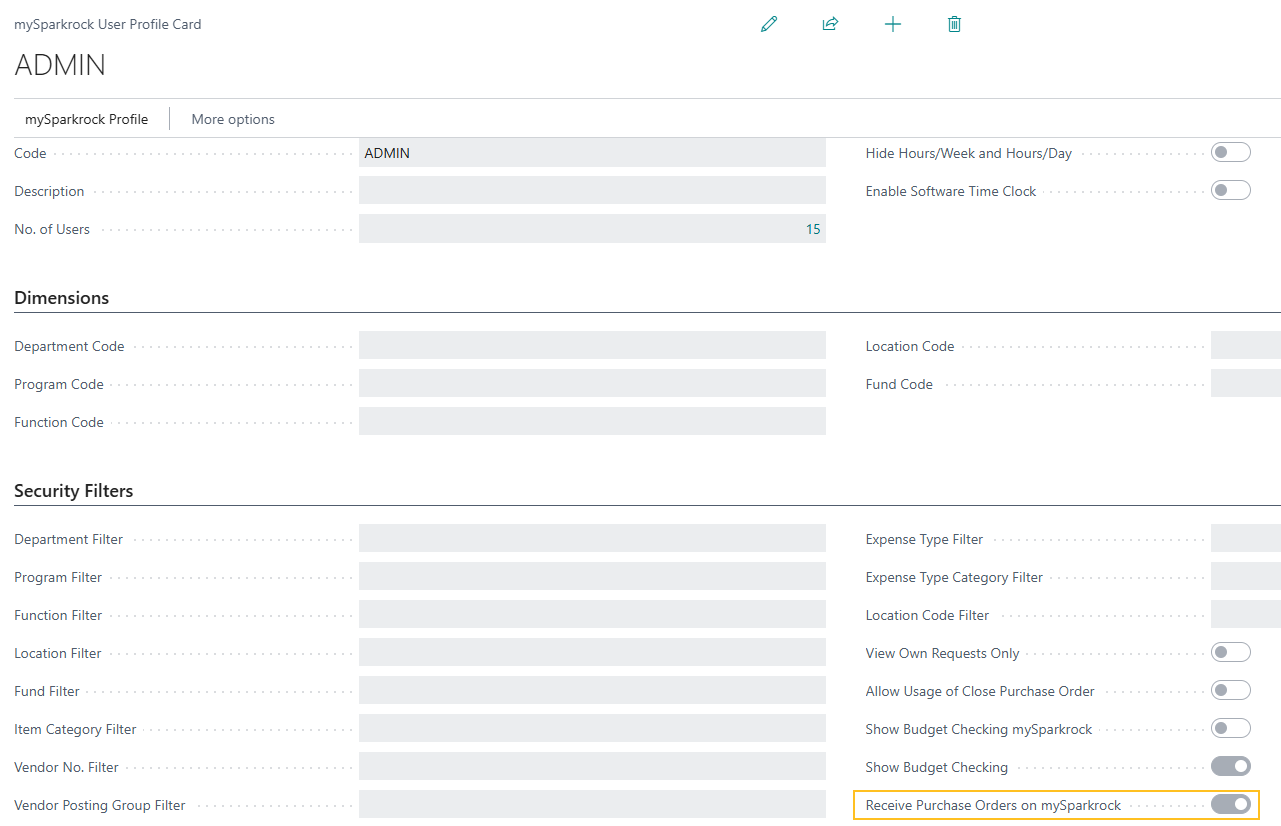
To specify that users who are assigned to a user profile can receive purchase orders on mySparkrock, on the respective mySparkrock User Profile Card page, turn on Receive Purchase Orders on mySparkrock. Alternatively, to prevent users who are assigned to a user profile from receiving purchase orders on mySparkrock, turn off Receive Purchase Orders on mySparkrock.
T4A XML enhancements
This release enhances the T4A XML file creation process to ensure compliance with Canada Revenue Agency (CRA) standards.
The following sections describe the specific T4A XML file enhancements in this release.
T619 section enhancements
In the T619 section, this release removes, replaces, and adds fields.
Removed fields
The following table describes the fields that have been removed.
| Field Name | XML Tags |
|---|---|
| Report type code | <rpt_tcd></rpt_tcd> |
| Transmitter number | <trnmtr_nbr></trnmtr_nbr> |
| Transmitter type indicator | <trnmtr_tcd></trnmtr_tcd> |
| Transmitter address | <TRNMTR_ADDR></TRNMTR_ADDR>, <addr_l1_txt></addr_l1_txt> and <addr_l2_txt></addr_l2_txt> |
| Transmitter city | <cty_nm></cty_nm> |
| Transmitter province or territory code | <prov_cd></prov_cd> |
| Transmitter postal code | <pstl_cd></pstl_cd> |
Replaced fields
The following table describes the fields that have been replaced.
| Field Name | Old XML Tags | New XML Tags |
|---|---|---|
| Transmitter name | <TRNMTR_NM></TRNMTR_NM> | <TransmitterName></TransmitterName> |
| Transmitter Country Code | <cntry_cd></cntry_cd> | <TransmitterCountryCode></TransmitterCountryCode> |
New fields
The following table describes the new fields.
| Field Name | XML Tags | Sparkrock 365 Field Mapping |
|---|---|---|
| Transmitter account number | <TransmitterAccountNumber><bn15></bn15></TransmitterAccountNumber> | On the Company Information page, on the Vendor T4A FastTab, the T4A Account No. field. |
| Transmitter RepID | <TransmitterRepID /> | No value is reported for this field. |
To learn more, go to Set up T4As for vendors and Export T4A data to an XML file.
<OTH_INFO> section enhancements
The following tables describes the new box numbers and their respective XML tags in the <OTH_INFO> section.
| Box | XML Tags |
|---|---|
| 026 | <elg_rtir_amt></elg_rtir_amt> |
| 027 | <nelg_rtir_amt></nelg_rtir_amt> |
| 028 | <oth_incamt></oth_incamt> |
| 030 | <ptrng_aloc_amt></ptrng_aloc_amt> |
| 032 | <rpp_past_srvc_amt></rpp_past_srvc_amt> |
| 034 | <padj_amt></padj_amt> |
| 037 | <alda_amt></alda_amt> |
| 040 | <resp_aip_amt></resp_aip_amt> |
| 042 | <resp_educt_ast_amt></resp_educt_ast_amt> |
| 046 | <chrty_dons_amt></chrty_dons_amt> |
| 102 | <nr_lsp_trnsf_amt></nr_lsp_trnsf_amt> |
| 104 | <rsch_grnt_amt></rsch_grnt_amt> |
| 105 | <brsy_amt></brsy_amt> |
| 106 | <dth_ben_amt></dth_ben_amt> |
| 107 | <wag_ls_incamt></wag_ls_incamt> |
| 108 | <lsp_rpp_nelg_amt></lsp_rpp_nelg_amt> |
| 109 | <nrgst_ppln_amt></nrgst_ppln_amt> |
| 110 | <pr_71_acr_lsp_amt></pr_71_acr_lsp_amt> |
| 111 | <inc_avg_annty_amt></inc_avg_annty_amt> |
| 115 | <dpsp_ins_pay_amt></dpsp_ins_pay_amt> |
| 116 | <med_trvl_amt></med_trvl_amt> |
| 117 | <loan_ben_amt></loan_ben_amt> |
| 118 | <med_prem_ben_amt></med_prem_ben_amt> |
| 119 | <grp_trm_life_amt></grp_trm_life_amt> |
| 122 | <resp_aip_oth_amt></resp_aip_oth_amt> |
| 123 | <ins_rvk_dpsp_amt></ins_rvk_dpsp_amt> |
| 124 | <brd_wrk_site_amt></brd_wrk_site_amt> |
| 125 | <dsblt_ben_amt></dsblt_ben_amt> |
| 126 | <cntrbr_prr_pspp_cnamt></cntrbr_prr_pspp_cnamt> |
| 127 | <vtrn_ben_amt></vtrn_ben_amt> |
| 128 | <vtrn_ben_pens_splt_elg_amt></vtrn_ben_pens_splt_elg_amt> |
| 129 | <tx_dfr_ptrng_dvamt></tx_dfr_ptrng_dvamt> |
| 130 | <atp_inctv_grnt_amt></atp_inctv_grnt_amt> |
| 131 | <rdsp_amt></rdsp_amt> |
| 132 | <wag_ptct_pgm_amt></wag_ptct_pgm_amt> |
| 133 | <var_pens_ben_amt></var_pens_ben_amt> |
| 134 | <tfsa_tax_amt></tfsa_tax_amt> |
| 135 | <rcpnt_pay_prem_phsp_amt></rcpnt_pay_prem_phsp_amt> |
| 136 | <pmmc_isg_amt></pmmc_isg_amt> |
| 142 | <indn_elg_rtir_amt></indn_elg_rtir_amt> |
| 143 | <indn_nelg_rtir_amt></indn_nelg_rtir_amt> |
| 144 | <indn_oth_incamt></indn_oth_incamt> |
| 146 | <indn_xmpt_pens_amt></indn_xmpt_pens_amt> |
| 148 | <indn_xmpt_lsp_amt></indn_xmpt_lsp_amt> |
| 150 | <lbr_adj_ben_aprpt_act_amt></lbr_adj_ben_aprpt_act_amt> |
| 152 | <subp_qlf_amt></subp_qlf_amt> |
| 154 | <csh_awrd_pze_payr_amt></csh_awrd_pze_payr_amt> |
| 156 | <bkcy_sttl_amt></bkcy_sttl_amt> |
| 158 | <lsp_nelg_trnsf_amt></lsp_nelg_trnsf_amt> |
| 162 | <ncntrbr_prr_pspp_cnamt></ncntrbr_prr_pspp_cnamt > |
| 180 | <lsp_dpsp_nelg_amt></lsp_dpsp_nelg_amt> |
| 190 | <lsp_nrgst_pens_amt></lsp_nrgst_pens_amt> |
| 194 | <prpp_tx_inc_pamt></prpp_tx_inc_pamt> |
| 195 | <prpp_txmpt_inc_pamt></prpp_txmpt_inc_pamt> |
| 196 | <abe_tuit_ast_amt></abe_tuit_ast_amt> |
| 200 | <prov_trty_emrg_ben_amt></prov_trty_emrg_ben_amt> |
| 201 | <repmt_covid_fncl_asstnc></repmt_covid_fncl_asstnc> |
| 205 | <oas_lump_sum_pamt></oas_lump_sum_pamt> |
| 210 | <pst_dctrl_fshp_amt></pst_dctrl_fshp_amt> |
To learn more, go to Set up T4As for vendors and Export T4A data to an XML file.
Employee benefits processing enhancements for a transfer HR request
Starting with this release, when you process an HR request to transfer an employee to a new assignment, Sparkrock 365 makes changes to the employee's Employee Benefits page as follows:
If the benefit plan of the new assignment is the same as the previous assignment, Sparkrock 365 does not make any changes to the employee's Employee Benefits page. In other words, the employee's benefit plan code remains the same.
If the benefit plan of the new assignment is different than the previous assignment, and the effective date of the transfer is less than or equal to today, Sparkrock 365 updates the employee's Employee Benefits page to have the new benefit plan code.
If the benefit plan of the new assignment is different than the previous assignment, and the effective date of the transfer is in the future, Sparkrock 365 does not update the employee's Employee Benefits page to have the new benefit plan code until the effective date of the transfer is reached.
To learn more, go to Transfer employees to new assignments.
Employee benefits processing enhancements for an additional assignment HR request
Starting with this release, when you process an additional assignment HR request, Sparkrock 365 makes changes to the employee's Employee Benefits page as follows:
If the benefit plan of the new assignment is the same as the existing assignment, Sparkrock 365 does not make any changes to the employee's Employee Benefits page. In other words, the employee's benefit plan code remains the same.
If the benefit plan of the new assignment is different than the existing assignment, and on the employee's Employee Benefits page there are one or more existing records, Sparkrock 365 retains the one or more existing records. In other words, Sparkrock 365 does not delete any records.
If the benefit plan of the new assignment is different than the existing assignment, and on the employee's Employee Benefits page, no records exist, Sparkrock 365 updates the employee's Employee Benefits page to have the new benefit plan code. For this scenario, if the effective date is less than or equal to today, Sparkrock 365 performs the update immediately. Otherwise, if the effective date is in the future, Sparkrock 365 does not update the employee's Employee Benefits page to have the new benefit plan code until the effective date is reached.
To learn more, go to Add additional employee assignments.
Retain employee information when reversing a new hire HR request
This release introduces the capability for you to choose whether you want to retain the employee information when reversing a new hire HR request.
After you choose the Reverse action on a new hire HR request, Sparkrock 365 now displays a prompt that asks you whether you want to keep the employee number.
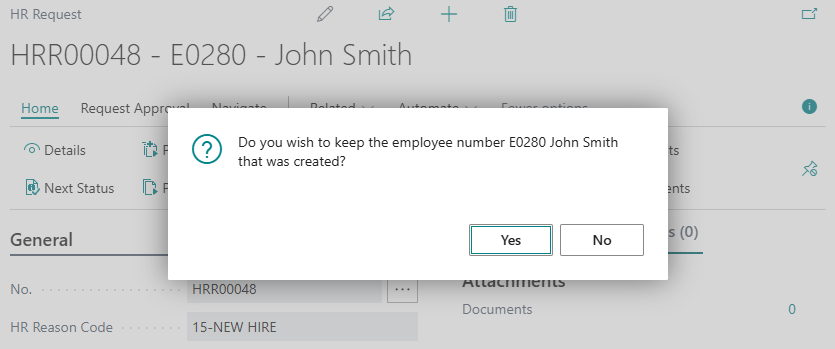
If you choose Yes, Sparkrock 365 retains the employee information and you can view the details on the Employee Card page. Alternatively, if you choose No, Sparkrock 365 deletes the employee information.
To learn more, go to Reverse HR requests.
New fields on the HR Request-Leave page
On the HR Request-Leave page, this release introduces the following new fields:
- Location Code: Specifies the code that represents the location for this HR request. When you process the HR request, Sparkrock 365 updates the Location Code on the respective HR employee assignment.
- Calculation Start Date: Specifies the start date for HR request calculations.
- Calculation End Date: Specifies the end date for HR request calculations.
- Assignment Start Date: Specifies the start date of an assignment that is associated with this HR request.
- Assignment End Date: Specifies the end date of an assignment that is associated with this HR request.
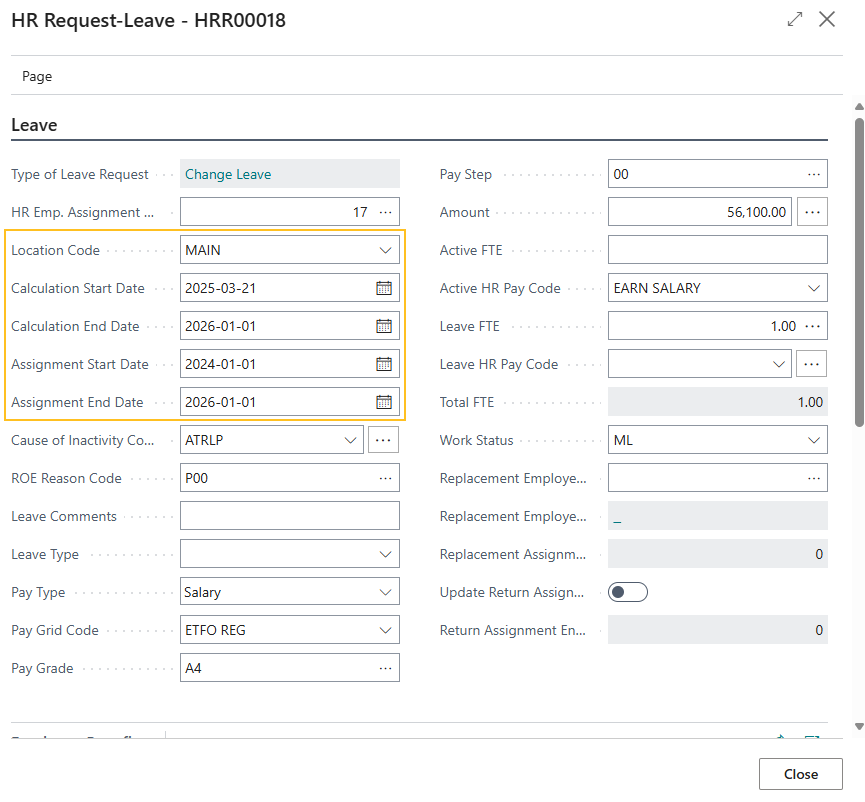
These fields are visible when you create an HR request that has an HR Reason Code of 37-LEAVE CHANGE, and then choose the Details action. To learn more, go to Change leave details.
Assignment allocation on leave change HR requests
Starting with this release, you can specify assignment allocation details on a leave change HR request, and then process the request to update the respective employee assignment allocations. You specify these details on the HR Request-Leave page, on the new Assignment Allocations FastTab.
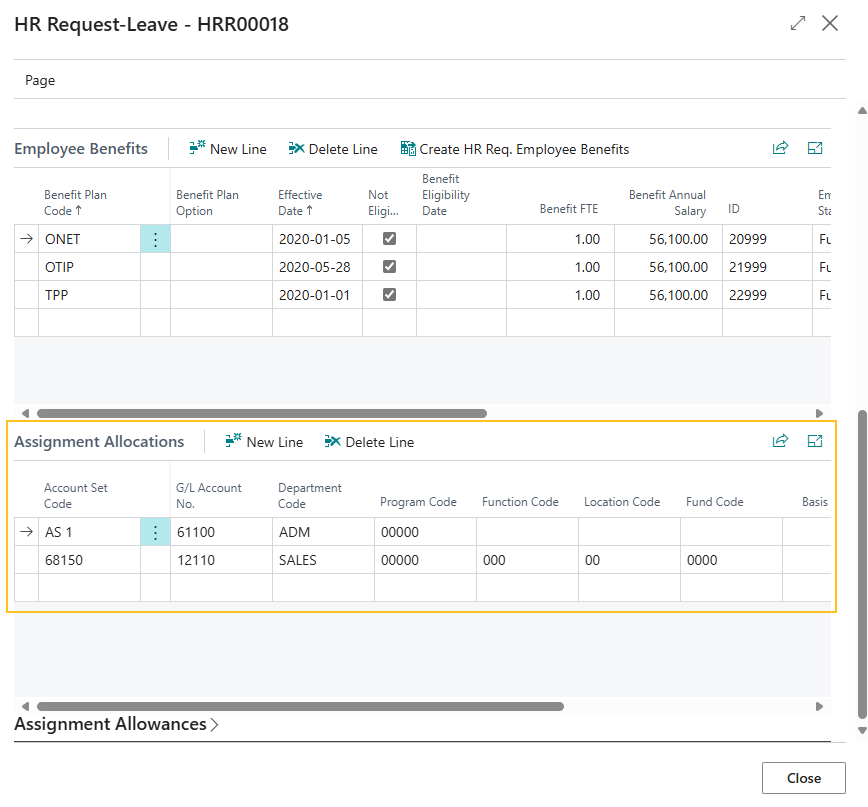
The Assignment Allocations FastTab is visible when you create an HR request that has an HR Reason Code of 37-LEAVE CHANGE, and then choose the Details action. To learn more, go to Change leave details.
Processing enhancements for leave change HR request date changes
This release introduces processing enhancements for leave change HR requests where there are changes to the Calculation Start Date, Calculation End Date, Assignment Start Date, or Assignment End Date.
Changes to start dates
The following sections describe the enhancements to leave change HR request processing for changes to start dates.
Leave change calculation start date or assignment start date is greater than the on leave calculation start date or assignment start date
When processing a leave change HR request, and the Calculation Start Date or Assignment Start Date is greater than the Calculation Start Date or Assignment Start Date on the related on leave assignment, Sparkrock 365 performs the following steps:
- Updates the Calculation End Date or Assignment End Date on the original active assignment to be one day less than the Calculation Start Date or Assignment Start Date on the leave change HR request.
- Cancels the on leave assignment.
- Creates an assignment based on the data that is specified in the leave change HR request.
Example
Below is an example to illustrate how Sparkrock 365 processes a leave change HR request where the calculation start date or assignment start date is greater than the on leave calculation start date or assignment start date.
The following table describes how assignment records appear before Sparkrock 365 processes the change leave HR request.
| HR Reason Code | Calculation Start Date or Assignment Start Date | Calculation End Date or Assignment End Date |
|---|---|---|
| 15-NEW HIRE | January 1, 2024 | June 30, 2024 |
| 35-ON LEAVE | July 1, 2024 | September 30, 2024 |
| 37-LEAVE CHANGE | July 16, 2024 | September 30, 2024 |
For this scenario, Sparkrock 365 performs the following steps:
- Updates the Calculation End Date or Assignment End Date on the original active assignment to July 15, 2024.
- Cancels the existing on leave assignment.
- Creates an assignment with the details from the leave change HR request.
The following table describes how the assignment records appear after Sparkrock 365 processes the change leave HR request.
| HR Reason Code | Calculation Start Date or Assignment Start Date | Calculation End Date or Assignment End Date | Entry Type |
|---|---|---|---|
| 15-NEW HIRE | January 1, 2024 | July 15, 2024 | Assignment |
| 35-ON LEAVE | July 1, 2024 | September 30, 2024 | Cancelled |
| 37-LEAVE CHANGE | July 16, 2024 | September 30, 2024 | Assignment |
Leave change calculation start date or assignment start date is less than the on leave calculation start date or assignment start date
When processing a leave change HR request, and the Calculation Start Date or Assignment Start Date is less than the Calculation Start Date or Assignment Start Date on the related on leave HR assignment, Sparkrock 365 performs the following steps:
- Updates the Calculation End Date or Assignment End Date on the original active assignment to be one day less than the Calculation Start Date or Assignment Start Date on the leave change HR request.
- Cancels the on leave assignment.
- Creates an assignment based on the data that is specified in the leave change HR request.
Example
Below is an example to illustrate how Sparkrock 365 processes a leave change HR request where the calculation start date or assignment start date is less than the on leave calculation start date or assignment start date.
The following table describes how assignment records appear before Sparkrock 365 processes the change leave HR request.
| HR Reason Code | Calculation Start Date or Assignment Start Date | Calculation End Date or Assignment End Date |
|---|---|---|
| 15-NEW HIRE | January 1, 2024 | June 30, 2024 |
| 35-ON LEAVE | July 1, 2024 | September 30, 2024 |
| 37-LEAVE CHANGE | June 15, 2024 | September 30, 2024 |
For this scenario, Sparkrock 365 performs the following steps:
- Updates the Calculation End Date or Assignment End Date on the original active assignment to June 14, 2024.
- Cancels the existing on leave assignment.
- Creates an assignment with the details from the leave change HR request.
The following table describes how the assignment records appear after Sparkrock 365 processes the change leave HR request.
| HR Reason Code | Calculation Start Date or Assignment Start Date | Calculation End Date or Assignment End Date | Entry Type |
|---|---|---|---|
| 15-NEW HIRE | January 1, 2024 | June 14, 2024 | Assignment |
| 35-ON LEAVE | July 1, 2024 | September 30, 2024 | Cancelled |
| 37-LEAVE CHANGE | June 15, 2024 | September 30, 2024 | Assignment |
Changes to end dates
The following sections describe the enhancements to leave change HR request processing for changes to end dates.
Leave change calculation end date or assignment end date is greater than the on leave calculation end date or assignment end date
When processing a leave change HR request, and the Calculation End Date or Assignment End Date is greater than the Calculation End Date or Assignment End Date on the related on leave assignment, Sparkrock 365 performs the following steps:
- Retains the original active assignment.
- Cancels the on leave assignment.
- Creates an assignment based on the data that is specified in the leave change HR request.
Example
Below is an example to illustrate how Sparkrock 365 processes a leave change HR request where the calculation end date or assignment end date is greater than the on leave calculation end date or assignment end date.
The following table describes how assignment records appear before Sparkrock 365 processes the change leave HR request.
| HR Reason Code | Calculation Start Date or Assignment Start Date | Calculation End Date or Assignment End Date |
|---|---|---|
| 15-NEW HIRE | January 1, 2024 | June 30, 2024 |
| 35-ON LEAVE | July 1, 2024 | September 30, 2024 |
| 37-LEAVE CHANGE | July 1, 2024 | October 15, 2024 |
For this scenario, Sparkrock 365 performs the following steps:
- Retains the original active assignment.
- Cancels the on leave assignment.
- Creates an assignment with the details from the leave change HR request.
The following table describes how the assignment records appear after Sparkrock 365 processes the change leave HR request.
| HR Reason Code | Calculation Start Date or Assignment Start Date | Calculation End Date or Assignment End Date | Entry Type |
|---|---|---|---|
| 15-NEW HIRE | January 1, 2024 | June 30, 2024 | Assignment |
| 35-ON LEAVE | July 1, 2024 | September 30, 2024 | Cancelled |
| 37-LEAVE CHANGE | July 1, 2024 | October 15, 2024 | Assignment |
Leave change calculation end date or assignment end date is less than the on leave calculation end date or assignment end date
When processing a leave change HR request, and the Calculation End Date or Assignment End Date is less than the Calculation End Date or Assignment End Date on the related on leave assignment, Sparkrock 365 performs the following steps:
- Retains the original active assignment.
- Cancels the on leave assignment.
- Creates an assignment based on the data that is specified in the leave change HR request.
Example
Below is an example to illustrate how Sparkrock 365 processes a leave change HR request where the calculation end date or assignment end date is less than the on leave calculation end date or assignment end date.
The following table describes how assignment records appear before Sparkrock 365 processes the change leave HR request.
| HR Reason Code | Calculation Start Date or Assignment Start Date | Calculation End Date or Assignment End Date |
|---|---|---|
| 15-NEW HIRE | January 1, 2024 | June 30, 2024 |
| 35-ON LEAVE | July 1, 2024 | September 30, 2024 |
| 37-LEAVE CHANGE | July 1, 2024 | September 15, 2024 |
For this scenario, Sparkrock 365 performs the following steps:
- Retains the original active assignment.
- Cancels the on leave assignment.
- Creates an assignment with the details from the leave change HR request.
The following table describes how the assignment records appear after Sparkrock 365 processes the change leave HR request.
| HR Reason Code | Calculation Start Date or Assignment Start Date | Calculation End Date or Assignment End Date | Entry Type |
|---|---|---|---|
| 15-NEW HIRE | January 1, 2024 | June 30, 2024 | Assignment |
| 35-ON LEAVE | July 1, 2024 | September 30, 2024 | Cancelled |
| 37-LEAVE CHANGE | July 1, 2024 | September 15, 2024 | Assignment |
Changes to start dates reversal processing
The following sections describe the enhancements to leave change HR request reversal processing for changes to start dates.
Leave change calculation start date or assignment start date is greater than the on leave calculation start date or assignment start date
When processing a reversal of a leave change HR request, and the Calculation Start Date or Assignment Start Date is greater than the Calculation Start Date or Assignment Start Date on the related on leave assignment, Sparkrock 365 performs the following steps:
- Adjusts the Calculation End Date or Assignment End Date on the original assignment to be one day less than the Calculation Start Date or Assignment Start Date of the on leave assignment.
- Restores the on leave assignment.
- Cancels the assignment that was created based on the data that was specified in the leave change HR request.
Example
Below is an example to illustrate how Sparkrock 365 processes a reversal of a leave change HR request where the calculation start date or assignment start date is greater than the on leave calculation start date or assignment start date.
The following table describes how assignment records appear before Sparkrock 365 processes the reversal of the change leave HR request.
| HR Reason Code | Calculation Start Date or Assignment Start Date | Calculation End Date or Assignment End Date | Entry Type |
|---|---|---|---|
| 15-NEW HIRE | January 1, 2024 | July 15, 2024 | Assignment |
| 35-ON LEAVE | July 1, 2024 | September 30, 2024 | Cancelled |
| 37-LEAVE CHANGE | July 16, 2024 | September 30, 2024 | Assignment |
For this scenario, Sparkrock 365 performs the following steps:
- Adjusts the Calculation End Date or Assignment End Date on the original assignment to be June 30, 2024.
- Restores the on leave assignment.
- Cancels the assignment that was created based on the data that was specified in the leave change HR request.
The following table describes how the assignment records appear after Sparkrock 365 processes the reversal of the change leave HR request.
| HR Reason Code | Calculation Start Date or Assignment Start Date | Calculation End Date or Assignment End Date | Entry Type |
|---|---|---|---|
| 15-NEW HIRE | January 1, 2024 | June 30, 2024 | Assignment |
| 35-ON LEAVE | July 1, 2024 | September 30, 2024 | Assignment |
| 37-LEAVE CHANGE | July 16, 2024 | September 30, 2024 | Cancelled |
Leave change calculation start date or assignment start date is less than the on leave calculation start date or assignment start date
When processing a reversal of a leave change HR request, and the Calculation Start Date or Assignment Start Date is less than the Calculation Start Date or Assignment Start Date on the related on leave assignment, Sparkrock 365 performs the following steps:
- Adjusts the Calculation End Date or Assignment End Date on the original assignment to be one day less than the Calculation Start Date or Assignment Start Date of the on leave assignment.
- Restores the on leave assignment.
- Cancels the assignment that was created based on the data that was specified in the leave change HR request.
Example
Below is an example to illustrate how Sparkrock 365 processes a reversal of a leave change HR request where the calculation start date or assignment start date is less than the on leave calculation start date or assignment start date.
The following table describes how assignment records appear before Sparkrock 365 processes the reversal of the change leave HR request.
| HR Reason Code | Calculation Start Date or Assignment Start Date | Calculation End Date or Assignment End Date | Entry Type |
|---|---|---|---|
| 15-NEW HIRE | January 1, 2024 | June 14, 2024 | Assignment |
| 35-ON LEAVE | July 1, 2024 | September 30, 2024 | Cancelled |
| 37-LEAVE CHANGE | June 15, 2024 | September 30, 2024 | Assignment |
For this scenario, Sparkrock 365 performs the following steps:
- Adjusts the Calculation End Date or Assignment End Date on the original assignment to be June 30, 2024.
- Restores the on leave assignment.
- Cancels the assignment that was created based on the data that was specified in the leave change HR request.
The following table describes how the assignment records appear after Sparkrock 365 processes the reversal of the change leave HR request.
| HR Reason Code | Calculation Start Date or Assignment Start Date | Calculation End Date or Assignment End Date | Entry Type |
|---|---|---|---|
| 15-NEW HIRE | January 1, 2024 | June 30, 2024 | Assignment |
| 35-ON LEAVE | July 1, 2024 | September 30, 2024 | Assignment |
| 37-LEAVE CHANGE | June 15, 2024 | September 30, 2024 | Cancelled |
Changes to end dates reversal processing
The following sections describe the enhancements to leave change HR request reversal processing for changes to end dates.
Leave change calculation end date or assignment end date is greater than the on leave calculation end date or assignment end date
When processing a reversal of a leave change HR request, and the Calculation End Date or Assignment End Date is greater than the Calculation End Date or Assignment End Date on the related on leave HR assignment, Sparkrock 365 performs the following steps:
- Restores the original assignment.
- Restores the on leave assignment.
- Cancels the assignment that was created based on the data that was specified in the leave change HR request.
Example
Below is an example to illustrate how Sparkrock 365 processes a reversal of a leave change HR request where the calculation end date or assignment end date is greater than the on leave calculation end date or assignment end date.
The following table describes how assignment records appear before Sparkrock 365 processes the reversal of the change leave HR request.
| HR Reason Code | Calculation Start Date or Assignment Start Date | Calculation End Date or Assignment End Date | Entry Type |
|---|---|---|---|
| 15-NEW HIRE | January 1, 2024 | June 30, 2024 | Assignment |
| 35-ON LEAVE | July 1, 2024 | September 30, 2024 | Cancelled |
| 37-LEAVE CHANGE | July 1, 2024 | October 15, 2024 | Assignment |
For this scenario, Sparkrock 365 performs the following steps:
- Restores the original assignment.
- Restores the on leave assignment.
- Cancels the assignment that was created based on the data that was specified in the leave change HR request.
The following table describes how the assignment records appear after Sparkrock 365 processes the reversal of the change leave HR request.
| HR Reason Code | Calculation Start Date or Assignment Start Date | Calculation End Date or Assignment End Date | Entry Type |
|---|---|---|---|
| 15-NEW HIRE | January 1, 2024 | June 30, 2024 | Assignment |
| 35-ON LEAVE | July 1, 2024 | September 30, 2024 | Assignment |
| 37-LEAVE CHANGE | July 1, 2024 | October 15, 2024 | Cancelled |
Leave change calculation end date or assignment end date is less than the on leave calculation end date or assignment end date
When processing a reversal of a leave change HR request, and the Calculation End Date or Assignment End Date is less than the Calculation End Date or Assignment End Date on the related on leave assignment, Sparkrock 365 performs the following steps:
- Restores the original assignment.
- Restores the on leave assignment.
- Cancels the assignment that was created based on the data that was specified in the leave change HR request.
Example
Below is an example to illustrate how Sparkrock 365 processes a reversal of a leave change HR request where the calculation end date or assignment end date is less than the on leave calculation end date or assignment end date.
The following table describes how assignment records appear before Sparkrock 365 processes the reversal of the change leave HR request.
| HR Reason Code | Calculation Start Date or Assignment Start Date | Calculation End Date or Assignment End Date | Entry Type |
|---|---|---|---|
| 15-NEW HIRE | January 1, 2024 | June 30, 2024 | Assignment |
| 35-ON LEAVE | July 1, 2024 | September 30, 2024 | Cancelled |
| 37-LEAVE CHANGE | July 1, 2024 | September 15, 2024 | Assignment |
For this scenario, Sparkrock 365 performs the following steps:
- Restores the original assignment.
- Restores the on leave assignment.
- Cancels the assignment that was created based on the data that was specified in the leave change HR request.
The following table describes how the assignment records appear after Sparkrock 365 processes the reversal of the change leave HR request.
| HR Reason Code | Calculation Start Date or Assignment Start Date | Calculation End Date or Assignment End Date | Entry Type |
|---|---|---|---|
| 15-NEW HIRE | January 1, 2024 | June 30, 2024 | Assignment |
| 35-ON LEAVE | July 1, 2024 | September 30, 2024 | Assignment |
| 37-LEAVE CHANGE | July 1, 2024 | September 15, 2024 | Cancelled |
To learn more, go to Change leave details.
Register employee certifications for Employment Data & Analysis System (EDAS) reporting
This release introduces enhancements regarding registering employee certifications for Employment Data & Analysis System (EDAS) reporting. The functionality supports registering certification data for the Teacher Regulation Branch (TRB) and Teacher Qualification Service (TQS).
To learn more, go to Set up British Columbia certifications and Set up a British Columbia certification for an employee association.
The following sections include information about the customer facing changes in this release to support this feature.
New British Columbia Certifications page
To provide the capability for you to register employee British Columbia certifications for Employment Data & Analysis System (EDAS) reporting, this release introduces a British Columbia Certifications page.
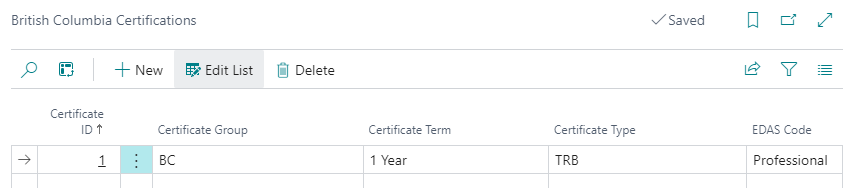
On the British Columbia Certifications page, you can specify the certifications that are to be associated with employee associations.
The page includes the following fields:
Certificate ID: Specifies the ID of the certification.
Certificate Group: Specifies the group of the certification.
Certificate Term: Specifies the term of the certification.
Certificate Type: Specifies the type of certification.
EDAS Code: Specifies the EDAS code of the certification.
To learn more, go to Set up British Columbia certifications.
Employee Associations page enhancements
To support Employment Data & Analysis System (EDAS) reporting requirements, on the Employee Associations page, this release introduces several fields.
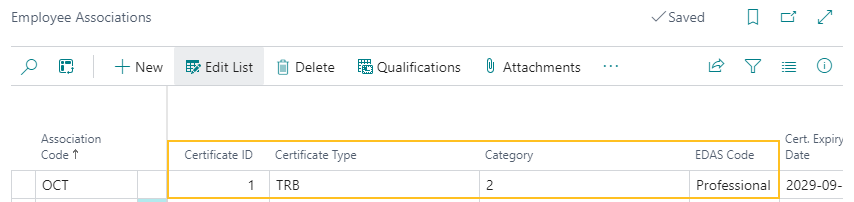
The following list includes information about the new fields:
Certificate ID: Specifies the ID of the certificate.
Certificate Type: Specifies the type of certification.
Category: Specifies the Teacher Qualification Service (TQS) category of the certification.
EDAS Code: Specifies the EDAS code of the certification.
Also, you can now add an attachment to an employee association record.
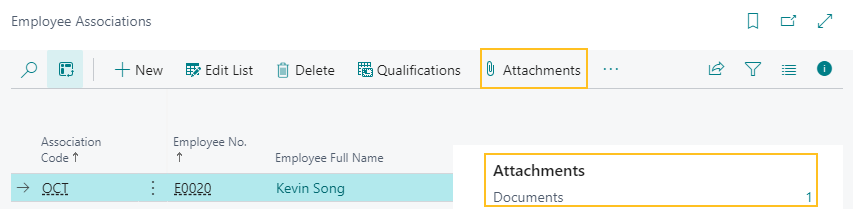
To learn more, go to Set up a British Columbia certification for an employee association.
Changes to 22 BCCT Certification field on the EDAS Setup page
On the EDAS Setup page, this releases makes changes to the 22 BCCT Certification field. The field now specifies the employee association that Sparkrock 365 is to use to obtain data for Employment Data & Analysis System (EDAS) reporting.

Changes for column 22 of the Employment Data & Analysis System (EDAS) report
Starting with this release, to determine the value of column 22 of the Employment Data & Analysis System (EDAS) report, Sparkrock 365 uses the first letter of the EDAS Code field from the Employee Associations page for the respective employee. To determine the employee association, Sparkrock 365 uses the setup in the 22 BCCT Certification field on the EDAS Setup page. If the value of the EDAS Code field is blank, Sparkrock 365 does not report a value in column 22.
To learn more, go to Employment Data & Analysis System (EDAS) report column mapping, calculations, and validations.
Removal of the BCCT Certification field from the Qualifications page
Due to the changes in this release for column 22 for Employment Data & Analysis System (EDAS) reporting, this release removes the BCCT Certification field from the Qualifications page.
Employment Data & Analysis System (EDAS) payroll payment reporting enhancements
Before this release, when an assignment ended, the associated payroll payments were reported in the same Employment Data & Analysis System (EDAS) reporting period as the assignment. For example, if an assignment ended on June 30th, 2024 and the EDAS reporting period also ended on June 30th, 2024, even though the employee didn't get paid until July 5, the payroll payments were reported in the EDAS reporting period ending on June 30th.
Starting with this release, Sparkrock 365 now reports payroll payments in the EDAS reporting period in which the payments are made. The payments are assigned to new assignments that are active during the EDAS reporting period.
To determine the new assignment to which to assign the payroll payment, Sparkrock 365 follows this process:
If an employee has two or more active assignments in the EDAS reporting period, Sparkrock 365 checks whether the Pension Position Class of the HR position class of the HR position that is associated with the active assignment is the same as the assignment that ended, and then performs the following additional processing depending on whether there is a match:
- Match: Sparkrock 365 assigns the payroll payment to the matching assignment.
- No match: Sparkrock 365 randomly assigns the payroll payment to one of the assignments.
If an employee has only one active assignment in the EDAS reporting period, Sparkrock 365 assigns the payroll payment to that assignment. In this scenario, a match of Pension Position Class is not required.
To learn more, go to Employment Data & Analysis System (EDAS) report column mapping, calculations, and validations.
Report Gender as F instead of X on the Employment Data & Analysis System (EDAS) report
Before this release, if the Gender on the Employee Card was not Male or Female, Sparkrock 365 reported the value X for Gender on the Employment Data & Analysis System (EDAS) report. Starting with this release, any Gender that is not Male is now reported as F.
To learn more, go to Employment Data & Analysis System (EDAS) report column mapping, calculations, and validations.
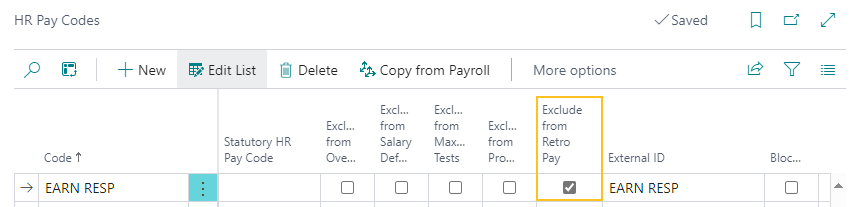
Exclude an HR pay code from retro pay calculations
This release introduces the capability for you to exclude an HR pay code from retro pay calculations. To exclude an HR pay code from retro pay calculations, on the HR Pay Codes page, on the row of the HR pay code that you want to exclude from retro pay calculations, select the Exclude from Retro Pay checkbox.
As part of this feature, this release introduces changes to the load retro pay lines functionality that is available from the Retro Pay Worksheet page. When you open the Load Retro Pay Lines page, and in Cause of Retro Pay, you specify Grid Change, Assignment Change, or New Assignment, and then proceed with loading lines, Sparkrock 365 excludes HR pay codes that have the Exclude from Retro Pay checkbox selected from worksheet line calculations. In other words, during the loading of retro pay worksheet lines, Sparkrock 365 excludes assignments, compensation ledger entries, or both, that are associated with the excluded HR pay code. Alternatively, for any HR pay codes for which the Exclude from Retro Pay checkbox is clear, Sparkrock 365 includes the HR pay codes in retro pay worksheet line calculations in the same manner as previous releases.
To learn more, go to Retro pay.
Social Security Number (SSN) format and validation enhancements
This release introduces format enhancements to the Social Security No. field that appears on new hire and rehire HR requests as well as on the Employee Card and Payroll Employee Card pages.
Now, when you specify a 9 digit number in the Social Security No. field, and then exit the field, Sparkrock 365 automatically adds dashes. For example, if you specify 789123654, and then exit the field, Sparkrock 365 automatically updates the format to be 789-12-3654.
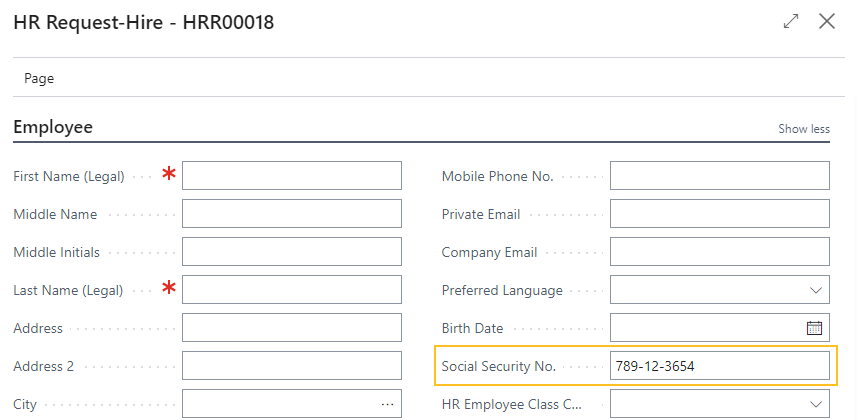
Also, starting with this release, Sparkrock 365 validates that the value specified in the Social Security No. field is 9 digits in length. If you specify a value that is not equal to 9 digits in length, Sparkrock 365 displays the following error:
Social Security No. must be in format XXX-XX-XXXX. If you enter 9 digits, value is auto-formatted.
Edit training registration lines in Excel
To save you time, this release introduces the capability for you to edit training registration lines in Excel.
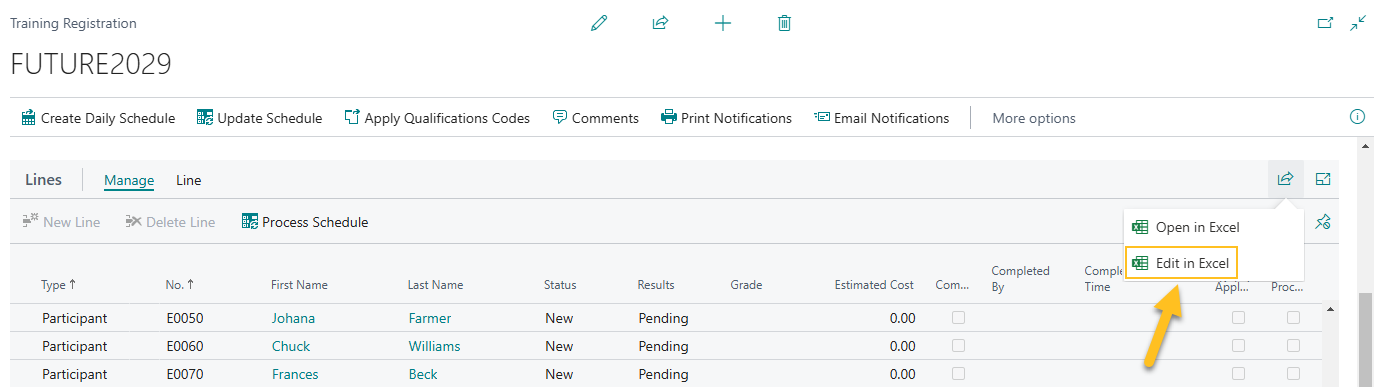
With the Edit in Excel feature, you can make changes to records in Excel, and then publish the changes back to Sparkrock 365.
For more information about editing in Excel, see Edit in Excel.
Compensation journal and HR pay code enhancements for hourly employees who take unpaid absences
To address an issue where standard units were incorrectly being reduced in the compensation journal for hourly paid employees who take unpaid absences, this release introduces compensation journal and HR pay code enhancements.
The following sections include information about the compensation journal and HR pay code enhancements for hourly employees who take unpaid absences.
New Display Offset for Regular Hours for Unpaid Time field on the HR Pay Code page
To ensure that the amounts for standard units are reported correctly in the compensation journal for hourly paid employees who take unpaid absences, this release introduces on the HR Pay Codes page, a Display Offset for Regular Hours for Unpaid Time field.

The Display Offset for Regular Hours for Unpaid Time field specifies whether this pay code in the compensation journal displays an offset to regular hours when an employee takes an unpaid vacation.
Note
Note:
If the Display Offset for Regular Hours for Unpaid Time checkbox is selected, the Multiplier for this pay code must be negative, and the Pay Type must be set to Hourly.
Compensation journal processing changes based on the value of the Display Offset for Regular Hours for Unpaid Time field
To ensure that the amounts for standard units are reported correctly in the compensation journal for hourly paid employees who take unpaid absences, this release introduces enhancements to compensation journal load lines processing.
Sparkrock 365 processing when loading lines into the compensation journal
The following table describes the Sparkrock 365 processing that occurs when loading lines into the compensation journal based on the value of the Display Offset for Regular Hours for Unpaid Time checkbox and other conditions.
| Conditions | Sparkrock 365 processing |
|---|---|
|
|
|
|
To learn more, go to Display offset for regular hours for unpaid time.
Hide benefits information from managers in mySparkrock
This release introduces the capability for you to control whether employee benefits information is hidden from managers in mySparkrock.
To provide this control, this release introduces on the Advanced HR Setup page, a Hide Benefits Info from Managers field.
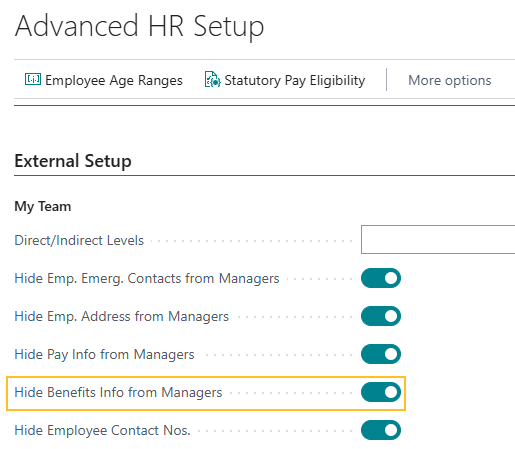
The Hide Benefits Info from Managers field specifies whether managers can view the Admin and Benefits section on their employees' respective Employee Profile page in mySparkrock.
Tip
Tip:
To determine a manager, Sparkrock 365 references the reports to hierarchy data for an HR position.
For more information about how to set up this feature, go to Hide employee benefits information from managers in mySparkrock. Also, for more information about the mySparkrock components of this feature, go to Hide employee benefits information from managers.
Search for employees on the Employees page using preferred first, middle, or last name
Starting with this release, on the Employees page, you can now use the personalization feature to add the Preferred First Name, Preferred Middle Name, and Preferred Last Name fields.
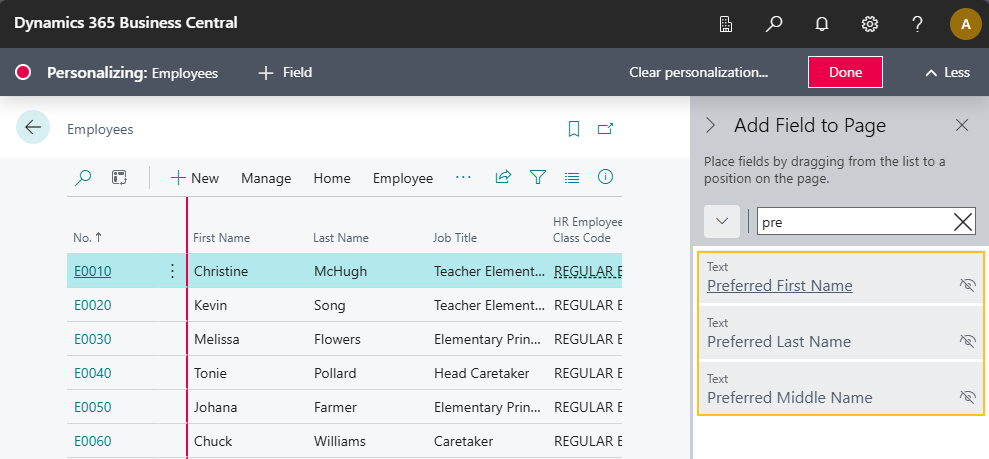
After you add these fields, and then refresh the page, you can perform a preferred name search.
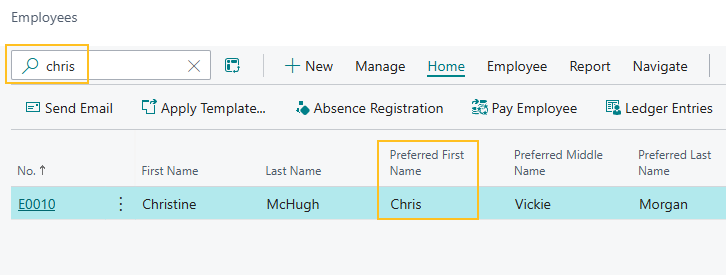
To learn more, go to Personalize your workspace and Use Search on list pages.
Preferred middle name and preferred last name enhancements for HR requests
On new hire and rehire HR requests, you can now specify a Preferred Middle Name and Preferred Last Name.
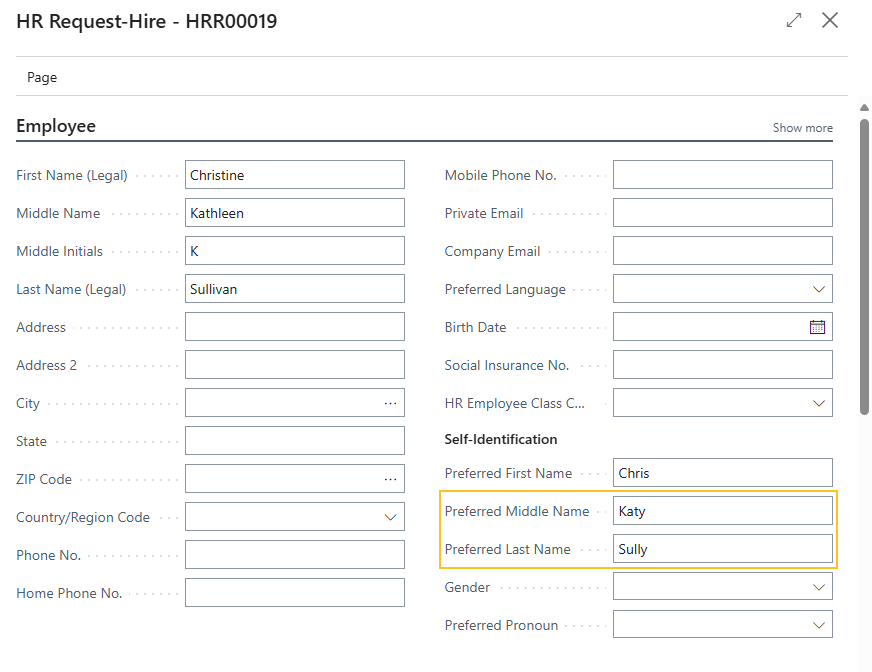
When an HR request is processed, the values for the Preferred Middle Name and Preferred Last Name fields flow through to the respective Employee Card page.
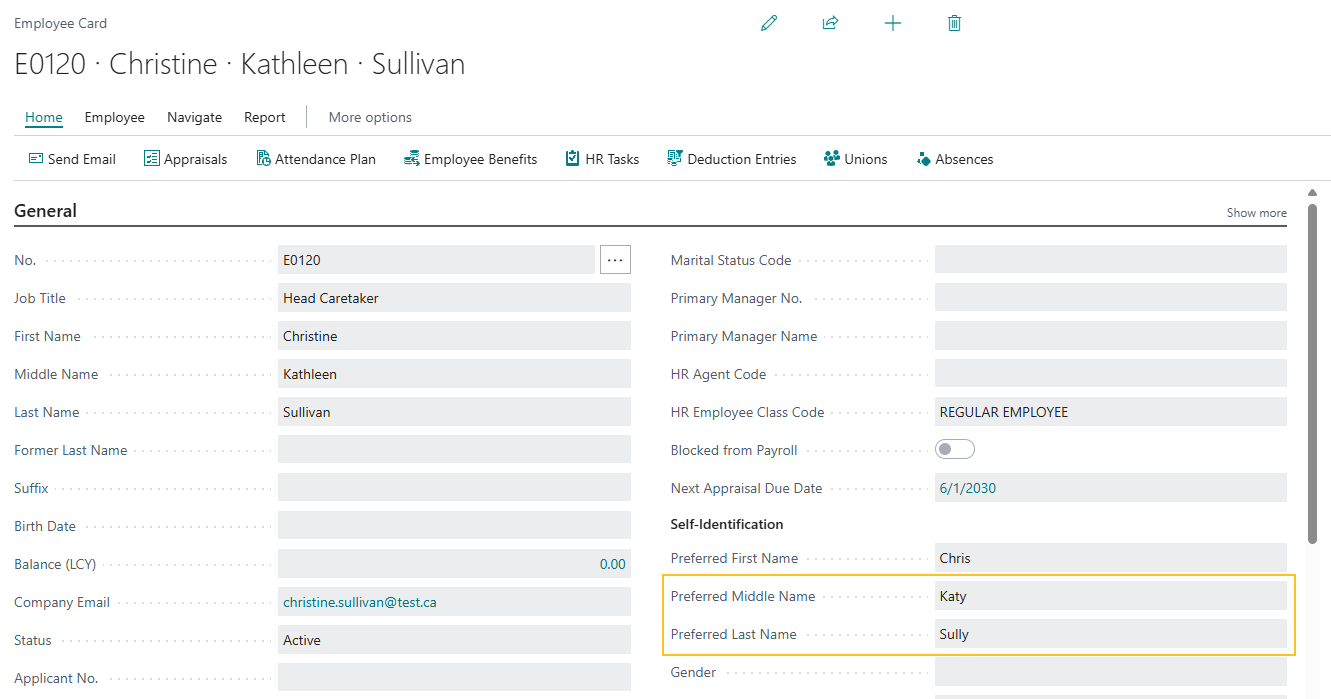
Additionally, on the HR Requests page, you can now search by Preferred Middle Name and Preferred Last Name.


Tip
Tip:
To have the Preferred Middle Name and Preferred Last Name fields appear on the HR Requests page, you may have to add the fields with the personalization feature. To learn more, go to Personalize your workspace.
To learn more about new hire or rehire HR requests, go to Hire or rehire employees.
Termination HR request enhancements
To prevent future-dated termination HR requests from being processed as of the processing date instead of the Termination Date on the HR request, this release introduces enhancements for termination HR requests.
Starting with this release, when an employee is terminated, the Status on the Employee Card changes to Terminated only when the Termination Date on the HR request is reached.
For example, if a termination HR request is processed on January 2, 2025, with a termination date of February 1, 2025, Sparkrock 365 does not update the Status on the Employee Card page to Terminated until February 1, 2025. Until February 1, 2025, the Status remains Active.
To support this behavior, this release adds the HR Function Code of 66 to the HR reason codes of 90-TERMINATION and 91-TCHR TERMINATION.
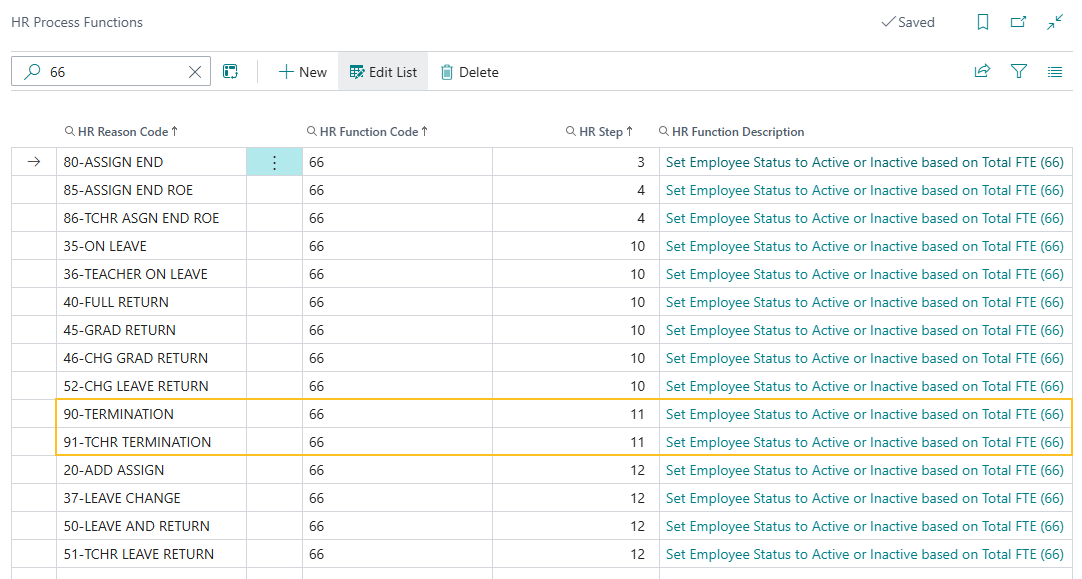
When processing a termination HR request, the HR Function Code of 66 determines when the Status on the Employee Card is updated based on the following logic:
If the Termination Date is on or before the current date, Sparkrock 365 updates the Status on the Employee Card to Terminated immediately.
If the Termination Date is in the future, Sparkrock 365 creates a scheduled task to update the Status on the Employee Card to Terminated on that date. Until the Termination Date is reached, the Status on the Employee Card remains Active.
In the event that the termination HR request is reversed, Sparkrock 365 behaves as follows:
If the processing date of the reversal is before the Termination Date is reached, Sparkrock 365 deletes the scheduled task that was created when the termination HR request was processed, and the Status on the Employee Card remains Active.
If the termination HR request is reversed after the Termination Date is reached, Sparkrock 365 updates the Status on the Employee Card from Terminated to Active. No changes are required to the scheduled task because the task has run.
To learn more about termination HR requests, go to Terminate employees. To learn more about scheduled tasks, go to Use job queues to schedule tasks.
Email notification enhancements for absence requests and HR requests
Starting with this release, you can specify the From email account that appears on email notifications for HR requests or absence requests.
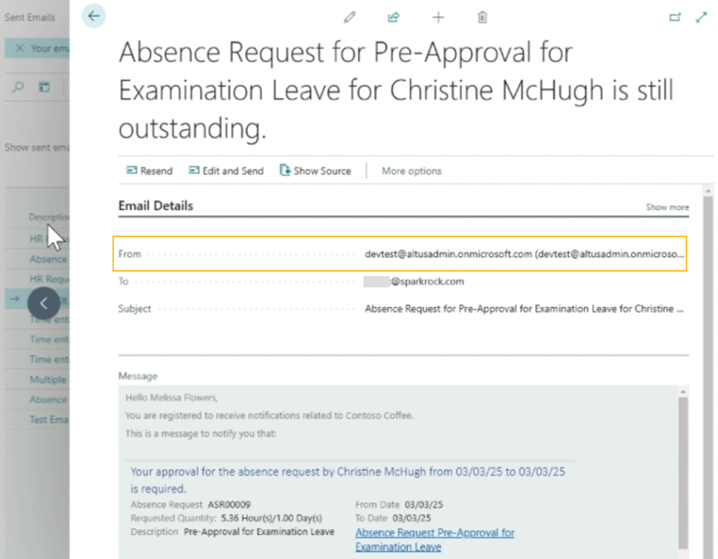
To provide this capability, this release introduces Absence Request and HR Request email scenarios.
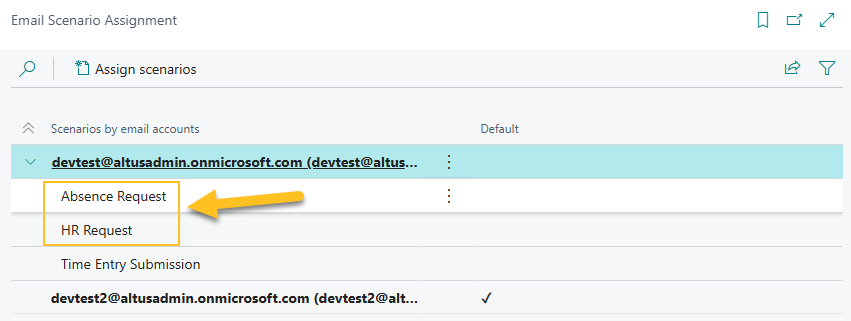
The new Absence Request email scenario sends out email notifications for the following situations:
- Email to one or more approvers about an absence request that requires their review and approval.
- Reminder email for absence requests when the approver has not approved or denied the original request.
- Email to the submitter of the absence request for approval indicating that the absence request has been approved or denied.
The new HR Request email scenario sends out email notifications for the following situations:
- Email to one or more approvers about an HR request that requires their review and approval.
- Email to the submitter of the HR request for approval indicating that the HR request has been approved or denied.
- Email to the creator of the HR Request when the HR request has been fully processed.
- Email to the submitter of the HR request for approval that the HR request has been reopened or cancelled.
Sparkrock 365 selects the From email account for absence request or HR request email notifications based on the email account to which the Absence Request or HR Request email scenario is assigned.
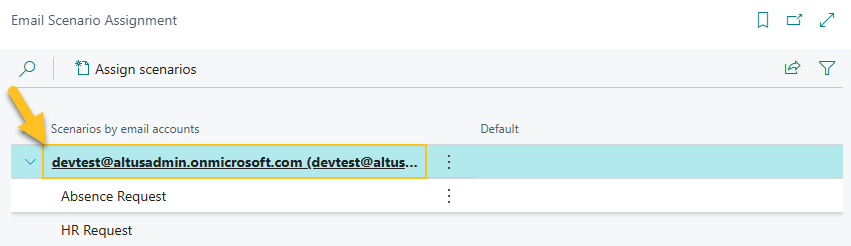
If the Absence Request or HR Request email scenario is not assigned to an email account, Sparkrock 365 automatically assigns the scenario to the default email account.
To learn more, go to Set up email scenarios.
British Columbia pension reporting enhancements
This release introduces the following enhancements related to British Columbia pension reporting:
Manual adjustments: Users can now manually adjust British Columbia pension report data before creating the British Columbia Pension report.
The high-level process for creating the British Columbia Pension report now includes the following steps:
- Complete the required setup.
- Load lines into the British Columbia Pension Report Worksheet page using the new Pension Report Type option of Pension by Pay Period.
- If required, manually adjust the pension report data directly on the British Columbia Pension Report Worksheet page.
- Load lines into the British Columbia Pension Report Worksheet page using the new Pension Report Type option of Pension Summary.
- Print the British Columbia Pension report.
Regular (RG) Line consolidation: In specific scenarios, Sparkrock 365 now consolidates multiple Municipal Pension Plan (MPP) and Teachers Pension Plan (TPP) RG lines into a single line.
Monthly pay cycle support for Municipal Pension Plan (MPP) lines: Sparkrock 365 now supports loading Municipal Pension Plan (MPP) lines for monthly pay cycles.
Pensionable service calculation updates: This release updates the calculation of Pensionable Service for Teachers Pension Plan (TPP) lines where the related pension position class is Teacher Teaching on Call (TTOC).
The following sections describe these changes in detail.
Manual adjustments
The following sections describe the changes in this release to support manual adjustments to British Columbia Pension report data.
New British Columbia pension report type
When loading lines into the British Columbia Pension Report Worksheet page, to differentiate between the Pension Summary report data that was introduced in previous releases and the new Pension by Pay Period report data in this release, this release introduces a Pension Report Type field on the British Columbia Pension Reporting Load Lines page.
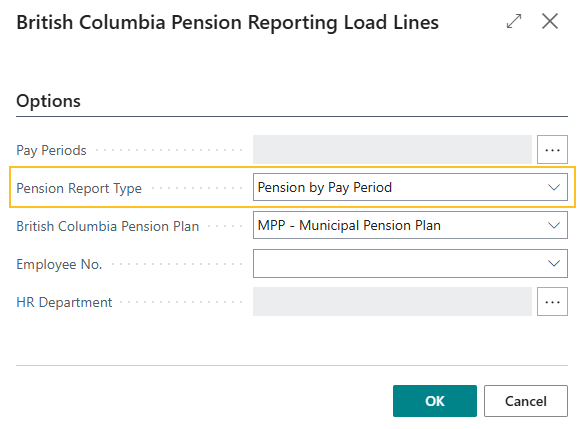
The Pension Report Type field specifies the type of pension report data to load into the British Columbia Pension Report Worksheet page.
When you specify Pension by Pay Period for Pension Report Type while loading lines, you can manually adjust worksheet lines as required. If you specify Pension Summary instead, worksheet lines consider any manually adjusted worksheet lines.
Load Municipal Pension Plan (MPP) lines for the Pension Report Type of Pension by Pay Period
When on the British Columbia Pension Reporting Load Lines page, if Pension Report Type is set to Pension by Pay Period and British Columbia Pension Plan is set to MPP - Municipal Pension Plan, Sparkrock 365 loads lines for employees with HR assignments that meet the following criteria:
The HR assignments have HR positions where the related HR position classes have Pension Employee Group set to 04GENERL.
The Calculation Start Date and Calculation End Date of those HR assignments match the Pay Periods that are specified on the British Columbia Pension Reporting Load Lines page.
To learn more about the values that appear in columns on the British Columbia Pension Report Worksheet page for Municipal Pension Plan (MPP) records, go to British Columbia pension report worksheet column mappings and calculations.
Load Teachers Pension Plan (TPP) lines for the Pension Report Type of Pension by Pay Period
When on the British Columbia Pension Reporting Load Lines page, if Pension Report Type is set to Pension by Pay Period and British Columbia Pension Plan is set to TPP - Teachers Pension Plan, Sparkrock 365 loads lines for employees with HR assignments that meet the following criteria:
The HR assignments have HR positions where the related HR position classes have Pension Employee Group set to 05GE10MO or 05GE12MO.
The Calculation Start Date and Calculation End Date of those HR assignments match the Pay Periods that are specified on the British Columbia Pension Reporting Load Lines page.
To learn more about how Sparkrock 365 determines the values that appear in columns on the British Columbia Pension Report Worksheet page for Teachers Pension Plan (TPP) records, go to British Columbia pension report worksheet column mappings and calculations.
Edit British Columbia Pension report worksheet lines
When you specify Pension by Pay Period for Pension Report Type while loading lines, you can manually adjust the following fields on worksheet lines as required:
- Pensionable Salary
- Pensionable Service
- Contributory Service
- Contributions
- Employee Contributions
- Employer Contributions
Tip
Tip:
You cannot modify lines when you specify Pension Summary for Pension Report Type while loading lines.
After making manual adjustments, you must process the lines to have the changes appear on the British Columbia Pension Adjustments page and British Columbia Pension report.
New Is Processed field on worksheet lines
To inform users about manually adjusted lines, this release introduces on the British Columbia Pension Report Worksheet page, an Is Processed field.
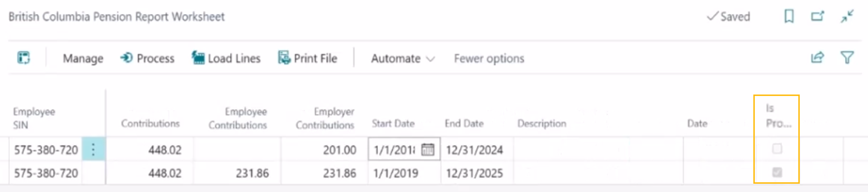
When manual changes are made to a line, Sparkrock 365 clears the Is Processed checkbox for that line.
When a line is processed, Sparkrock 365 select the Is Processed checkbox for that line.
New Process action
After you manually adjust one or more lines, you must process those lines to have the changes appear on the British Columbia Pension report.
To process lines for which the Is Processed checkbox is clear, on the British Columbia Pension Report Worksheet page, on the action bar, choose Process.
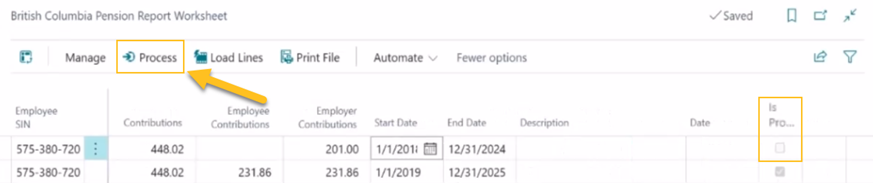
When you choose the Process action, Sparkrock 365 updates the records that appear on the British Columbia Pension Adjustments page.
Pension Summary report worksheet lines consider manual adjustments
When Pension Summary is specified for Pension Report Type while loading lines into the British Columbia Pension Report Worksheet page, Sparkrock 365 considers the processed manual adjustments that appear on the British Columbia Pension Adjustments page and updates the worksheet line amounts accordingly.
Validation to prevent printing of a British Columbia Pension report before processing manual adjustments
To prevent users from printing reports before processing, Sparkrock 365 displays an error if you use the Print File action when any line has the Is Processed checkbox clear and Pension by Pay Period was specified for Pension Report Type while loading lines.
If Pension Summary is specified instead, Sparkrock 365 does not display an error related to the Is Processed field when you use Print File.
New British Columbia Pension Adjustments page
To record manual adjustments to British Columbia pension report data, this release introduces a British Columbia Pension Adjustments page.
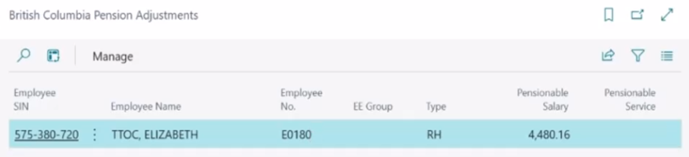
When creating a British Columbia Pension report, Sparkrock 365 uses the data that appears on this page to determine the amounts that appear on the report.
To learn more about British Columbia pension adjustments, go to British Columbia pension adjustments.
Regular (RG) Line consolidation
The following sections describe the specific scenarios for which Sparkrock 365 consolidates British Columbia Pension report regular (RG) lines.
Municipal Pension Plan (MPP) RG line consolidation
When loading records into the worksheet, Sparkrock 365 consolidates Municipal Pension Plan (MPP) lines if all of the following conditions are met:
- Two or more assignments during the pension reporting period have a matching Employment Duration Type on the respective HR Position Class of the assignments. Each matching Employment Duration Type must be either 10 Month or 12 Month for all records. The Employment Duration Type is specified on the HR position class that is associated with the HR position that is linked to each assignment.
- The Pension Employee Group is 04GENERL
- The HR pay cycle codes that are associated with the assignments have a matching Type. Each matching Type must be either Biweekly or Monthly for all records. The Type is specified on the HR pay cycle code that is linked to each assignment.
- The line Type is equal to RG.
The pension reporting period is based on the load lines date selection.
The consolidation involves a summation of the amounts for the following fields:
- Pensionable Salary
- Pensionable Service
- Contributory Service
- Contributions
- Employee Contributions
- Employer Contributions
Teachers Pension Plan (TPP) RG line consolidation
When loading records into the worksheet, Sparkrock 365 consolidates Teachers Pension Plan (TPP) lines if all of the following conditions are met:
- Two or more assignments during the pension reporting period have a matching Pension Employee Group on the respective HR Position Class of the assignments. Each matching Pension Employee Group must be either 05GE10MO or 05GE12MO for all records. The Pension Employee Group is specified on the HR position class that is associated with the HR position that is linked to each assignment.
- Two or more assignments during the pension reporting period have the same Employment Duration Type on the respective HR Position Class of the assignments. Each matching Employment Duration Type must be either 10 Month or 12 Month for all records. The Employment Duration Type is specified on the HR position class that is associated with the HR position that is linked to each assignment.
- The HR pay cycle codes that are associated with the assignments have a matching Type. Each matching Type must be either Biweekly or Monthly for all records. The Type is specified on the HR pay cycle code that is linked to each assignment.
- The line Type is equal to RG.
The pension reporting period is based on the load lines date selection.
The consolidation involves a summation of the amounts for the following fields:
- Pensionable Salary
- Pensionable Service
- Contributory Service
- Contributions
- Employee Contributions
- Employer Contributions
Monthly pay cycle support for Municipal Pension Plan (MPP) lines
Before this release, Sparkrock 365 included a validation that prevented users from selecting pay cycles other than biweekly for a Municipal Pension Plan (MPP) report. This release adds monthly pay cycle support.
To learn more about how Sparkrock 365 determines the values that appear in columns on the British Columbia Pension Report Worksheet page for Municipal Pension Plan (MPP) records for monthly pay cycles, go to British Columbia pension report worksheet column mappings and calculations.
Pensionable service calculation updates
This release introduces changes to the Pensionable Service calculation when all the following conditions are met:
- You load Teachers Pension Plan (TPP) lines.
- The Pension Position Class on the HR position class that is associated with the one or more assignments is TTOC.
- The Posting Date on the related one or more compensation ledger entry records falls within the date range that is specified on the British Columbia Pension Reporting Load Lines page.
The following sections describe the calculation details for biweekly and monthly HR pay cycle types.
Biweekly HR pay cycle type
When all the conditions above are met, and the HR pay cycle Type is equal to Biweekly, Sparkrock 365 performs the following Pensionable Service calculation:
(Hours/Days) / (Total Eligible Days in a Biweekly Pay Period) x (Total Eligible Days in a Biweekly Pay Period / Default Days/Year)
Sparkrock 365 uses the value of Hours/Days from the compensation ledger entries and the value of Default Days/Year from the HR position that is linked to the assignment. The total eligible days in a biweekly pay period is always 10.
The calculation is performed on a per pay period basis, and then is summed for the date range that is specified on the British Columbia Pension Reporting Load Lines page.
Monthly HR pay cycle type
When all the conditions above are met, and the HR pay cycle Type is equal to Monthly, Sparkrock 365 performs the following Pensionable Service calculation:
Pensionable Service = ((Hours / Days) / No. of Days in Pay Period) x ((No. of Days in Pay Period) / (No. of Days per Year))
Sparkrock 365 uses the values of Hours/Days and No. of Days in Pay Period from the compensation ledger entries and the value of No. of Days per Year from the HR employee assignment.
The calculation is performed on a per pay period basis, and then is summed for the date range that is specified on the British Columbia Pension Reporting Load Lines page.
OECTA worksheet enhancements
On the OECTA Worksheet page, this release introduces enhancements to the Annual Actual Salary and Annual Grid Salary fields. When you load lines, Sparkrock 365 now calculates for each employee, the sum of the Yearly Amount for all active assignments during the reporting period, and then populates the sum in the Annual Actual Salary and Annual Grid Salary fields.
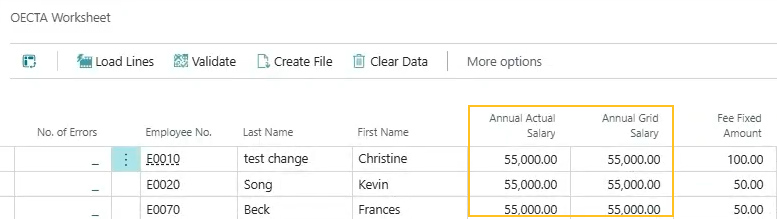
To learn more, go to Load Ontario English Catholic Teachers Association (OECTA) export file data into the OECTA worksheet.
Payroll has been updated to version 24.40.0.1
To stay current with the latest payroll updates and fixes, payroll has been updated to 24.40.0.1.
To learn more, go to Payroll release notes version 24.40.0.0 through 24.40.0.1.
Open the Employee Record of Employment page directly from the Employee Card page
To improve efficiency, starting with this release, you can open the Employee Record of Employment page directly from the Employee Card page.
To support this feature, this release introduces a Record of Employment action on the Employee Card page. You can find this action on the action bar under Related > Payroll.
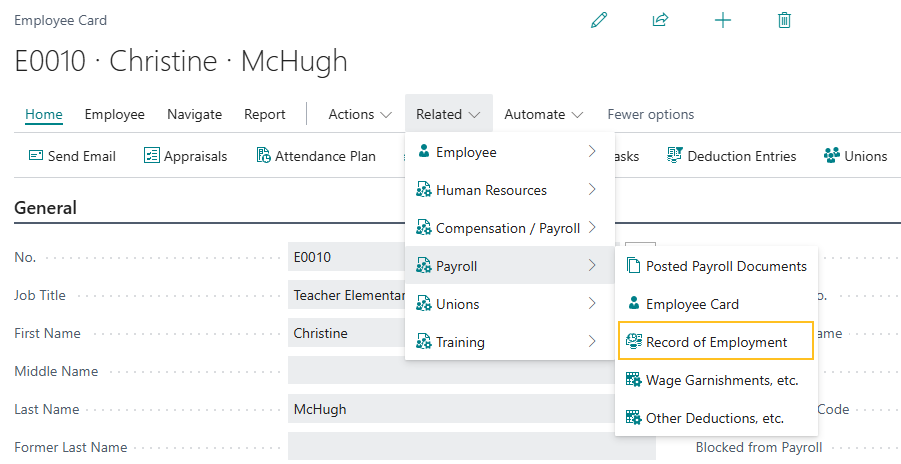
Selecting the Record of Employment action opens the corresponding Employee Record of Employment page.
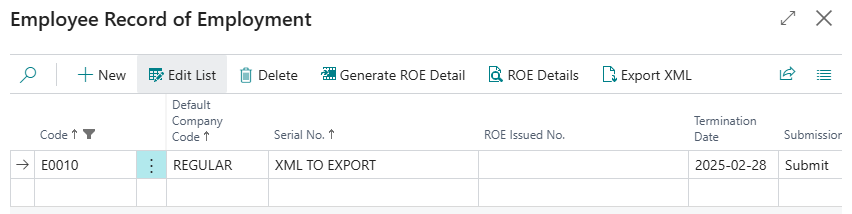
Email notification enhancements for time entry submission
Starting with this release, you can define the From email account that appears on email notifications for time entry submissions.
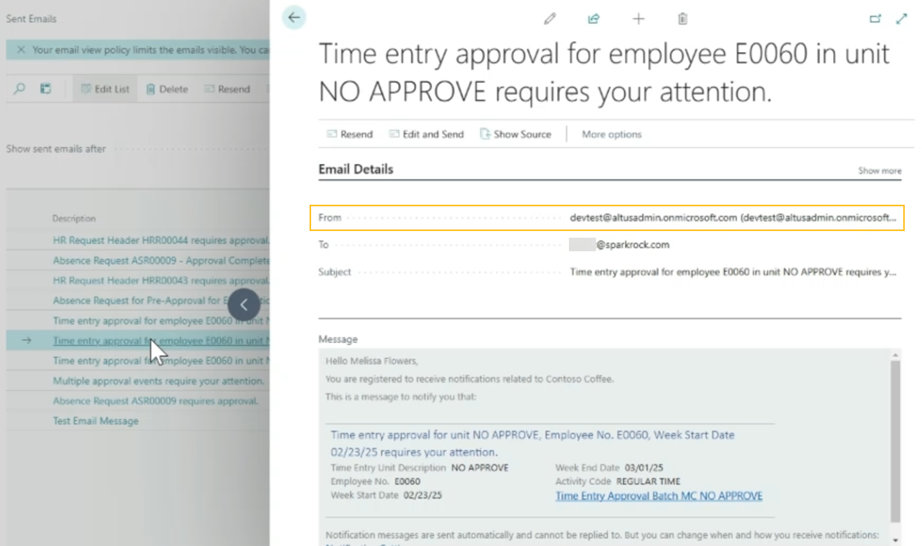
To provide this capability, this release introduces a Time Entry Submission email scenario.
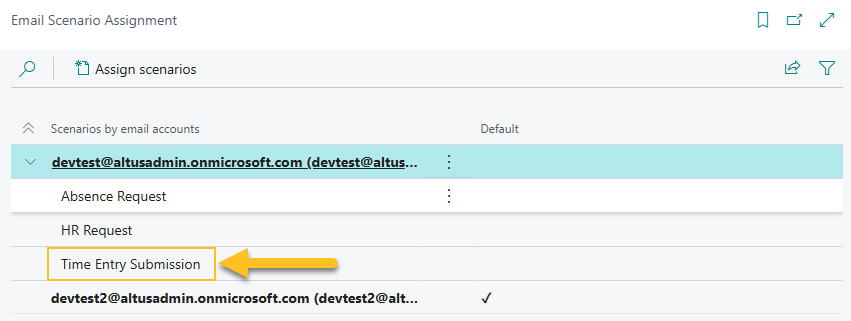
The new Time Entry Submission email scenario sends out email notifications for the following situations:
- Email to one or more approvers about a time entry submission that requires their review and approval.
- Reminder email for time entry submission when the approver has not approved or denied the original request.
- Email to the submitter of the time entry submission indicating that the request has been approved or denied.
Sparkrock 365 selects the From email account on time entry submission email notifications based on the email account to which the Time Entry Submission email scenario is assigned.
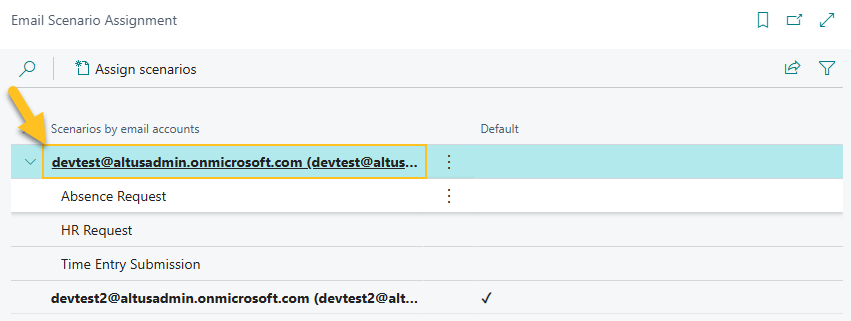
If the Time Entry Submission email scenario is not assigned to an email account, Sparkrock 365 automatically assigns the scenario to the default email account.
To learn more, go to Set up email scenarios.
Fixed problems
Version 24.5 for Sparkrock 365 2024 release wave 1 resolves the following problems.
| Description | |
|---|---|
| When your Language is set to French (Canada), and then you try to open a financial report, Sparkrock 365 may display an unnecessary error about excessive string length. |
|
| In environments that use Azure Blob Storage, when you are creating an email for a purchase order and you choose Add file from source document, Sparkrock 365 opens the Related Attachments page, but displays an unnecessary error after you select an attachment, and then choose OK. |
| Description | |
|---|---|
| When an approver who has the Finance Department Manager role receives an e-mail to approve a purchase order, the link in the e-mail directs the user to an incorrect page. |
|
| When you process a purchase requisition, if you modify the Document No. value, and then choose the Renumber Document Numbers action while consuming inventory, records may have an incorrect Journal Document No. value on the Lines FastTab of the Purchase Requisition page. |
|
| On the Requests Sent for Approval and Requests to Approve pages, the amounts in the Details column display 0.00, instead of the purchase order amount. |
|
| When you create one or more item journal lines to consume inventory from a purchase requisition, Sparkrock 365 populates the Document No. value with the purchase requisition number, instead of populating the value based on the item journal batch number series. This issue results in Sparkrock 365 displaying an error during posting. |
Update considerations
Consider the following information before updating to version 24.5 for Sparkrock 365 2024 release wave 1.
Transfer of open bank reconciliation worksheets
When you update to this release, open bank reconciliations are transferred to standard bank reconciliations one by one.
- All cleared entries in the Payments, Deposits, and Checks sections are transferred to statement lines and are auto-matched to bank ledger entries when possible.
- All non-cleared entries in the Payments and Checks sections are not transferred to standard bank reconciliation.
- All entries in the Adjustments section are transferred to statement lines, but are not auto-matched. You can complete the bank reconciliations by filling in any entries that weren't transferred and match entries that weren't auto-matched. In the standard bank reconciliation, you must post such differences to a general journal before you post the reconciliation. To learn more about posting a standard bank reconciliation, go to To create missing ledger entries to match bank statement lines. You can complete the bank reconciliations, and fill in any entries that weren't transferred and match entries that weren't auto-matched.
You can still review bank reconciliations that you did using the bank reconciliation worksheet. To review earlier bank reconciliations, use Tell Me to open the Bank Account page, and then choose the Posted Reconciliation Worksheets action.
Note
Note:
To avoid any issues with the transfer, Sparkrock recommends that you complete all open reconciliations before the update.
Transfer of open deposits
When you update to this release, open deposits are transferred to new bank deposits on a line-by-line basis. On the Bank Deposits page, you can find the new bank deposits, complete the registration, and post the deposits. To learn more about bank deposits, go to Create bank deposits.
You can still review deposits that you made using the deprecated deposits feature. To review earlier bank deposits, open the Posted Deposits page using Tell Me, and then open the respective deposit.
Note
Note:
To avoid any issues with the transfer, Sparkrock recommends that you complete all open deposits before the update.
Notification Entry Dispatcher job as a recurring job
When you update to this release, the following job is no longer required to be set up as a recurring job:
Object Type To Run is equal to Codeunit.
Object ID to Run is equal to 1509.
Object Caption to Run is equal to Notification Entry Dispatcher.
User ID is equal to MYSPARKROCK
PD-3410 .
Pending approvals
Before updating to this version from Sparkrock 2016, it is recommended that you update the approval status of any documents that are in a pending approval or in progress state to an approved or open state.
Missing permissions
When you update to this version, users may encounter permission related errors. The following table describes the Sparkrock 365 pages where these errors may appear, the error, and the permission setup that is necessary to prevent the error.
| Permission Setup To Prevent Error | |||||||
|---|---|---|---|---|---|---|---|
| Page | Error | Object ID | Object Name | Read Permission | Insert Permission | Modify Permission | Delete Permission |
| Purchase Invoice | Sorry, the current permissions prevented the action. (TableData VAT Setup Tax Setup Read: Base Application). | 189 | VAT Setup | Yes | |||
| Purchase Credit Memo | Sorry, the current permissions prevented the action. (TableData Purch. Cr. Memo Entity Buffer Insert: Base Application). | 5508 | Purch. Cr. Memo Entity Buffer | Yes | Yes | Yes | Yes |
Note
Note:
Sparkrock recommends that you add these permissions to a permission set to which the user is already assigned.
For information about how to assign permissions to users and groups, see Assign permissions to users and groups.
Known problems
The following sections include information about the known problems in version 24.5 for Sparkrock 365 2024 release wave 1.
Error when migrating user groups to security groups
On the User Groups Migration Guide page, after Sparkrock 365 automatically loads the matching user group and security group records, if you use the lookup on the Security Group Code and replace the existing code with the same code, Sparkrock 365 displays the following error:
You are not allowed to map the same security group to multiple user groups. Security Group <Code> is already mapped to another user group.
Workaround
To resolve this error, delete the Security Group Code, and then exit the field. This clears the error, allowing you to specify a new Security Group Code.
mySparkrock users cannot view data sets
mySparkrock users cannot view data sets because the MYSPARKROCK user is missing permission sets.
Workaround
To resolve this problem, perform the following steps:
In Sparkrock 365, choose
, enter microsoft entra applications, and then choose the related link.The Microsoft Entra Applications page opens.
Select the row that has a Description of mySparkrock, and then on the action bar, choose Manage > Edit.
The Microsoft Entra Application Card page opens.
On the User Permission Sets FastTab, add the records that appear in the following table.
Permission Set Name Type Extension Name SPKFA ANALYSIS, EDIT SR365 Create Fin. Analysis System Financial Analysis SPKFA ANALYSIS, VIEW SR365 View Financial Analysis System Financial Analysis SPKFA DATA SET, EDIT SR365 Create data sets System Financial Analysis SPKFA DATA SET, VIEW SR365 View data sets System Financial Analysis To add a record, choose Manage > New Line, and then specify values for fields as required.
Connectivity issue with APIs and other services or integrations
After updating to this release, you may experience connectivity issues with APIs and other services or integrations.
The following list includes examples of how connectivity issues may become apparent:
API errors
Power BI dashboards may no longer work correctly
Integrations may have trouble communicating with Sparkrock 365
Workaround
To resolve this problem, you must uninstall, and then install the respective extension. To uninstall, and then install the extension, perform the following steps:
In Sparkrock 365, choose
, enter extension management, and then choose the related link.The Extension Management page opens.
In Search, enter api.
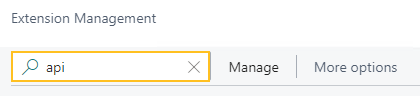
A list of the API extensions are displayed, for example, PS Finance APIs.
You may have to change your view so that you can view the version number for any extension. To view the version number for all extensions, choose
 , and then choose List.
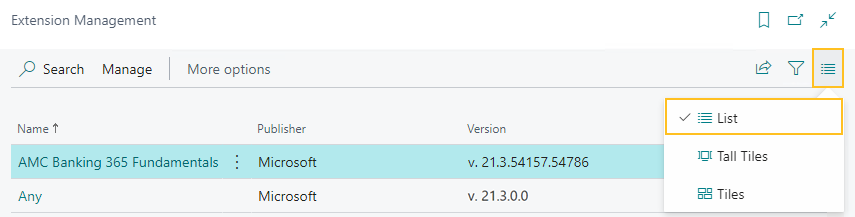
For each extension that does not have a version that starts with v.24.5 and Is Installed is selected, perform the following steps to uninstall, and then install the extension:
- Select the extension that you want to update, and then on the action bar, choose Manage > Uninstall.
The Extension Uninstallation page opens. - Choose Uninstall.
A dialog box appears and displays text that indicates the extension was successfully uninstalled. - To close the dialog box, choose OK.
- Select the extension that you want to update, and then on the action bar, choose Manage > Install.
The Extension Installation page opens. - Choose Next.
The page refreshes and you are requested to review extension information before installation. - To proceed, turn on I accept the terms and conditions.
- Choose Install.
The extension is updated to the latest version.
- Select the extension that you want to update, and then on the action bar, choose Manage > Uninstall.
Alternate workaround
It is possible that custom web services may have been deleted during or after the update.
To resolve this problem, you must copy and paste the web services lines from a sandbox environment into your production environment.
To copy and paste one or more web services lines, perform the following steps:
Open a Sparkrock 365 sandbox environment that was created before the update or create a sandbox environment from a backup.
Select Search (Alt+Q)
, enter web services, and then choose the related link.The Web Services page opens.
Copy the information for the one or more lines that you want to copy.
In your Sparkrock 365 production environment, choose
, enter web services, and then choose the related link.The Web Services page opens.
Paste the information for the one or more lines that you copied.
Re-open button is missing for a submitted expense claim in mySparkrock
The Re-open button may disappear from a submitted expense claim in mySparkrock. This issue occurs when the MYSPARKROCK user is not set up in Sparkrock 365, on the User Setup page.
Workaround
Perform the following steps:
Select Search (Alt+Q)
, enter user setup, and then choose the related link.The User Setup page opens.
On the action bar, choose New.
A new row appears.
In User ID, specify MYSPARKROCK.
Assign all permissions to this specific user.
For example, select the checkboxes for the following fields:
- A/P Batch Admin
- Allow A/P Batch Creation
- Allow A/P Batch Auditing
- Allow A/P Batch Deletion
- Allow User to Access Compensation Data
- HR Request Reversal Allowed
Electronic Funds Transfer (EFT) errors
The following setup scenarios may result in an Electronic Funds Transfer (EFT) error:
On the Countries/Regions page, ISO Code and ISO Numeric Code are blank, and on the Field Mapping page of the respective data exchange definition, on the Bank No. row, the Optional checkbox is selected.
For this scenario, Sparkrock 365 may generate an EFT file successfully, but the bank may reject the file.
On the Countries/Regions page, ISO Code and ISO Numeric Code are blank, and on the Field Mapping page of the respective data exchange definition, on the Bank No. row, the Optional checkbox is clear.
For this scenario, when you try to generate an Electronic Funds Transfer (EFT) bank import file, Sparkrock 365 may display an error, for example:
Fin. Institution Transit No. must have a value in ACH RB Detail: Data Exch. Entry No.=3, Data Exch. Line Def Code=DETAIL. It cannot be zero or empty.
Workaround
On the Countries/Regions page, ensure that you have a value specified in ISO Code and ISO Numeric Code.
For Canadian banks, specify the following:
- In ISO Code, specify CA.
- In ISO Number Code, specify 124.
For United States of America banks, specify the following:
- In ISO Code, specify US.
- In ISO Number Code, specify 840.
Transaction cannot be completed because it will cause inconsistencies in the G/L Entry table error
When you try to post a purchase invoice for a vendor that has a foreign trade Currency Code set up, for example, USD, you may receive the following error:
This transaction cannot be completed because it will cause inconsistencies in the G/L Entry table. Check where and how the CONSISTENT function is used in the transaction to find the reason for the error.
Contact your system administrator.
Tables can be marked as inconsistent during comprehensive tasks, such as posting. This prevents data from being updated incorrectly.
Workaround
On the Change Exchange Rate page for the specific invoice, increase the number of decimal places for the value in the Relational Exch. Rate Amount field, for example, from 1.4286 to 1.428571.
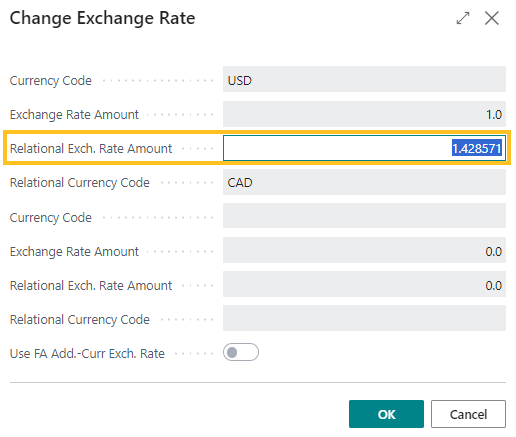
Alternate workaround
On the Currency Card page of the respective currency, increase the number of decimal places for the value in the Amount Rounding Precision field, for example, from 0.01 to 0.001.
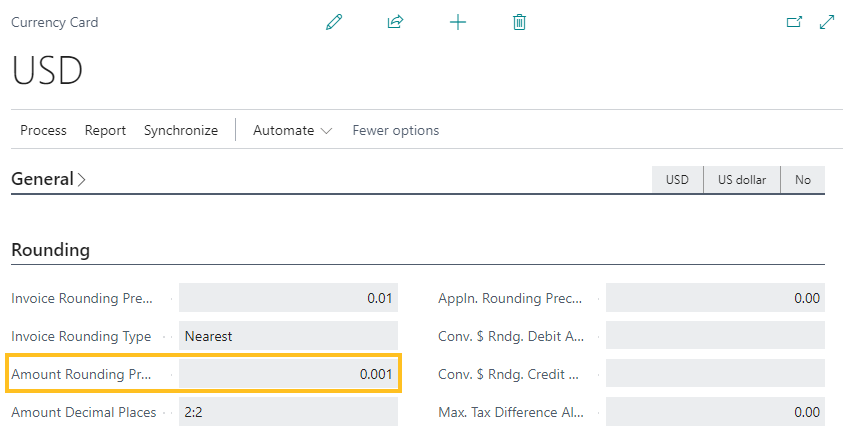
Cannot open links in sent emails
When you open a sent email from the Sent Emails Last 30 Days page, and then select the link that appears in the body of the email, Sparkrock 365 becomes unresponsive.
Workaround
Open links in the body of sent emails from Gmail or Outlook, instead of from Sparkrock 365.
Payroll Employee or Payroll Processing pages may fail to open
When using the platform security filters on permission sets, the Payroll Employee page, Payroll Processing page, or both pages may fail to open with a something went wrong error message. This is a limitation of the payroll processing module.
Workaround
Remove the permission sets with security filters from the user who must access these pages.
Related information
New for Sparkrock Impact
Payroll releases
Feedback
To send feedback about this page, select the following link: