Sparkrock 365 2022 release wave 2 release notes
These release notes include supplemental information about the Sparkrock 365 2022 release wave 2.
Video
The following video includes information about the new features and enhancements in Sparkrock 365 2022 release wave 2.
Highlights
The following sections highlight the major accomplishments in this release.
Financial reporting enhancements (formerly known as account schedules)
Account Set and Vendor Item No. fields on the Purchase Order Archive page
Attachments, links, and notes on Finance Department Manager pages
Created By and Created At fields on Posted Purchase Receipt page
Tax input field enhancements on purchase invoices and purchase credit memos
Warehouse, Bins, and Bin Policies FastTabs on the Location Card
Indirect permissions enhancements for HR requests and HR request reversals
Grounds for Termination and Record of Employment Captions are now based on your language setup
New features and changes
Sparkrock 365 2022 release wave 2 introduces exciting new features and enhancements to existing functionality.
Microsoft Dynamics 365 Business Central 21.0
The base Microsoft Dynamics 365 Business Central platform that powers Sparkrock 365, has been updated from 20.4 to 21.0. For more information about the 21.0 release, see What's new and planned for Dynamics 365 Business Central.
To view a detailed list of cumulative platform fixes that are available from Microsoft, see Update history for Microsoft Dynamics 365 Business Central.
Regional Settings on Company Setup
This release enhances the Company Setup assisted setup guide to load country specific data automatically based on Country/Region Code.

When you use the Company Setup assisted setup guide, settings on the Application Area Setup and Payroll Setup pages are updated automatically based on the value that is specified for Country/Region Code in the guide.
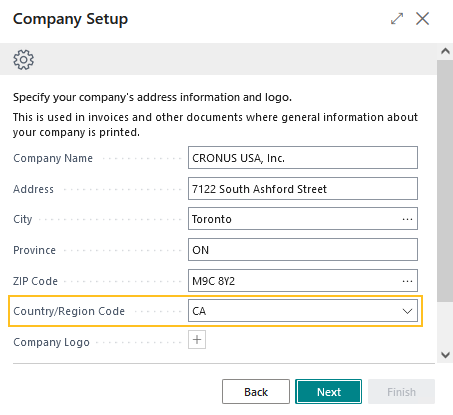
The following table describes the resulting field settings that are updated based on the value that is specified in Country/Region Code in the Company Setup assisted setup guide.
| Country/Region Code value in Company Setup assisted setup guide | Page | Field Setting |
|---|---|---|
| CA | Application Area Setup | Basic CA turned on Basic US turned off |
| US | Application Area Setup | Basic CA turned off Basic US turned on |
| All other values | Application Area Setup | No settings updated |
| CA | Payroll Setup | Country set to CA |
| US | Payroll Setup | Country set to US |
| All other values | Payroll Setup | No settings updated |
This release includes a new page in the Company Setup assisted setup guide where you can specify your company's regional settings. These settings are used on pages that include addresses, such as for employees, vendors, and customers.
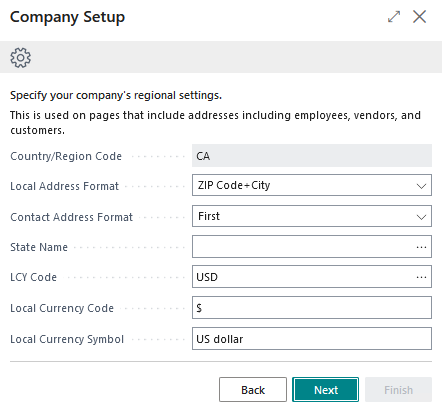
The following table describes the resulting field settings that are updated based on the values that are specified in the Company Setup assisted setup guide.
| Field in Company Setup assisted setup guide | Page | Field Setting |
|---|---|---|
| Local Address Format | Countries/Regions General Ledger Setup |
Address Format Local Address Format |
| Contact Address Format | Countries/Regions | Contact Address Format |
| State Name | Countries/Regions | State Name |
| LCY Code | General Ledger Setup | LCY Code |
| Local Currency Symbol | General Ledger Setup | Local Currency Symbol |
| Local Currency Description | General Ledger Setup | Local Currency Description |
Also, when the value of Country/Region Code is set to CA in the guide, a new page that includes a ROE Reason Codes field appears in the guide.
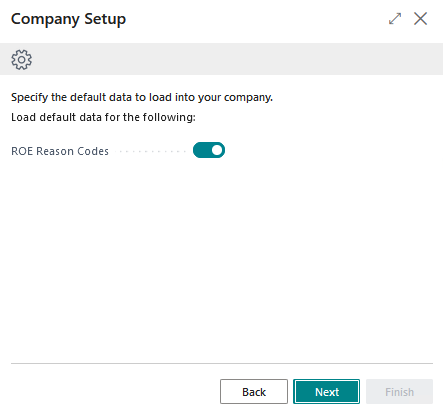
When ROE Reason Codes is turned on, after you choose Finish in the guide, a list of default ROE reason codes are automatically populated on the ROE Reason Codes page. Otherwise, when Country/Region Code is turned off, data is not loaded.
For more information, see Company setup regional settings.
Role center enhancements
To ensure that design standards are consistent for all role centers, this release includes the following role center enhancements.
Caption updates
This release updates the captions for actions on the following role centers:
Accounting Manager role center
Location Old Caption New Caption Navigation bar Customer Customers Navigation menu under Cash Management Deposit Deposits Navigation menu under Projects Project Status Project Statuses Actions under Approvals Approval Group Approval Groups Schedule Administrator role center
Location Old Caption New Caption Navigation menu under Scheduling HR Employees Employees Navigation menu under Scheduling HR Absence Requests Absence Requests Human Resources Manager role center
Location Old Caption New Caption Navigation bar Training Training Registrations Accounts Payable Coordinator role center
Location Old Caption New Caption Navigation menu under Accounts Payable Vendor Vendors Navigation menu under Accounts Payable A/P Batch A/P Batches Project and Grant Administrator role center
24491 Location Old Caption New Caption Navigation menu under Projects Statuses Project Statuses Navigation menu under Projects Contact Types Project Contact Types
Role center part organization
This release updates the following role centers to have headlines appear first, followed by cues, and then any remaining parts:
Finance Department Manager
Purchasing Agent
Security Administrator
24694
Remove Start role center part
This release removes the Start part from the following role centers:
HR Department Manager
Human Resources Manager
Finance Department Manager
24693
Remove product videos from role centers
This release removes the Product Videos part from the following role centers:
Finance Department Manager
HR Department Manager
To view product videos, go to https://learn.sparkrock365.com/.
Permission sets
This release includes new permission sets. You can view all Sparkrock 365 permission sets on the Permissions Sets page.
For more information about permission sets, see Assign permissions to users and groups and Create users according to licenses.
Financial reporting enhancements (formerly know as account schedules)
To make it easier for new users to get started with Business Central, Microsoft renamed the account schedules functionality to financial reporting. Learn more at Financial reporting replaces account schedules.
In addition to the name change, this release includes several enhancements to the functionality.
Replace account schedules terminology with financial reporting on role centers
On the Accounting Manager role center, the navigation menu has been updated from Account Schedules to Financial Reporting.

On the Budgeting Administrator role center, the navigation menu has been updated from Account Schedules to Financial Reporting.

Dimension filters support shortcut dimensions 1 to 8 from the general ledger setup
On the Financial Report page, this release enhances the Dimensions FastTab to support shortcut dimensions 1 to 8 that are set up on the General Ledger Setup page. The dimension filters are used during account schedule data calculations and are only applied during that single run. The dimension filters are not stored.
Extend dimension totalling on the row definitions of a financial report to include all 8 shortcut dimensions
This release extends dimension totalling on the row definitions of a Financial Report page to include the 8 shortcut dimensions that can be set up on the General Ledger Setup page. When a financial report row definition is created that includes totaling for the 8 shortcut dimensions, the data on the lines is correctly totaled and filtered by these dimensions.
Display account sets as rows on a financial report
Starting with this release, you can display account sets as rows on a financial report.
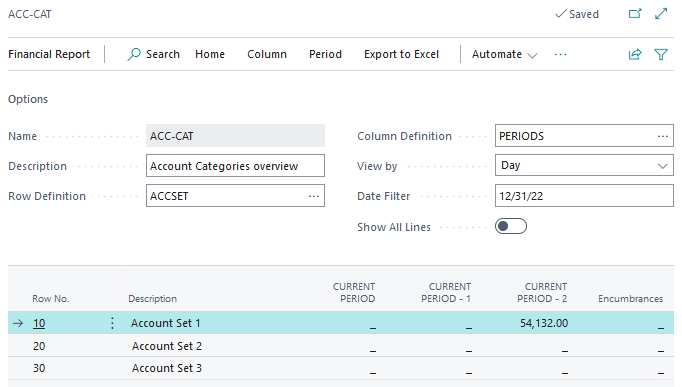
For more information, see Insert account sets as rows on a financial report.
Drill down page enhancements
This release includes several enhancements to financial report drill down pages.
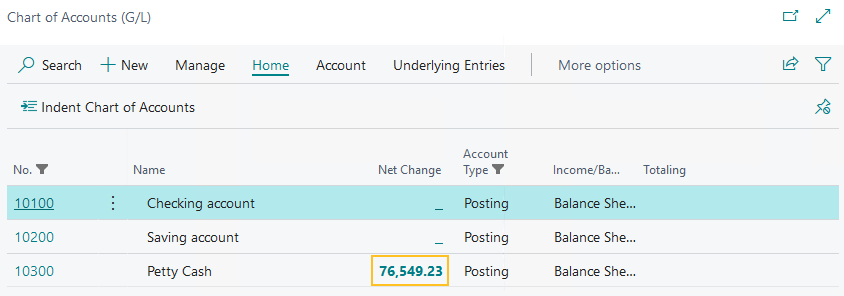
Display drill down calculation amounts in bold
On the Financial Report page, when you drill down on a column amount, a page appears that summarizes the information, for example, general ledger accounts or account sets. You can then drill down further on calculations to see the source entries. To highlight the amounts on which you have performed a drill down, the values are now presented in bold, for example, Net Change.
Display only columns with values
Starting with this release, only columns with values that are part of the column definition and that are linked to the schedule are displayed. For example, if there is no column with a budget entry, the Budgeted Amount column is hidden.
Hide drill down columns on Chart of Accounts and Account Set Analysis pages
To prevent the display of information that is not relevant when drilling down from the Financial Report page to the Chart of Accounts or Account Set Analysis pages, this release hides columns by default. For example, when you drill down from the Financial Report page to the Chart of Accounts page, the Gen. Posting Type, Gen. Bus. Posting Group, and Gen. Prod. Posting Group fields are now hidden by default. If required, to make fields visible, use the personalization feature. Learn more at Personalize your workspace.
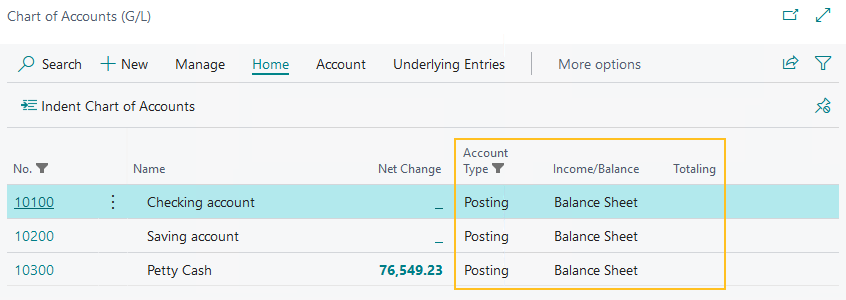
Move Account Type, Income/Balance, and Totaling columns
To help users locate a column quicker so the user can drill down further on amount fields, this release moves the Account Type, Income/Balance, and Totaling fields to the right side of the column layout.
Account set totaling and indenting
Starting with this release, on the Account Sets and Account Set Analysis pages, you can group and indent the display of account sets, which provides a better viewing experience and allows totals to be set up and viewed for a group. This new functionality is similar to the totaling and indenting functionality that exists for the chart of accounts.
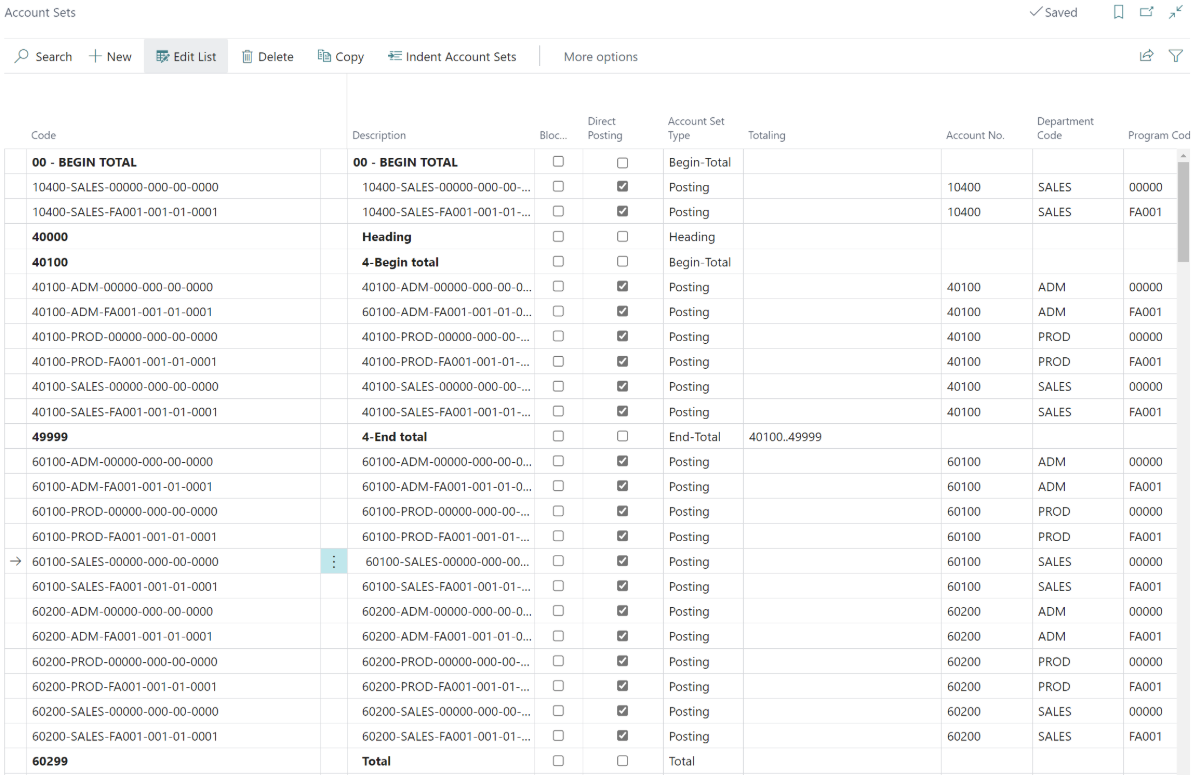
When you indent account sets, an indent is applied to the account set Description field of rows that have an Account Set Type of Posting and that are between rows that have an Account Set Type of Begin-Total and End-Total.
Important
Important:
Indenting must be performed after totals are set up so that subtotals are correct depending on where Begin-Total and End-Total rows have been specified.
For more information about account set totaling, see Set up account set totaling and indenting. For more information about update considerations for this feature, see Account set records updated.
Column definition enhancements
Column definitions that are used in financial reports and reporting and analytics reports now include the Ledger Entry Type of Commitments, Encumbrances, and Encumbrance Entries.
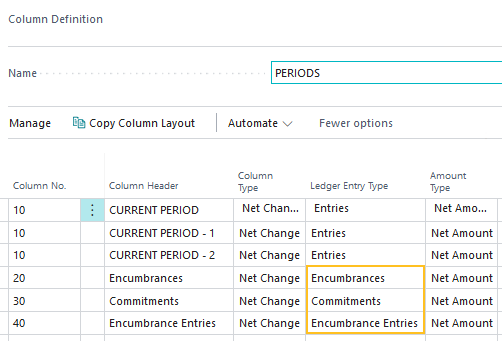
The Amount Type for these ledger entry types is always Net Amount.
For information about calculation details for these new ledger entry types, see Column definition ledger entry type calculations.
Finance approval enhancements
This release includes the following enhancements to finance approvals.
Approval Amount Threshold field
To help identify the sequence in which different approvals are working and the hierarchy of approval based on the amount threshold, this release introduces a Approval Amount Threshold field on the following approval related pages:
Approval Entries
Posted Approval Entries
Requests to Approve
Purchase Request Approver
The Approval Amount Threshold field is visible by default.
For more information about update procedures, see Automatically populate Approval Amount Threshold field.
Approval Code and Approval Rule Code fields on the Request to Approve and Approval Entries pages
On the Requests to Approve and Approval Entries pages, this release adds the Approval Code and Approval Rule Code fields.
These fields are hidden by default. To make the fields visible, use the personalization feature. Learn more at Personalize your workspace.
Account Set and Vendor Item No. fields on the Purchase Order Archive page
On the Purchase Order Archive page, this release adds the Account Set and Vendor Item No. fields. These fields are visible by default.
Attachments, links, and notes on Finance Department Manager pages
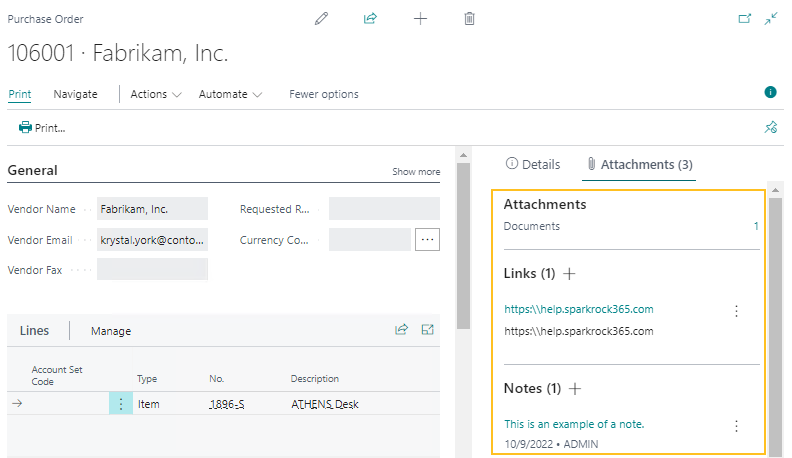
For users who have the Finance Department Manager role, starting with this release, attachments, links, and notes now appear in the FactBox pane on the following pages:
Purchase Order
Purchase Requisition
Payment Request
Expense Claim
Posted Purchase Invoices
Posted Credit Memos
Created By and Created Aty fields on Posted Purchase Receipt page
For users to be able to view when and who created a purchase receipt, this release adds on the Posted Purchase Receipt page, the following fields:
Created By: Specifies the user who created the record.
Created At: Specifies the date and time that the record was created.
These fields are hidden by default.
To make the Created By and Created At fields visible on the Posted Purchase Receipt page
Select Search (Alt+Q)
 , enter posted purchase receipts, and then choose the related link.
The Posted Purchase Receipts page opens.
Select the posted purchase receipt for which you want to view the Created By and Created At fields on the Posted Purchase Receipt page, and then on the action bar, choose Manage > View.
The Posted Purchase Receipt page opens.
To make the Created By and Created At fields visible, use the personalization feature. Learn more at Personalize your workspace.
26356
Budget journal enhancements
This release includes the following enhancements to the budget journal functionality.
Document No. column in budget journal import templates
To improve usability, this release adds a Document No. column to the Budget Journal Import and Budget Journal Account Sets Import Microsoft Excel templates.
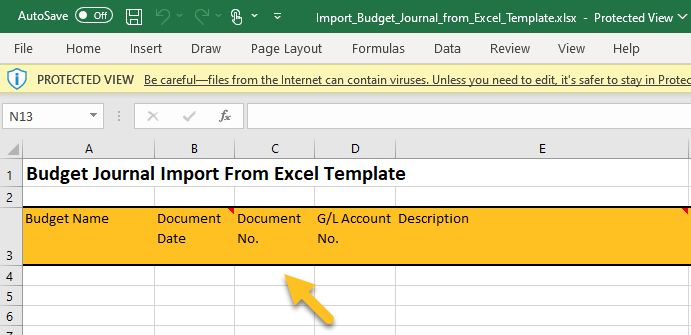
When a user imports budget journal information into Sparkrock 365, the Document No. is now taken from the specified template. When the value for the Document No. column in the template is blank, the import uses the applicable number series from the budget journal batch. Otherwise, when the value in the template is blank and there is no number series, an error is displayed.
To download the latest version of the templates, go to Sparkrock 365 downloads.
Budget journal Document No. transferred to G/L budget entries
Starting with this release, when a budget journal is posted, the value of the Document No. from the journal is automatically populated in the Document No. field on the respective G/L budget entries.

On the G/L Budget Entries page, the Document No. field is hidden by default. To make the field visible, use the personalization feature. Learn more at, see Personalize your workspace.
Tax input field enhancements on purchase invoices and purchase credit memos
Starting with this release, on the Purchase Invoice and Purchase Credit Memo pages, when the document is in a foreign currency, you can now edit the Total Incl. Tax Input field as well as the other configurable tax fields as per the setup on the Purchases & Payables Setup page.

Also, this release introduces changes to ensure that on the Purchase Invoice Statistics and Purchase Credit Memo Statistics pages, the Reconcile, Clear All Tax Differences, and Update Header actions work the same when the document is in a foreign currency or the local currency.
Archived Purchase Order report
This release introduces an Archived Purchase Order report. The report has the same RDLC layout as the Purchase Order report, except for the following differences:
The report includes purchase order archive information, instead of purchase order information.
The Version No. is displayed on the report.
When an archived purchase order is printed, this report is loaded as the default layout.
Restore to Purchase Order on purchase credit memo lines
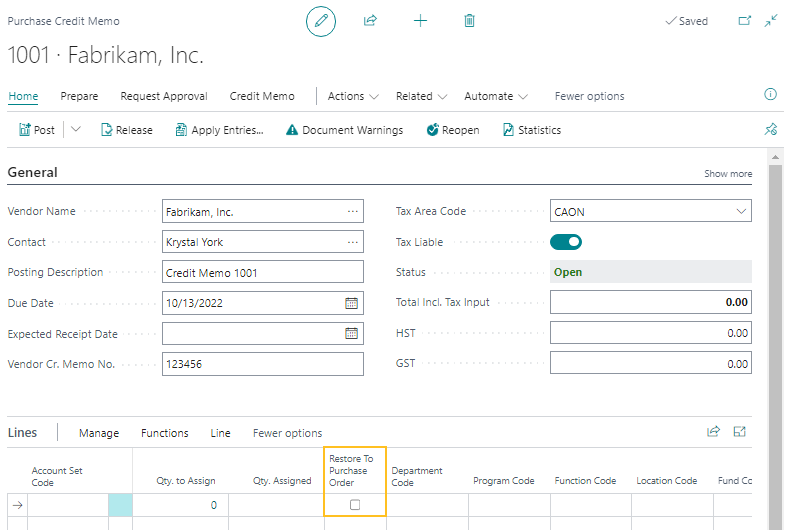
Starting with this release, on the Purchase Credit Memo page, on the Lines FastTab, the Restore to Purchase Order field is now visible by default.
Finance Department Manager role center checklist
To help new users get started, this release introduces on the Finance Department Manager role center, a new Finance Department Manager checklist.
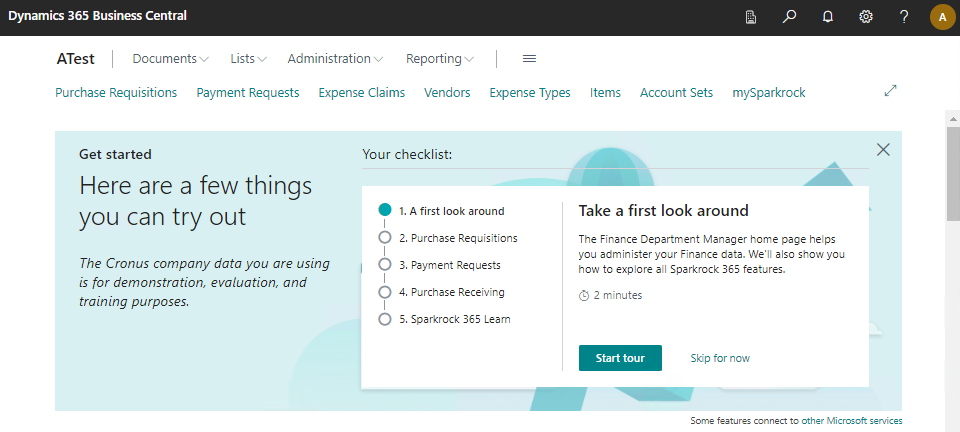
For more information about checklists, see Onboard users with checklists.
Finance Department Manager guided experiences
The following new guided experiences are available from the Finance Department Manager role center checklist:
Purchase Requisitions
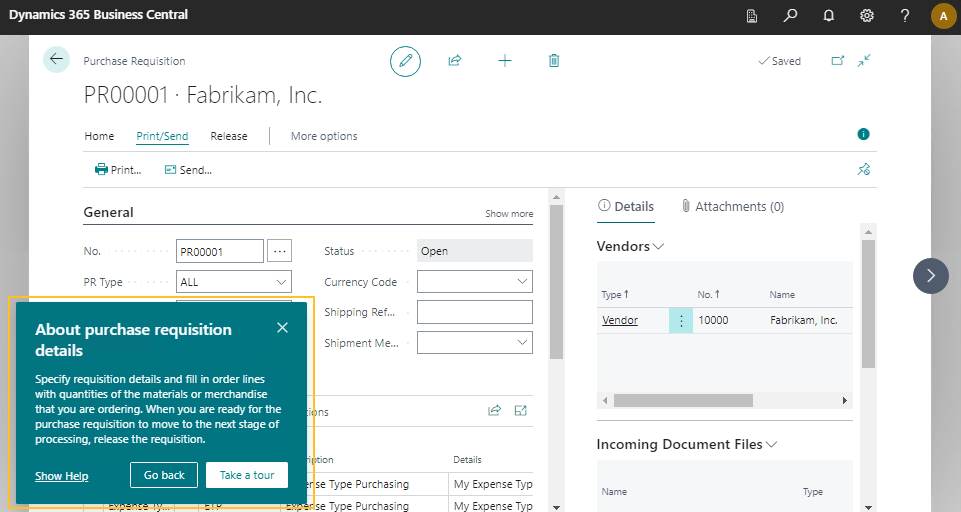
Payment Requests
Purchase Receiving
For more information about checklists and guided experiences, see Set up a guided experience and Onboard users with checklists.
Finance and procurement teaching tours
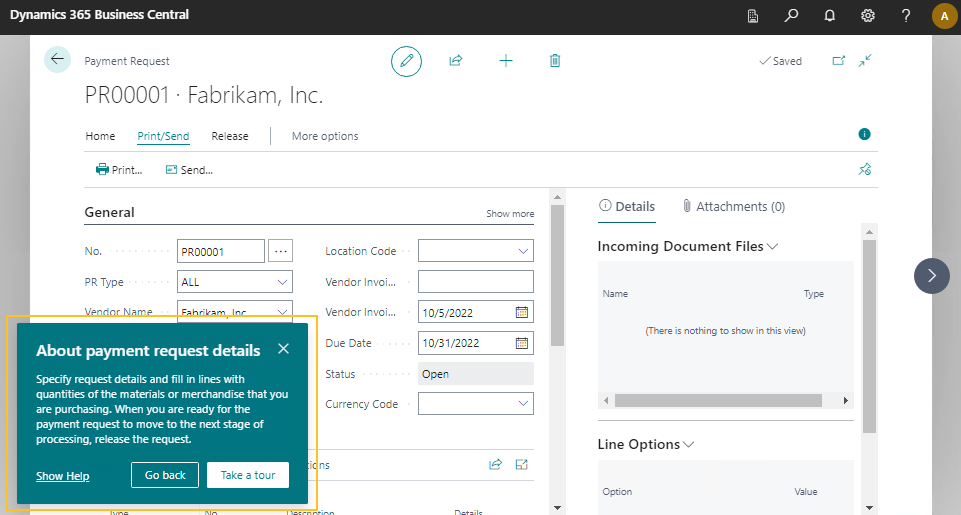
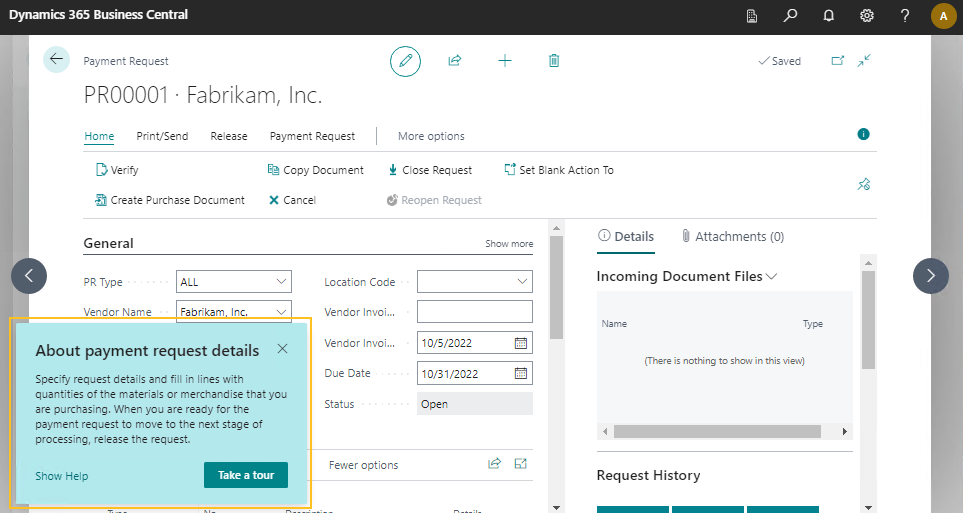
This release introduces teaching tours on the following finance and procurement pages:
Payment Requests

Payment Request
Purchase Requisitions
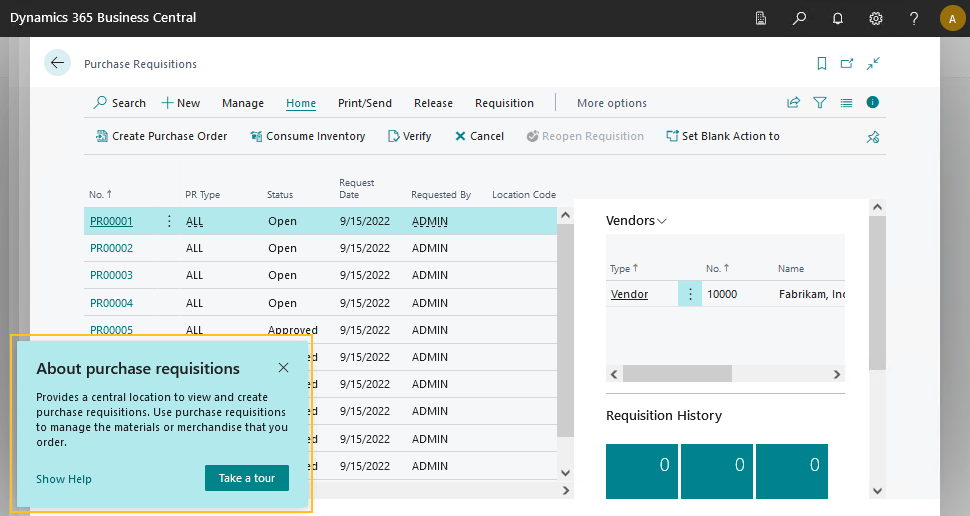
Purchase Requisition
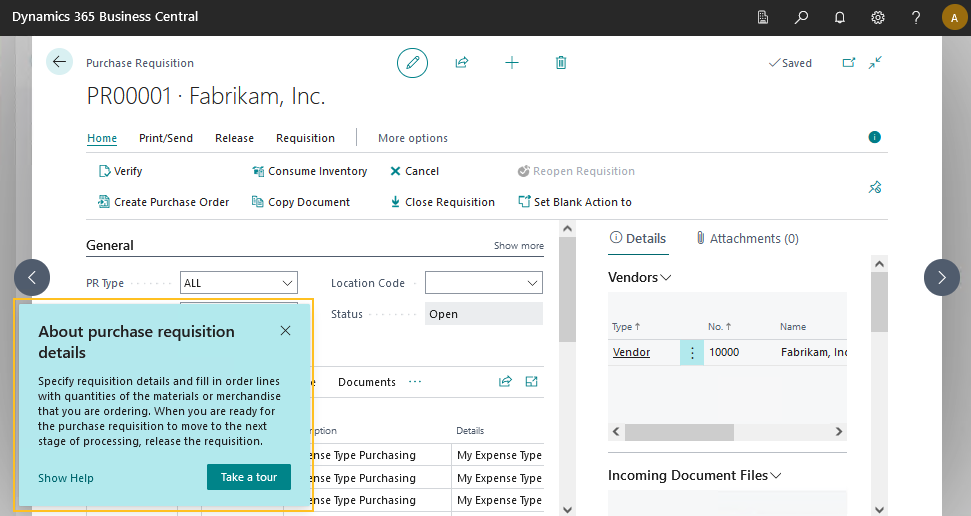
Teaching tours include short messages that inform, remind, or teach users about important and new capabilities. For more information about teaching tours and tips, see Teaching tips and tours and Teaching tips.
Warehouse, Bins, and Bin Policies FastTabs on the Location Card
On the Location Card page, this release makes the Warehouse, Bins, and Bin Policies FastTabs available for use.
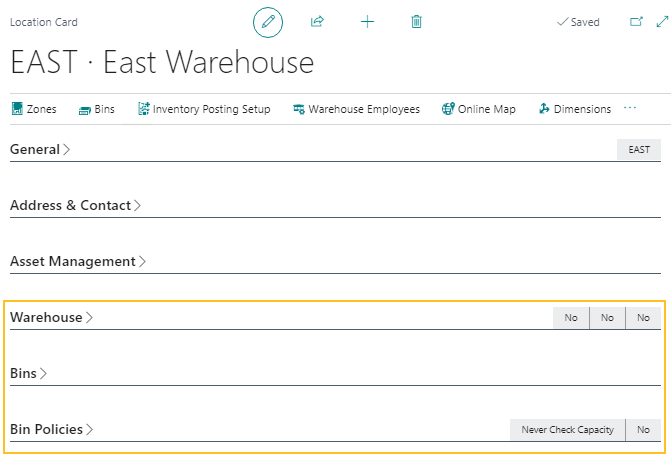
To learn more about Sparkrock 365 warehouse management features, see Warehouse management overview.
Create employee benefits enhancements
To support situations where benefit groups are assigned after the new hire process has completed, this release enhances the create employee benefits functionality. The enhancements to the create employee benefits functionality include the following changes to Sparkrock 365.
New Create Employee Benefits action on the Employee Benefits page
On the Employee Benefits page, this release adds a Create Employee Benefits action.
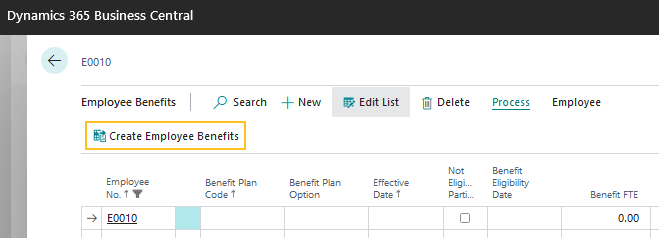
When you choose the Create Employee Benefits action, the Create Employee Benefits page opens.
For more information, see To assign benefit plans from a benefit group to an employee from the Employee Benefits page.
New Create HR Req. Employee Benefits action on the details page of an HR request
On the details page of an HR request, on the Employee Benefits FastTab, this release adds a Create HR Req. Employee Benefits action.
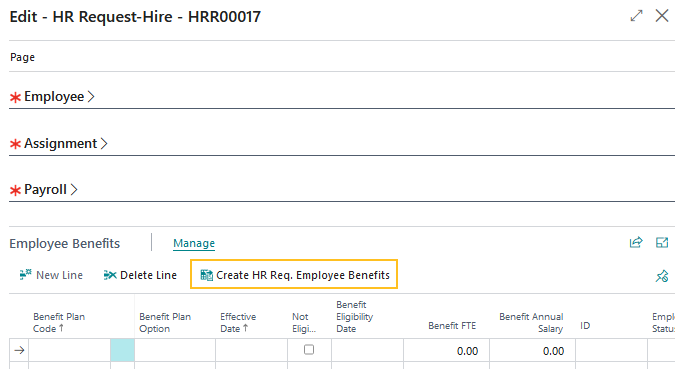
This action opens the new Create HR Request Employee Benefits page.
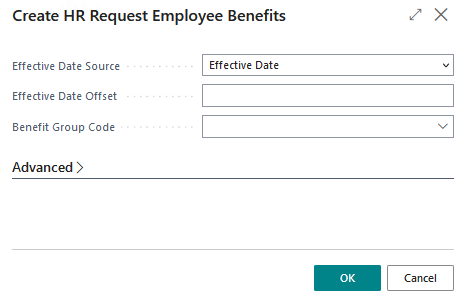
The Create HR Request Employee Benefits page includes the following fields as well as the standard advanced filter options:
Effective Date Source: (Optional) Specifies the option that is to be used to determine the effective date for employment benefits.
Effective Date Offset: Specifies the date formula that is to be used for the effective date calculation.
Benefit Group Code: Specifies the benefit group code that can be used to filter to specific employees.
Note
Note:
You can only create employee benefits from HR requests where the respective reason code has one of the following process types:
- New Hire
- Rehire
- Additional Assignment
- Transfer
- Details Change
- Leave
- Termination
When assigning benefit plans from a benefit group to an employee from an HR requests, the benefit plans are not assigned until the HR request is processed.
For more information, see To assign benefit plans from a benefit group to an employee from an HR request.
Filter changes on the Create Employee Benefits page
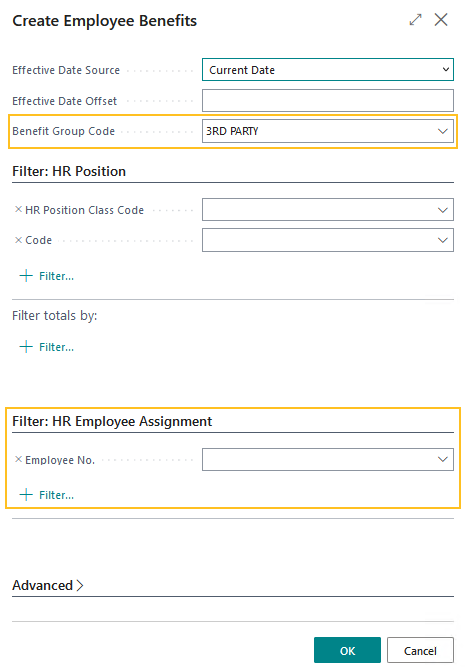
On the Create Employee Benefits page, this release introduces the Benefit Group Code filter. This field provides the capability to specify a benefit group code to filter to specific employees.
Also, the HR Employee Assignment filter is now visible by default. The default field is Employee No. and is automatically populated when the Create Employee Benefits page is opened from the Employee Benefits page. The Employee No. can be manually populated when the Create Employee Benefits page is opened from the Benefit Groups page.
Note
Note:
On the Benefit Groups page, the Create Employee Benefits action works the same as in previous releases except for the new filters. For more information, see To assign benefit plans from a benefit group to an employee from the Benefit Groups page.
Accrue time off based on a percentage of hours worked
For many organizations, time off, such as vacation and sick time is awarded to an employee based on the time the employee has worked. For example, an employee may be awarded vacation time at a rate of 4% for the time the employee has worked, which means that when the employee works 40 hours, the employee is awarded 1.6 hours of vacation time to be taken at a later date. To support these organizations, this release introduces the capability to accrue time off based on a percentage of hours worked.
For more information, see Accrue time off based on hours worked.
To support this new functionality, this release includes the changes that are described in the following sections.
New Calculation Basis field on the Cause of Absence Card page
On the Cause of Absence Card page, this release introduces a Calculation Basis field.
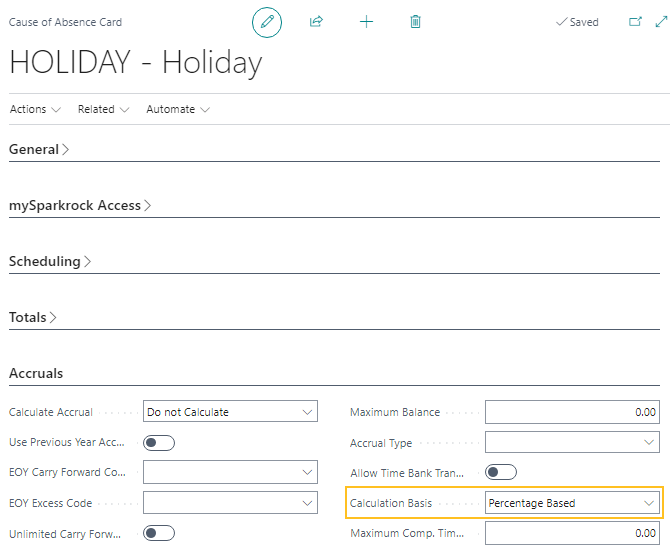
The Calculation Basis field specifies whether the accrual calculation is to be unit based or percentage based.
When the Calculation Basis field value is Unit Based, accrual calculations remain the same as in previous releases. Alternatively, when the Calculation Basis field value is Percentage Based, accrual calculations are based on a percentage of accrual units. The percentage calculation filters compensation ledger entries based on HR pay codes that are assigned to a cause of absence.
New COA Eligible HR Pay Codes page
This release introduces a COA Eligible HR Pay Codes page.

On the COA Eligible HR Pay Codes page, you can specify the eligible HR pay codes that are to be included in the percentage calculation for the respective cause of absence. The percentage calculation filters compensation ledger entries based on these HR pay codes.
New Load Eligible HR Pay Codes action on the Cause of Absence Card page
To help with administration, on the Cause of Absence Card page, this release introduces a Load Eligible HR Pay Codes action.

The Load Eligible HR Pay Codes action provides the capability to specify the eligible HR pay codes that are to be included in the percentage calculation for the respective cause of absence. The percentage calculation filters compensation ledger entries based on these HR pay codes.
The Load Eligible HR Pay Codes action can only be chosen when on the Cause of Absence Card page, on the Accruals FastTab, the Calculation Basis field is set to Percentage Based.
When you choose the Load Eligible HR Pay Codes action, the Load Eligible HR Pay Codes page opens.
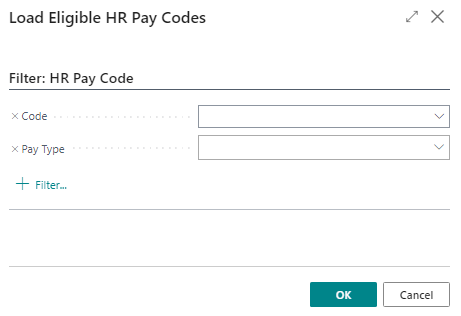
On the Load Eligible HR Pay Codes page, you can specify filters to filter the data that is to be loaded into the COA Eligible HR Pay Codes page.
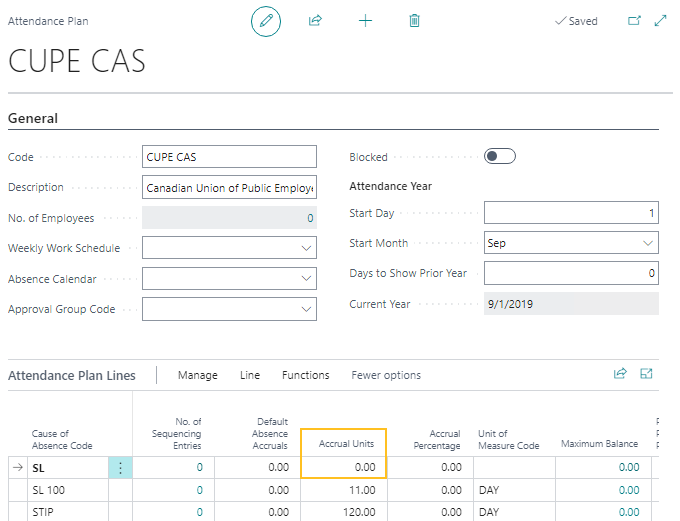
Rename No. Accrual Units field to Accrual Units
On the Attendance Plan and Employee Attendance Plan pages, this release renames the No. Accrual Units field to Accrual Units.
New Accrual Percentage field on the Attendance Plan and Employee Attendance Plan pages
On the Attendance Plan and Employee Attendance Plan pages, there is a new Accrual Percentage field.
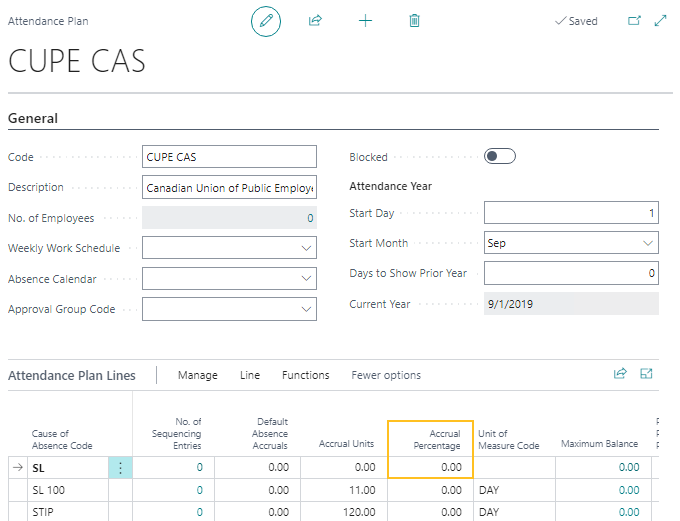
The Accrual Percentage field specifies that accruals are calculated based on a percentage of the quantity of accrual units. The Accrual Percentage field can only be edited when on the Cause of Absence Card page of the respective cause of absence, the Calculation Basis field is set to Percentage Based.
New Accrual Percentage field on the Attendance Plan Accruals and Employee Attendance Plan Accruals pages
On the Attendance Plan Accruals and Employee Attendance Plan Accruals pages, there is a new Accrual Percentage field.

The Accrual Percentage field specifies that accruals are calculated based on a percentage of the quantity of accrual units. The Accrual Percentage field can only be edited when on the Cause of Absence Card page of the respective cause of absence, the Calculation Basis field is set to Percentage Based.
New calculations on the Annual Accrual Worksheet and Per Pay Accrual Worksheet
To support accruals that are based on a percentage of hours worked, this release updates calculations on the Annual Accrual Worksheet and Per Pay Accrual Worksheet pages.
Calculated New Year Accrual field calculation on the Annual Accrual Worksheet
On the Annual Accrual Worksheet page, this release updates the calculation for the Calculated New Year Accrual field. The Calculated New Year Accrual field is updated when on the Cause of Absence Card page, the Calculation Basis field is set to Percentage Based and the Accrual Type field is set to Fixed Amount.
The calculation filters compensation ledger entries based on the following criteria:
The value of the Hours / Days field that appears on the Compensation Ledger Entries page.
The Accrual Percentage that appears on the lines of the respective Employee Attendance Plan page.
The HR pay codes that are specified on the COA Eligible HR Pay Codes page for the respective cause of absence.
Calculated Accrual field calculation on the Per Pay Accrual Worksheet
On the Per Pay Accrual Worksheet page, this release updates the calculation for the Calculated Accrual field. The Calculated Accrual field is updated when on the Cause of Absence Card page, the Calculation Basis field is set to Percentage Based and the Accrual Type field is set to Years of Service.
The calculation filters compensation ledger entries based on the following criteria:
The value of the Hours / Days field that appears on the Compensation Ledger Entries page.
The Accrual Percentage that appears on the lines of the respective Employee Attendance Plan Accruals page.
The HR pay codes that are specified on the COA Eligible HR Pay Codes page for the respective cause of absence.
Calculated Accrual field is automatically populated when the Per Pay Accrual Worksheet is opened from the Compensation Journal
On the Compensation Journal page, when you load lines, you can choose to turn on Create Accrual Lines. After the compensation journal lines are created, you can choose Related > Accrual Worksheet which opens the Per Pay Accrual Worksheet page. Starting with this release, when the Per Pay Accrual Worksheet page is opened using this method, the Calculated Accrual field is automatically populated. The value of the Calculated Accrual field is comprised of the hours that were worked on the compensation journal lines multiplied by the Accrual Percentage from the respective lines on the Employee Attendance Plan page.
HR approval enhancements
This release includes the following enhancements to HR approvals.
No approval workflow for this record type is enabled message
To make the Sparkrock 365 behavior consistent for all approval requests, starting with this release, on the Absence Request and HR Request pages, when you choose Request Approval > Send Approval Request and there is no workflow enabled, the following message appears:
No approval workflow for this record type is enabled.
The same message also appears when a request for approval is sent for time entry and there is no workflow enabled.
Centralize HR approval setup
To centralize HR approval settings in one location, this release removes the Approvals FastTab from the Advanced HR Setup and Time Entry Setup pages and moves the existing fields to the HR Approval Setup page.

Make Auto Approve Back Office Requests behavior consistent
Starting with this release, the approval process for absence requests and HR requests works similar to the approval process for time entry. On the HR Approval Setup page, when the respective Auto Approve Back Office Requests checkbox is selected and the Enabled checkbox is clear, time entry, absence request, and HR requests are automatically approved.

Note
Note:
When on the HR Approval Setup page, Auto Approve Back Office Requests checkbox is selected, the Enabled checkbox is clear, and an absence request is created in mySparkrock, the following message appears in mySparkrock:
No approval workflow for this record type is enabled.
Indirect permissions enhancements for HR requests and HR request reversals
To ensure that HR requests and HR request reversals are processed without incurring any issues, this release introduces indirect permissions. This functionality provides the capability to support indirect permission scenarios, such as where an organization wants to configure a user to be able to process an HR request, but prevent the user from creating employee records manually.
Grounds for Termination and Record of Employment Captions are now based on your language setup
Starting with this release, when the Language field is set to English (Canada) on the My Settings page, Sparkrock 365 displays Record of Employment (ROE) captions, instead of Grounds for Termination captions. Otherwise, when the Language field is not equal to English (Canada), Sparkrock 365 displays Grounds for Termination captions.
Note
Note:
This change affects the Tell Me feature.
HR management checklists
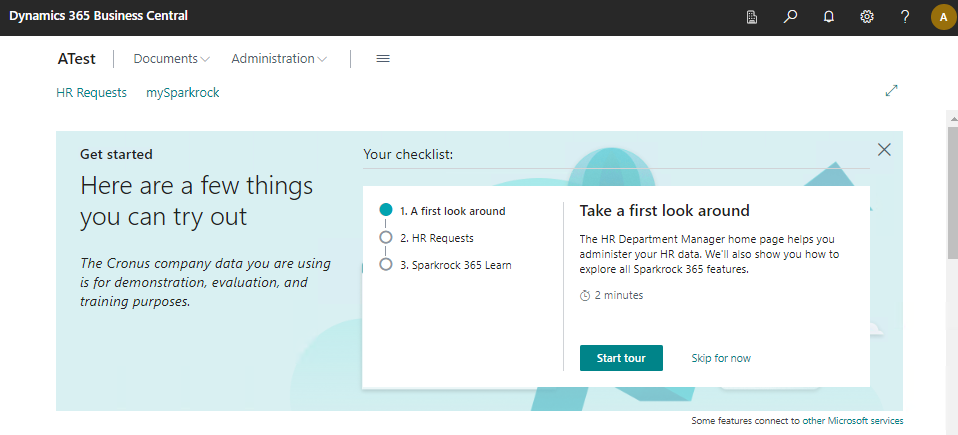
To help new users get started, this release introduces HR management checklists on the following role centers:
HR Department Manager role center
Human Resources Manager role center
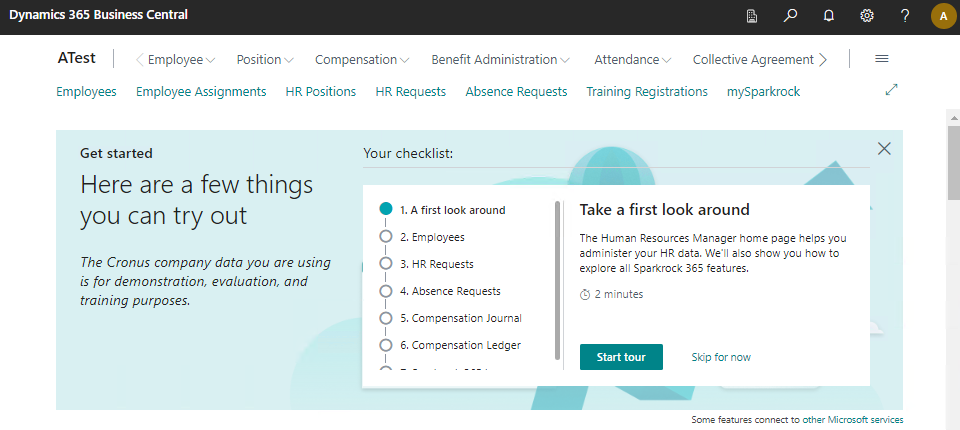
For more information about checklists, see Onboard users with checklists.
HR Management guided experiences
The following new guided experiences are available from the Human Resources Manager role center checklist:
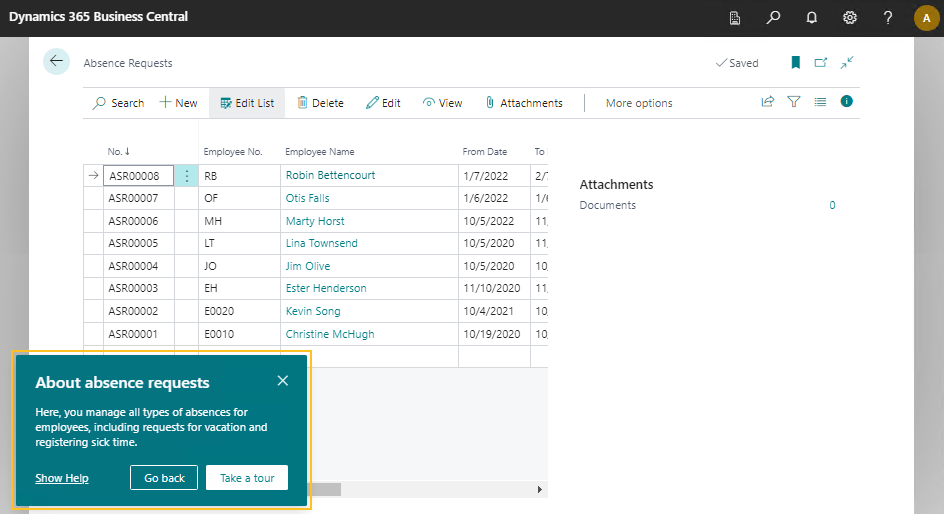
Absence Requests
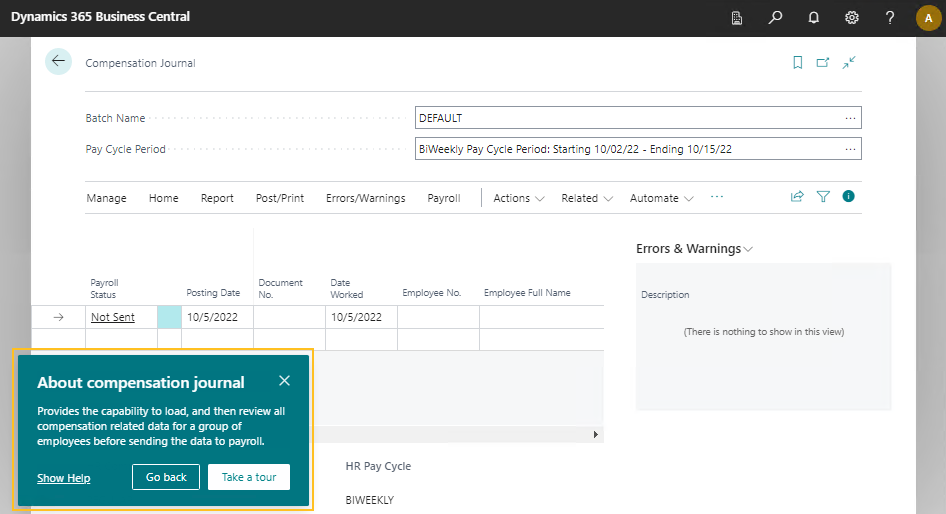
Compensation Journal
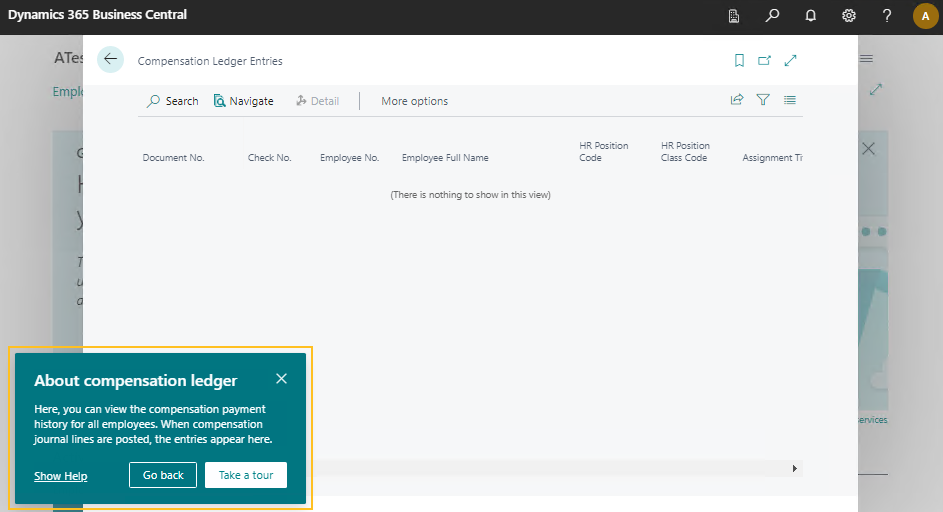
Compensation Ledger
For more information about checklists and guided experiences, see Set up a guided experience and Onboard users with checklists.
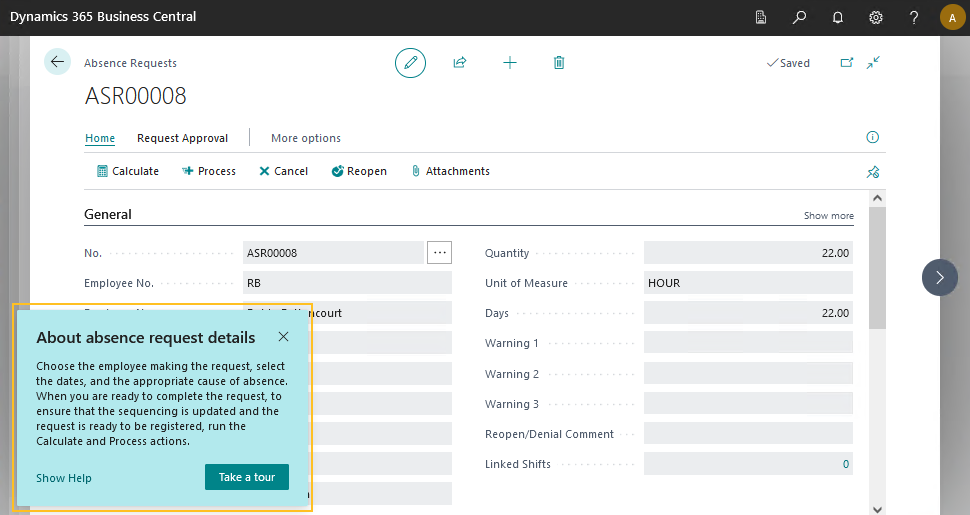
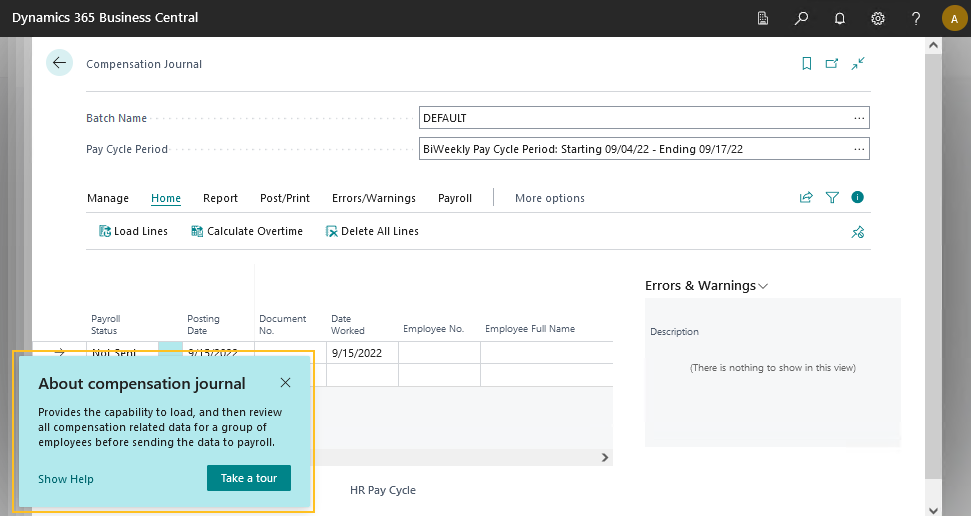
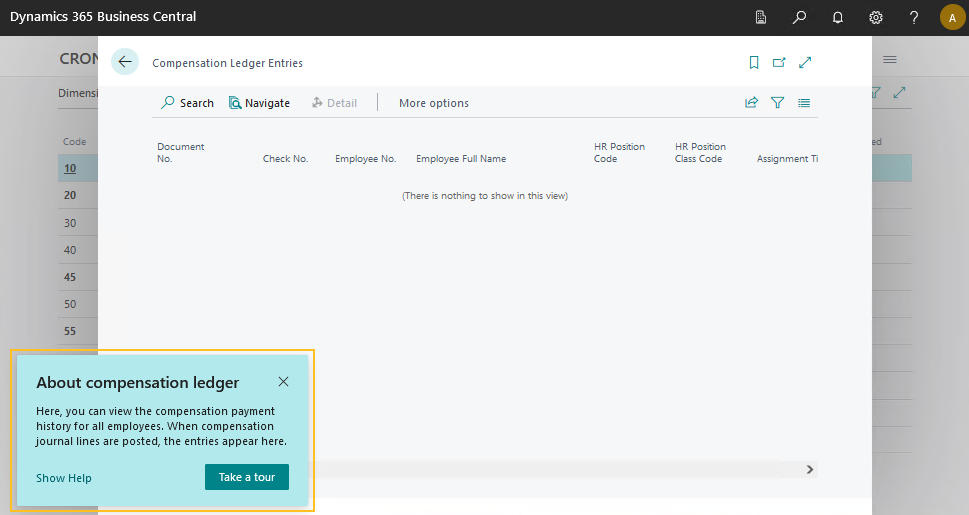
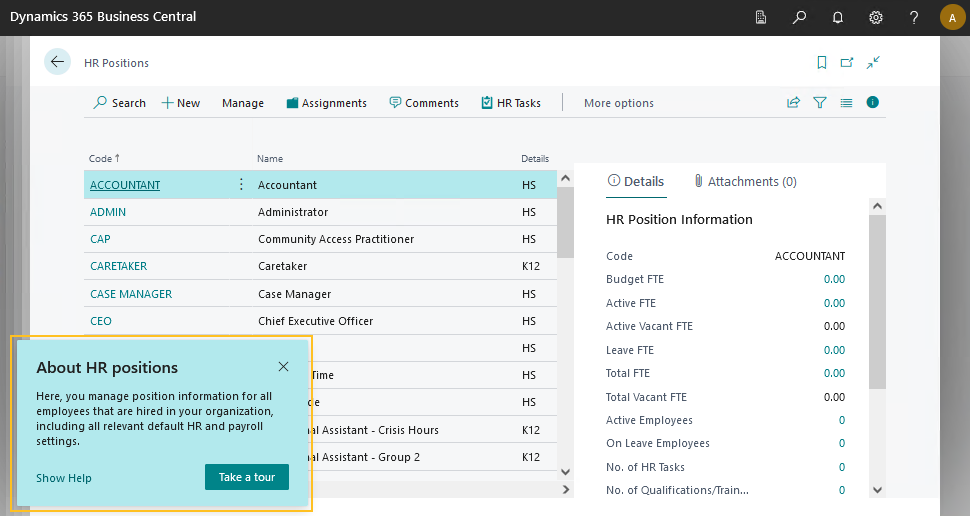
HR management teaching tours
This release introduces teaching tours on the following HR management pages:
Absence Requests list
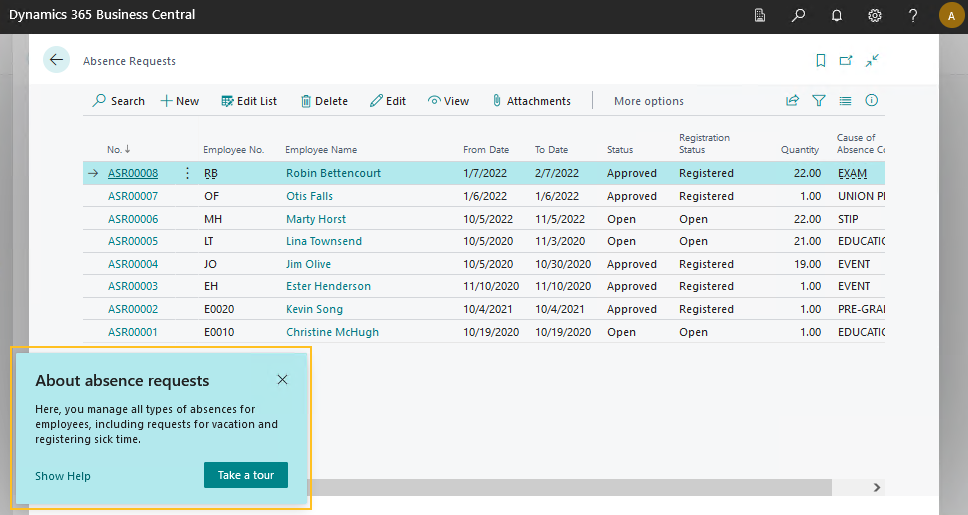
Absence Request card
Compensation Journal
Compensation Ledger Entries
HR Positions
HR Position Card
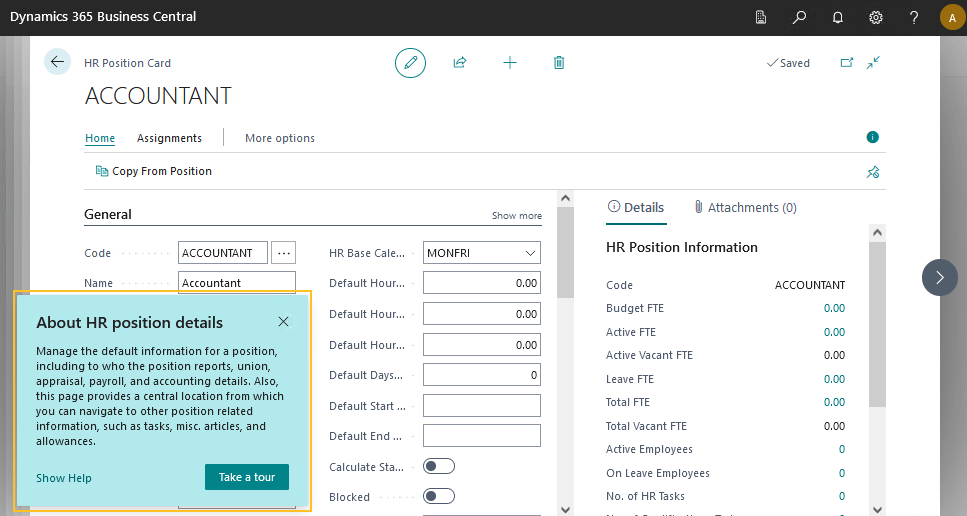
Teaching tours include short messages that inform, remind, or teach users about important and new capabilities. For more information about teaching tours and tips, see Teaching tips and tours and Teaching tips.
Remove G/L Account No. field from the HR Pay Codes page
On the HR Pay Codes page, this release removes the G/L Account No. field because the field is obsolete.
T4 tax form enhancements
The T4 Report in Sparkrock 365 is no longer triggered from mySparkrock. The T4 Report must be run in Sparkrock 365. After the T4 Report has successfully completed, employees can download their T4 tax forms in mySparkrock. When an employee downloads their T4 tax form in mySparkrock, on the T4 Distribution Management page in Sparkrock 365, the Downloaded from Self-Service Web Portal checkbox is now selected automatically.
Reporting and Analytics extension
This release introduces a next generation reporting and analytics tool that is intended to replace the financial analysis functionality.
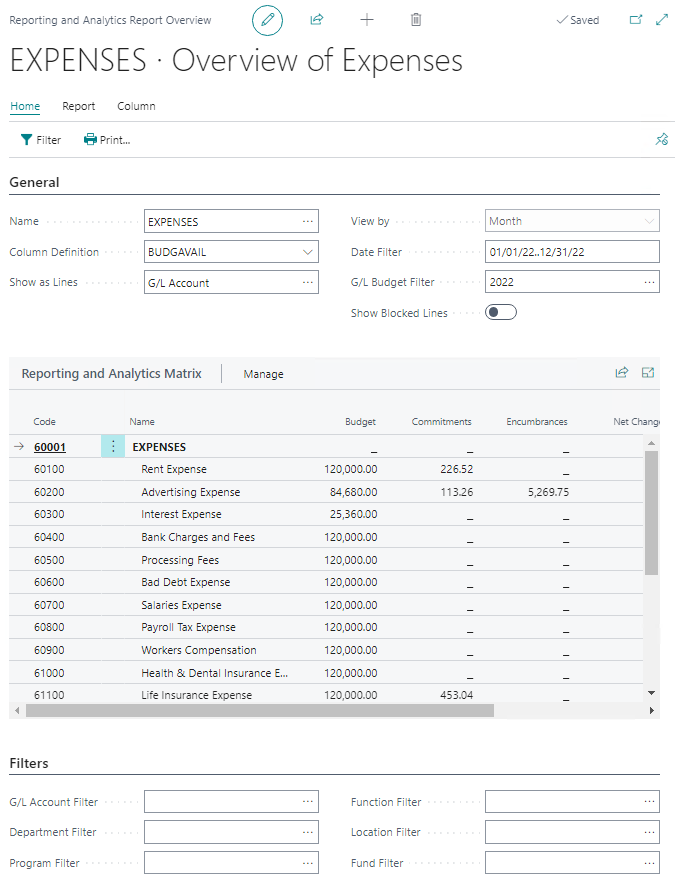
The new Reporting and Analytics extension provides the capability for full and manager users to perform the following tasks and more:
Create or view reports that compare budget versus actual financial information in real-time.
View variances or differences, and then drill down to the underlying records that comprise the amounts.
Choose the column definitions to be viewed, for example, entries, budget entries, commitments, encumbrances, and encumbrance entries.
Choose the row definitions to be viewed, for example, by general ledger accounts, account sets, or dimensions.
Filter data as required.
Use the totals from the chart of accounts and dimensions to create subtotals and totals on reports, making the information easier to view and analyze.
Export information to Excel for further analysis.
It is recommended that the following reporting and analytics permission sets be assigned to users based on their responsibilities:
SPKRA R&A, SETUP : Intended for users who are responsible for reporting and analytics setup.
SPKRA R&A, VIEW : Intended for users who run reporting and analytics reports, including manager users.
For more information about the Reporting and Analytics extension, see Reporting and analytics.
For information about how to transfer financial analysis data sets setup so that the data sets can be used in this new extension, see Obsolete data sets.
Reporting and Analytics teaching tours
To help you get started with the new reporting and analytics tool, take the Reporting and Analytics teaching tours on the following pages:
Reporting and Analytics Reports

Reporting and Analytics Report Overview
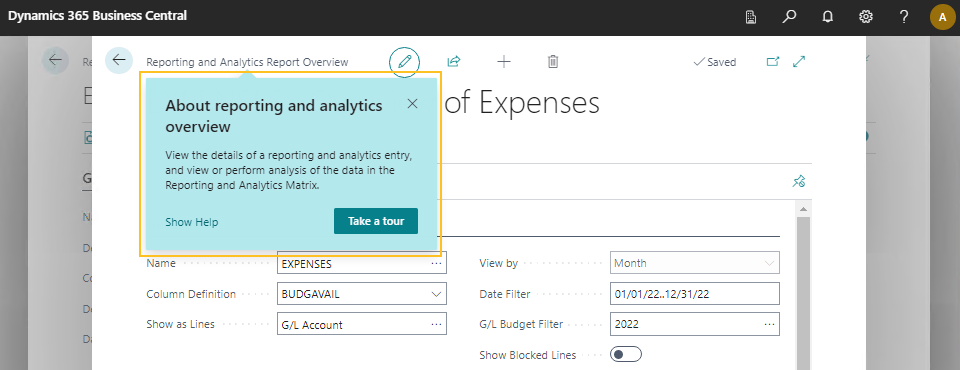
Teaching tours include short messages that inform, remind, or teach users about important and new capabilities. For more information about teaching tours and tips, see Teaching tips and tours and Teaching tips.
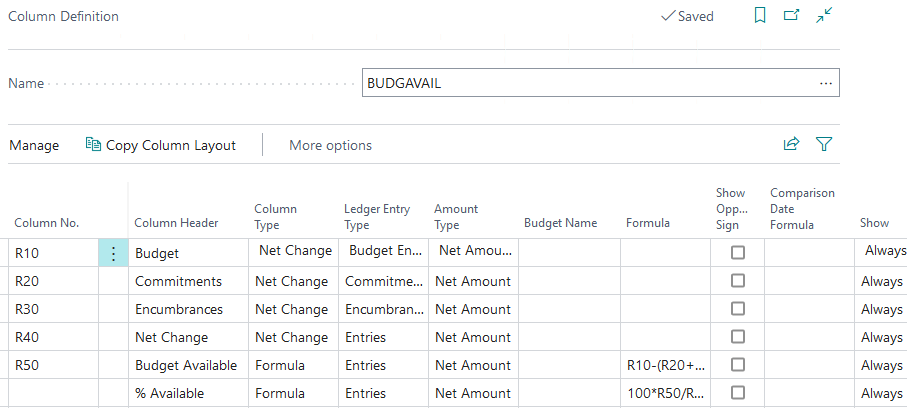
BUDGAVAIL default column definition for reports
To help you get started with column definitions for reports, this release includes a default column definition with the name of BUDGAVAIL. The BUDGAVAIL column definition is intended to be used as a starting point and can be updated as required.
Schedule premiums
This release introduces the capability to schedule premiums. Typically, a premium is paid when an employee works in a certain location, performs work during a specific time period, or performs specific duties. For example, an employee may have a wage of $25.00 per hour and be paid a premium of $2.00 per hour for a specific activity. When the employee is being paid for performing that activity, the employee receives their regular wage of $25.00 per hour, plus the extra $2.00 per hour premium, for a total of $27.00 per hour.
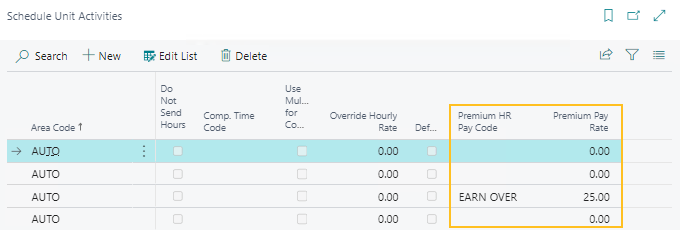
Starting with this release, a user can set up a schedule unit activity to have an HR pay code with a premium pay rate. When the activity is added to a shift, the premium HR pay code and premium pay rate are transferred to the shift for audit purposes. When the scheduling entries lines are loaded into the compensation journal, new lines are created for the premium. The number of hours on the premium lines are the same as the number of hours on the respective activity.
Learn more at Set up premiums.
To support this functionality, this release adds the following fields to the Schedule Unit Activities page:
Premium HR Pay Code: Specifies the code that represents the HR pay code for which a premium is to be applied.
Premium Pay Rate: Specifies the rate that is to be applied for a premium.
Update considerations
The following sections include information about update considerations for Sparkrock 365 2022 release wave 2.
Prevent Opening Bank Deposits page instead message
After you update to this release, when you open the Bank Deposits page, the following message may appear:
Opening Bank Deposits page instead
To prevent this message from appearing, perform the following steps:
Select Search (Alt+Q)
 , enter feature management, and then choose the related link.
The Feature Management page opens.
On the row that has a Feature of Feature Update: Standardize bank reconciliation and deposits, in Enable For, specify None.
26566
Automatically populate Approval Amount Threshold field
To support the new Approval Amount Threshold field, this release automatically populates the value of this field with the approval amount threshold that was applied, otherwise, the value is zero.
Obsolete data sets
Due to the new Reporting and Analytics extension, the Data Sets page will become obsolete in a future release. This release renames the page to (Obsolete) Data Sets.
Data on the (Obsolete) Data Sets page can be transferred to the new Reporting and Analytics Reports page. The user who performs the transfer must be configured as a reporting and analytics administrator. Learn more at Set up a reporting and analytics administrator.
To transfer the setup from the (Obsolete) Data Sets page to the Reporting and Analytics Reports page
Select Search (Alt+Q)
 , enter data sets, and then choose the related link.
The (Obsolete) Data Sets page opens.
Select the one or more data sets that you want to transfer to reporting and analytics, and then on the action bar, choose Create Reporting and Analytics.
The Convert to Reporting and Analytics page opens.
Specify values for fields as required.
Choose OK.
A dialog box appears and displays a message that asks whether you want to convert the one or more selected data sets to reporting and analytics.
Choose Yes.
Account set records updated
Due to the new Account set totaling and indenting feature, when you update to this release, the Account Set Type field is set to Posting and the Direct Posting checkbox is selected for all existing account set records.
Defects corrected
The following sections include information about the defects that have been corrected in Sparkrock 365 2022 release wave 2.
mySparkrock Preferred Language is not updated correctly
In mySparkrock, when the Preferred Language field is updated, and then the change is approved in Sparkrock 365, the respective Sparkrock 365 Employee Card page is not updated as per the request. Due to the Employee Card page not being updated, the respective mySparkrock user profile displays incorrect data.
Resolution
Now, when the change is approved in Sparkrock 365, the Employee Card page and the mySparkrock user profile are updated correctly.
Known issues
The following sections include information about the known issues in Sparkrock 365 2022 release wave 2.
Missing logo on printed PDF files
When you open a document, and then choose to preview or print a PDF file, the logo is missing in the output.
Workaround
To have the logo appear on a PDF, send the document to a Microsoft Word document, open the document in Word, and then save the document as PDF (*.pdf).
For example, to have the logo appear on a PDF of a posted sales invoice, perform the following steps:
Select Search (Alt+Q)
 , enter posted sales invoices, and then choose the related link.
The Posted Sales Invoices page opens.
Select the posted sales invoice for which you want to create a PDF, and then on the action bar, choose Print/Send > Print.
The Sales - Invoice page opens.
Specify values for fields as required, and then choose Send to....
A dialog box appears.
Select Microsoft Word Document, and then choose OK.
The document appears in your downloads.
Open the Word document.
Choose File > Save As, and then save the document as PDF (*.pdf).
Cannot open links in sent emails
When you open a sent email from the Sent Emails Last 30 Days page, and then select the link that appears in the body of the email, Sparkrock 365 becomes unresponsive.
Workaround
Open links in the body of sent emails from Gmail or Outlook, instead of from Sparkrock 365.
Payroll Employee or Payroll Processing pages may fail to open
When using the platform security filters on permission sets, the Payroll Employee page, Payroll Processing page, or both pages may fail to open with a something went wrong error message. This is a limitation of the payroll processing module.
Workaround
Remove the permission sets with security filters from the user who must access these pages.
Related information
Feedback
To send feedback about this page, select the following link:
